background image

U.2 NVMe Interchange System for Mercury Helios 3S

Device Setup

7

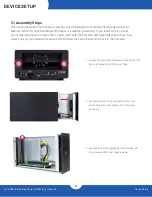
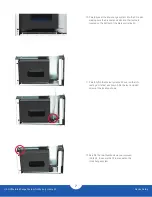
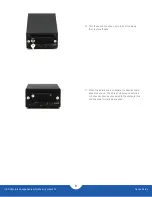
11. Carefully flip the Mercury Helios 3S over so that it’s 

resting on its feet as shown. Affix the last included 
screw at the location shown.

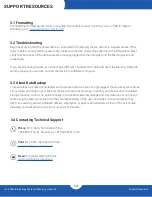
10. Carefully seat the interchange system into the PCIe slot, 

making sure the bracket ends slot into their cutouts, 
located on the bottom of the Mercury Helios 3S. 

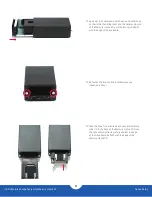
12. Re-affix the two thumbscrews you removed 

in Step 3, to secure the PCIe bracket on the 
Interchange system.

Summary of Contents for U.2 NVMe Interchange System

Page 1: ...Assembly Manual User Guide U 2 NVMe Interchange System for Mercury Helios 3S Install up to 16TB U 2 NVMe SSD Designed for global workflows Locking drive bay...

Page 2: ...m System Requirements 1 Mac Requirements PC Requirements 1 2 Package Contents 1 1 3 About This Manual 1 1 4 Rear View 2 1 5 Usage Notes 3 Device Setup 2 1 Assembly Steps 4 Support Resources 3 1 Format...

Page 3: ...re not supported Hot swap is not supported Disconnect the Mercury Helios 3S to swap the drive 1 2 Package Contents 1 3 About This Manual The images and descriptions may vary slightly between this manu...

Page 4: ...ded steps for assembly Use proper anti static precautions while installing this device Failure to do so can cause damage to your drive and or the PCIe enclosure Do not attempt to disassemble or modify...

Page 5: ...Go to the System Tray located in the lower right corner of your screen Click on the Eject icon a small green arrow over a hardware image 2 A message will appear detailing the devices that the Eject ic...

Page 6: ...pre installed and need to replace the U 2 drive start with the final step and work backward to Step 6 at which point you can replace the drive and then follow the same instructions back to the final...

Page 7: ...he drive tray 5 Pull the drive tray out and separate it from the outer case 6 Flip the drive tray over and set it on a flat surface Place the U 2 drive into the drive tray making sure the connector on...

Page 8: ...tray using the four included drive screws at the locations shown Be sure all four screws are alike there is a fifth screw used later that is similar to but not exactly like the others For now set the...

Page 9: ...ts feet as shown Affix the last included screw at the location shown 10 Carefully seat the interchange system into the PCIe slot making sure the bracket ends slot into their cutouts located on the bot...

Page 10: ...er case on their side then slide them into the outer enclosure of the Mercury Helios 3S until the front grill is flush with the edge of the enclosure 15 Take the drive tray oriented as shown and caref...

Page 11: ...16 Turn the key on the drive tray to lock it into place then remove the key 17 When the installation is complete the device should appear as shown The PCIe enclosure and installed U 2 drive can now be...

Page 12: ...y that both ends of the data cable are properly plugged into the computer and the Mercury Helios 3S respectively If you are still having trouble try connecting a different Thunderbolt 3 cable and see...

Page 13: ...erference will not occur in a particular installation If this equipment does cause harmful interference with radio or television reception which can be determined by turning the equipment off and on t...

Reviews: