background image

OWC DIGITAL - MERCURY HELIOS 

INTRODUCTION

1

INTRODUCTION

1.1 MINIMUM SYSTEM REQUIREMENTS

1.1.1 Apple® Mac® Requirements

• Thunderbolt™ port, OS X

®

 10.9 or later

1.1.2 PC Requirements

• Thunderbolt port, Windows

®

 7 or later

NOTE:

 Boot Camp® is not supported. The Thunderbolt certification process does 

not include Macs running Windows through Boot Camp.

1.1.3 Supported PCIe Cards

• Thunderbolt-compatible PCIe cards (see 

Section 1.6

 for details).

1.2 PACKAGE CONTENTS

1.3 ABOUT THIS MANUAL

Firmware, images, and descriptions may vary slightly between this manual and the unit 
shipped. Functions and features may change depending on the firmware version. Please 
visit the product webpage for the most recent product specifications.

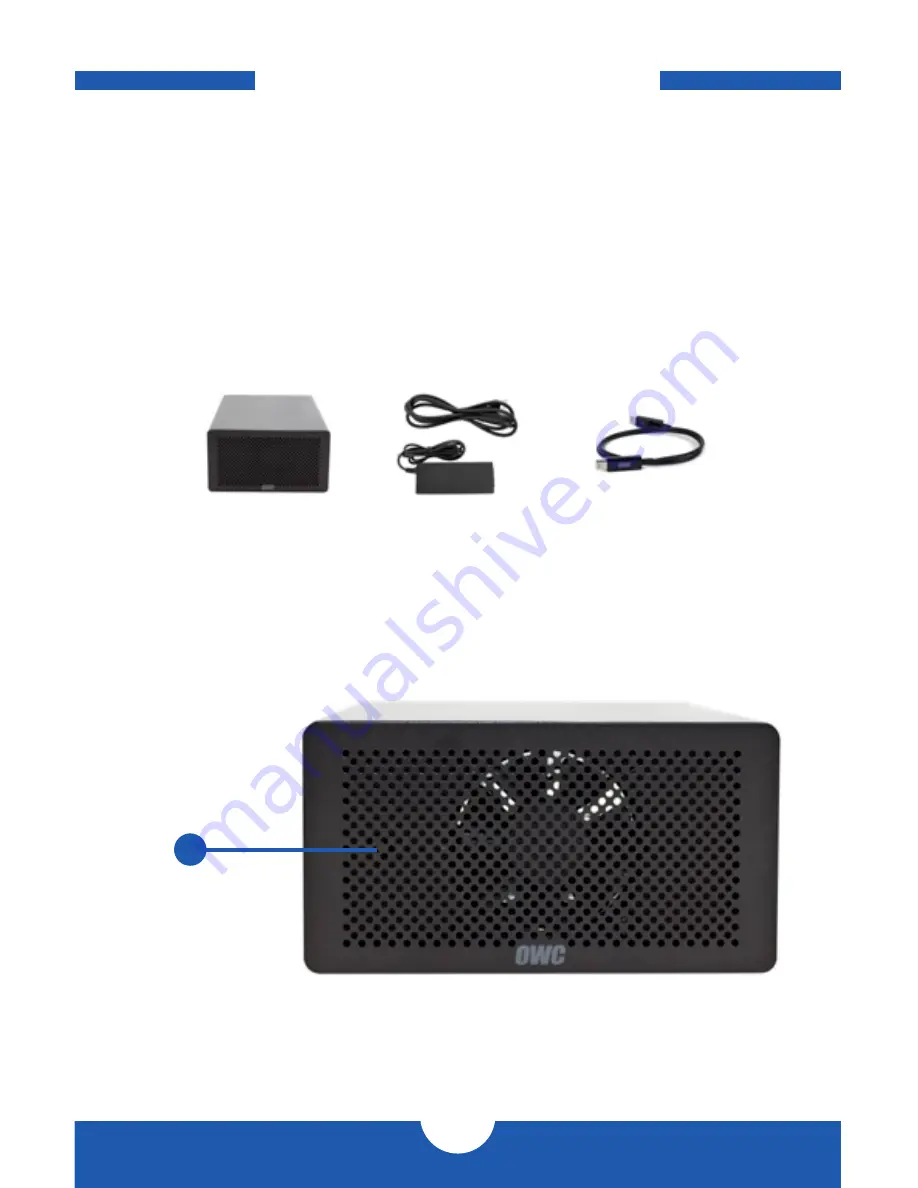
1.4 FRONT VIEW

1. LED Power Indicator —

 This LED illuminates when there is an active data connection 

between the Helios and the computer. If the Helios is unplugged from power or if the 
Thunderbolt cable is unplugged, the Helios will power off and the LED power indicator 
will also turn off.

1

Thunderbolt cable

OWC Digital

Mercury Helios®

Power Supply

and cable

Summary of Contents for Mercury Helios

Page 1: ...OWC Digital Mercury Helios ASSEMBLY MANUAL USER GUIDE...

Page 2: ...ents 1 1 3 Supported PCIe Cards NOTE Boot Camp is not supported The Thunderbolt certification process does not include Macs running Windows through Boot Camp 1 2 PACKAGE CONTENTS 1 3 ABOUT THIS MANUAL...

Page 3: ...ACKAGE CONTENTS 1 3 ABOUT THIS MANUAL Firmware images and descriptions may vary slightly between this manual and the unit shipped Functions and features may change depending on the firmware version Pl...

Page 4: ...ort can be used to chain additional Thunderbolt devices Thunderbolt device chains can contain up to six total Thunderbolt devices and a display can be connected at the end 4 DC power input Connect the...

Page 5: ...o work in a clean and static free area and avoid wearing clothing that retains static charges 2 1 ASSEMBLY 1 Remove the OWC Digital Mecury Helios from its packaging and place it on a soft surface 2 Lo...

Page 6: ...sis to remove it fully from the outer enclosure 4 Turn the inner chassis so that the PCIe slot is facing up as shown below Using your fingers or a Phillips screwdriver remove the screw from the empty...

Page 7: ...os NOTE Handle the PCIe card only by its edges Do not touch any of the components on the face of the PCIe card or the golden connectors 6 Press down on the PCIe card to seat the connectors into the PC...

Page 8: ...screw s that you removed earlier to secure the PCIe card to the inner chassis as circled below Do not overtighten the screw s 8 Slide the inner chassis back into the outer enclosure as shown below the...

Page 9: ...bscrews on the rear panel circled below in red Press each screw in toward the enclosure then twist clockwise while still applying pressure Keep twisting until you feel increased resistance Assembly is...

Page 10: ...off switch As long as the power supply is connected the Helios will turn on when it receives a data signal through the Thunderbolt cable If there is no Thunderbolt cable connected or if the computer i...

Page 11: ...g a Thunderbolt compatible driver Check with the PCIe card manufacturer for a Thunderbolt compatible driver In Windows you can look at all connected Thunderbolt devices by using the Thunderbolt Softwa...

Page 12: ...enclosure Failure to do so can cause damage to your drive mechanisms and or the hard drive enclosure Read this user guide carefully and follow the correct procedures when setting up the device Do not...

Reviews: