background image

12 


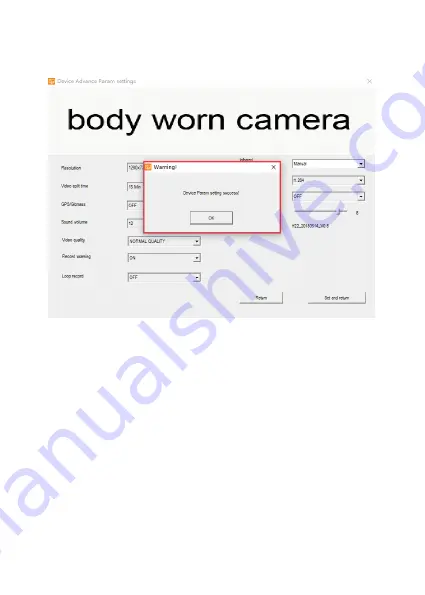
After you change the settings

, click “

set and return

” to go back to 

previous interface. 


8. Review the recorded files 
 
Press Enter U disk to mount the camera as mass storage in 
computer. 

PS: 

you will hear a sound from computer announcing camera is 

under U disk mode. Then you can go to camera folder to view and 
delete files. 
 

Summary of Contents for EH220

Page 1: ...EH220 User Manual Thanks for your purchasing This camera is specially designed for video recording and photo taking Please read the user manual before using it Body Worn Video and Audio Recorder...

Page 2: ...1 Body Camera Exterior Overview...

Page 3: ...and turn on off IR for low light recording automatically 6 Charging Indicator LED Blue Charging Status White camera is fully charged 7 Status Indicator LED Solid Red camera is in standby mode Flashin...

Page 4: ...to external camera optional 11 Fn Button a Press to turn on off infrared lights when infrared lights are in manual mode b When camera is in standby mode hold 3 seconds to turn on off WIFI 12 Power Bu...

Page 5: ...once Hold for 3 seconds to stop video recording and the camera will vibrate twice while the LED will change to a solid red colour Note When the camera is powered off hold the recording button for 3 s...

Page 6: ...has been turned on WiFi icon will turn blue GPS icon When GPS has been received GPS icon will turn green Storage icon When the storage is full it will show 4 blocks then one block less once storage h...

Page 7: ...Status Indicator LED Solid Green Camera is in standby mode Solid Red Camera is in standby mode while pre record is set Flashing Red Camera is recording video Flash red once Camera is taking photo Cha...

Page 8: ...T BUTTON when the camera freezes up or works abnormally Note When the cameras battery level goes to 5 it will prompt voice alarm LOW BATTERY LOW BATTERY When the cameras memory level descends to 200MB...

Page 9: ...computer 2 Connect the camera to computer and run BodyWornCamera exe PS Make sure the camera is not in recording mode or pre recording mode before connecting camera to computer You can find discover...

Page 10: ...et 5 Changing Device Police ID enter Device Police ID and click set 6 Password setting Enter old password new password and confirm password and then click Modify 7 Other settings Click other settings...

Page 11: ...04 1296 30P 1920 1080 30P 1280 720 30P 848 480 30P Video split time While recording video the camera will automatically split its recording into files of this length 5 min 15 min 30 min GPS Glonass Wh...

Page 12: ...s disabled Off On Loop Record When on camera will overwrite the very first video file with the latest video file once its memory is full Off On Infrared When set to manual you need to press Fn button...

Page 13: ...back to previous interface 8 Review the recorded files Press Enter U disk to mount the camera as mass storage in computer PS you will hear a sound from computer announcing camera is under U disk mode...

Page 14: ...13...

Page 15: ...14...

Reviews: