


Part Number 10400010-106 06/2008
©2007-2008 Overland Storage, Inc.
Page 3 of 4
3.
While pressing firmly with the tool, pull the
magazine
out about one inch (2.5cm).
4.
Remove the
tool
.
5.
Slide the
magazine
all the way out.
6.
For an ARCvault 24
left
magazine
Remove Unit from Rack
WARNING: It is recommended that a mechanical lifter
(or at least two people) be used to prevent injury during
rack removal and reinsertion.
1.
If necessary, at the OCP, press
Power > Power Off
Library
> OK
(at the power down message).
2.
After the unit has shut down, at the rear, remove the
power cord
and all
cables
.
3.
At the front, open the doors and loosen the
retaining
screws
inside (
4.
Carefully remove the
ARCvault unit
from the rack
and place it on a secure, flat surface.
NOTE:
Some units require a tool to release the rail stops.
Figure 7. Left Retaining Screw
Install New Unit in Rack
1.
Swap out the
chassis
assemblies.
2.
Carefully slide the new
ARCvault
into the rack rails.
3.
At the front, open the doors and tighten the
retaining
screws
to the rack.
4.
Reinsert the
media magazines
and close the
doors
.
NOTE:
If the old unit was an ARCvault 12, insert the single
magazine into the right-side leaving the left side empty.
5.
At the rear of the unit, reconnect the LVD
SCSI cable
,
SCSI terminator
, and any
management cables
.
6.
Plug in the
power cord
and
power on
the unit.
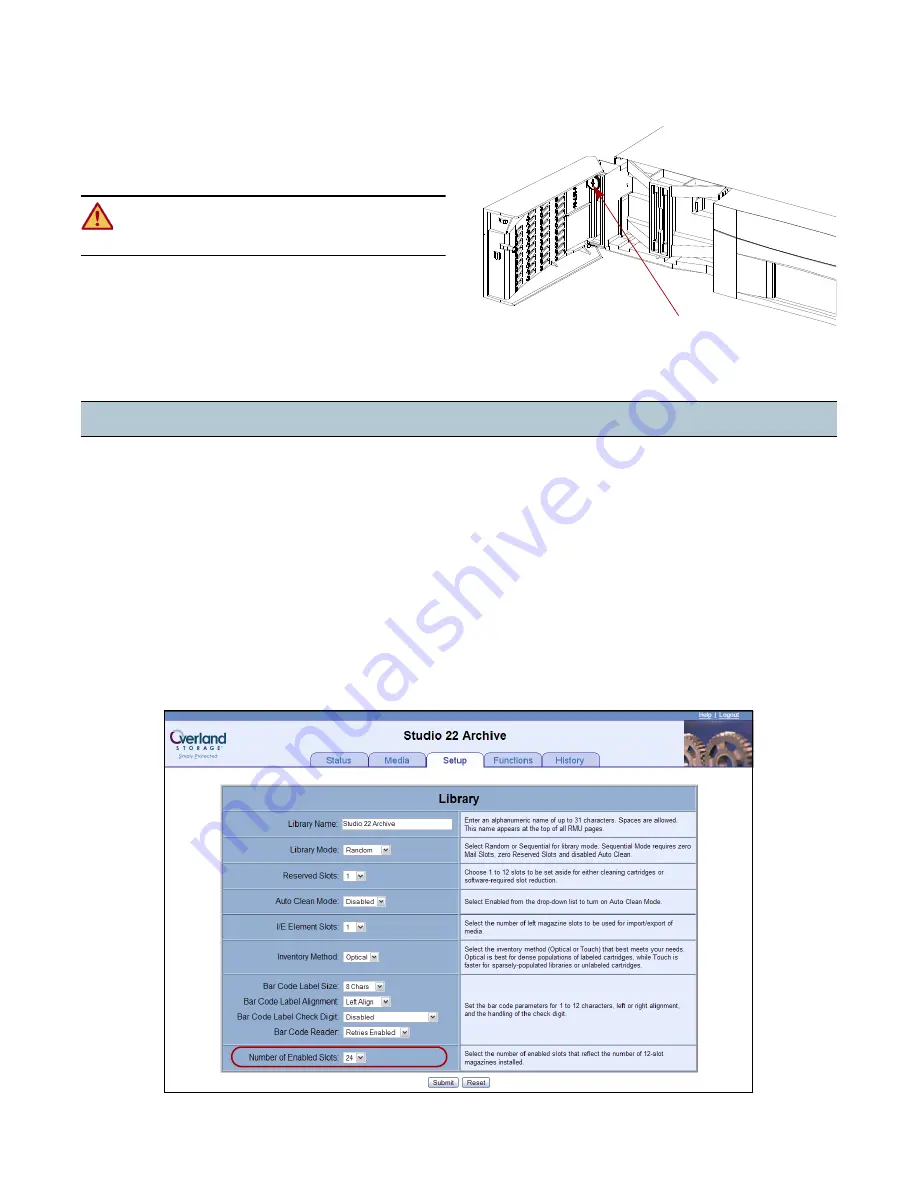
Configure the Unit
1.
If the old unit was an ARCvault 12, reconfigure the new
unit (
) to also be a 12-slot autoloader:
a.
Log into the
RMU
as Administrator (password = 2)
using IP address
10.0.0.1
.
b.
Go to
Setup > Library
.
c.
Set
Number of Enabled Slots = 12
.
d.
Click
Functions > Reboot Library
.
2.
Log into
RMU > Setup
and make any changes to
configure the new unit like the old one.
Use the Trace Log from the old unit to obtain the
configuration data.
Figure 8. RMU Setup Library Option
Left
Retaining Screw
Incorporate New Chassis


