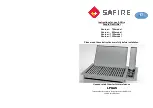
background image

1. Parts List 


Quantity  varies  according  to  model  purchased.  Specifications  subject  to change  without  prior  notice.  For  more 
details on hardware, please see the corresponding ‘Hardware Reference Diagram’. 


CODE 

PART 

QTY 

HOOD & BODY 

A1 

Hood


(Pre-Assembled to Body)


A2 

Flame Tamer 

A3 

Warming Rack 

A4 

Cooking Grill 

A5 

Main Burner 

A6 

Knob 

A7 

Knob Bezel 

A8 

Drip Tray 

A9 

Grease Cup 

A10 

Left Drip Tray Bracket 

A11 

Right Drip Tray Bracket 

A12 

Side Burner Gas Hose/Injector Assembly 

SIDE SHELF 

B1 

Left Side Shelf 

B2 

Right Side Burner Shelf 

B3 

Side Burner 

B4 

Side Burner Grid 

TROLLEY 

C1 

Upper Body Support 

C2 

Left Side Trolley Assembly 

C3 

Right Side Trolley Assembly 

C4 

Door (Left) 

C5 

Door (Right) 

C6 

Rear Panel 

C7 

Matchstick Lighting Rod Assembly 

C8 

Bottom Panel 

C9 

Lockable Caster 

C10 

Caster 

HARDWARE 

M6×12 Bolt & Ø6 Spring Washer 

25 

Door Axle 

Ø6 Washer 

M4x8 Bolt & Ø4 Spring Washer 


Summary of Contents for GD4222S-S

Page 1: ... may be dangerous and will invalidate your warranty This does not affect your statutory rights Retain these instructions for future reference Leak test annually and whenever the gas bottle is removed or replaced Check that the hose connections are tight and leak test each time you reconnect the gas bottle For Flare up control please refer to the OPERATION section of this manual FOR YOUR SAFETY If ...

Page 2: ...ray 1 A9 Grease Cup 1 A10 Left Drip Tray Bracket 1 A11 Right Drip Tray Bracket 1 A12 Side Burner Gas Hose Injector Assembly 1 SIDE SHELF B1 Left Side Shelf 1 B2 Right Side Burner Shelf 1 B3 Side Burner 1 B4 Side Burner Grid 1 TROLLEY C1 Upper Body Support 1 C2 Left Side Trolley Assembly 1 C3 Right Side Trolley Assembly 1 C4 Door Left 1 C5 Door Right 1 C6 Rear Panel 1 C7 Matchstick Lighting Rod Ass...

Page 3: ... to model purchased Specifications subject to change without prior notice For more details on hardware please see the corresponding Hardware Reference Diagram A3 A4 A1 A2 B1 A8 B2 A5 A12 A6 A11 A10 A7 B4 B3 C1 C3 C6 C2 C7 C5 C4 C10 C8 B C9 A9 ...

Page 4: ...ations subject to change without prior notice door axe 2PCS D A D C B A M4 Á 8 bolt 4 spring washer 4PCS B 6 Washer 4PCS C M6 Á 12 bolt 6 spring washer 25PCS M6 12 Bolt Ø6 Spring Washer 25pcs M4x8 Bolt Ø4 Spring Washer Door Axle Ø6 Washer ...

Page 5: ...es are present Please read the Important Information section carefully before assembly and use of your barbecue 1 Insert the two Lockable Casters C9 and two standard Casters C10 into the holes below the Bottom Panel C8 as shown and tighten with a wrench The two Lockable Casters C9 should be on the front side Attach the two Door Axles B to this Bottom Panel in the areas as shown Attach the Right Si...

Page 6: ...ear Panel C6 to the upper section of the Left and Right Side Trolley Assembly using 4 x M6x12 Bolts and Ø6 Spring Washers A Fit the doors C4 C5 to the cabinet by placing them into the door axes and then depressing the spring pins to insert into the upper body support Attach the Left Drip Tray Bracket A10 to the Left Side Trolley Assembly C2 using 2 x M6x12 Bolts and Ø6 Spring Washers A as shown Re...

Page 7: ...own Carefully place the Hood and Barbecue Body A1 onto the trolley assembly WARNING DO NOT RELEASE THE BARBECUE BODY WHILE THE BARBECUE HAS NOT BEEN PROPERLY SEATED THIS MAY RESULT IN INJURY OR DAMAGE TO YOUR BARBECUE Attach the barbecue to the trolley assembly using 4 x M6x12 Bolts and Ø6 Spring Washers A and 4 x Ø6 Washers C as illustrated 5 6 A1 B1 ...

Page 8: ...Hose Injector Assembly A12 through the hole on the front of the side burner shelf and position it such that its screw holes align up Place a Knob Bezel A7 on front with its screw hole indentations aligned up with those on the side shelf and secure it along with the injector assembly to the shelf using M4x8 Bolts Ø4 Spring Washers Dx2pcs Attach a Knob A6 to the exposed gas valve pin B2 A7 A12 A6 ...

Page 9: ...de burner Place the Side Burner B3 through the central hole in the side burner shelf Fit the side burner venturi tube over the gas valve outlet This is a loose fit and not a gas tight seal Secure the burner with 2 x M4x8 Bolts and Ø4 Spring Washers D Insert the ignition wire into the lower position on the side burner electrode 9 10 B3 B4 ...

Page 10: ...Carefully lay each Flame Tamer A2 into the barbecue body ensuring it lies level within the body as illustrated 11 12 Place each Cooking Grill A4 into the grill body as shown above A2 A4 ...

Page 11: ...t the top left and right edges of the barbecue body as shown above Insert the Drip Tray A8 into the brackets A10 A11 at the bottom of barbecue body then place the Grease Cup A9 in the slot below the drip tray as shown above 13 14 A3 14 15 A8 A9 ...

Page 12: ...f either side of the trolley as shown above 15 Ensure the mating faces of the connection are clean and not damaged Do not use any sealing tape paste or liquid on the connection The nut must be tightened with the use of a spanner Do not use force which may damage the assembly 16 C7 ...

Page 13: ...ontrol valve on the gas bottle or regulator Step 3 Through the gap on the underside of the control panel check for leaks by brushing a solution of water and liquid detergent soap over all the gas system joints including all valve connections hose connections and regulator connections Step 4 NEVER USE AN OPEN FLAME to test for leaks at any time Step 5 If bubbles form over any of the joints there is...

Page 14: ...e manufacturer or its agent must not be altered by the user Modification of the barbecue may be dangerous is not permitted and will nullify any warranty If you have any queries regarding these instructions contact your local dealer 6 Gas Regulator and Hose This barbecue can use either propane or butane or propane butane mixed LPG liquid petroleum gas bottled gas Propane bottles will supply gas all...

Page 15: ... O position Open the gas control valve on the gas bottle or regulator Push the control knob of the burner you wish to light and turn it anti clockwise until you feel resistance to the turning Pause 4 seconds then continue turning the control knob until a click is heard and the burner is lit Repeat previous step 4 5 times until the burner is lit Ignite any of the remaining burners in any order as n...

Page 16: ...is properly fitted before use 8 9 Flare Up Control Very Important Notice Flare ups occur when meat is barbecued and its fat and juices fall upon the hot flame tamer Smoke of course helps give food its barbecued flavour but it is best to avoid excessive flare up to prevent food being burned To control flare ups it is ABSOLUTELY ESSENTIAL to trim away excess fat from meat and poultry before grilling...

Page 17: ... is found to ensure that there are no signs of blockage debris insects in either the burner portholes or the primary air inlet of the burners Use a pipe cleaner to clear obstructions When refitting the burners be careful to check that the neck of the burner fits over the valve outlet It is quite normal for surface rust to be present on the burners If rust appears between uses or in storage clean w...

Page 18: ...5 14 kW 4 0 91mm 0 91mm 0 87mm 0 80mm 28 30 mbar Butane or 37 mbar Propane 30 mbar LPG mixture 37 mbar LPG mixture 50 mbar LPG mixture Side Burner 0845 15 3 2kW 1 0 86mm 0 86mm 0 81mm 0 76mm 28 30 mbar Butane or 37 mbar Propane 30 mbar LPG mixture 37 mbar LPG mixture 50 mbar LPG mixture Model No GD4222S S Gas Consumption 1252 g h Main burners 1019 g h Side burner 233 g h Countries of Use I3 28 30 ...

Page 19: ...lator checked or replaced Obstructions in burner Clean burner Obstructions in gas jets or gas hose Clean jets and gas hose Low flame or flashback fire in burner tube a hissing or roaring noise may be heard LP gas bottle too small Use larger bottle Obstructions in burner Clean burner Obstructions in gas jets or gas hose Clean jets and gas hose Windy conditions Use barbecue in a more sheltered posit...

Reviews: