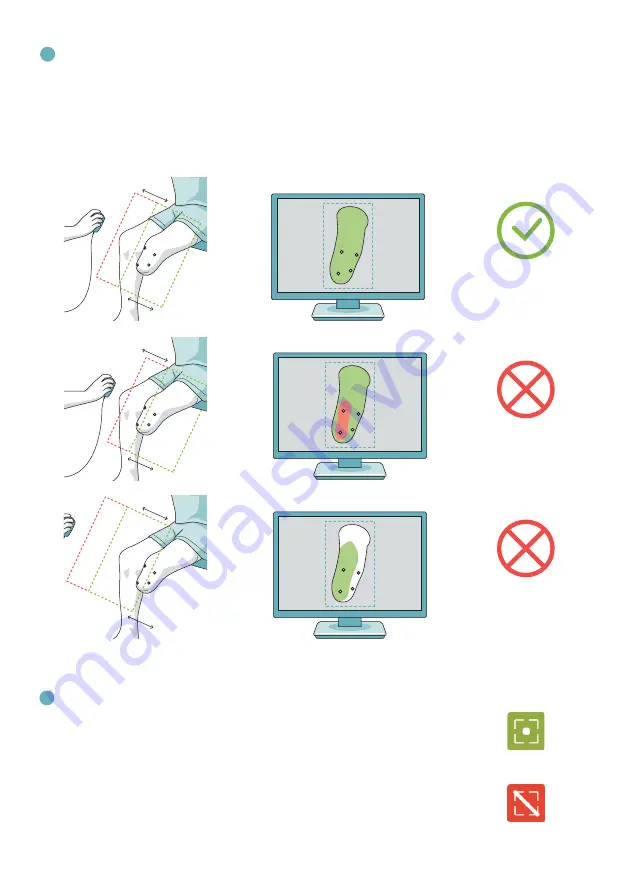
Positioning the object and start scanning
•
Different colors indicate whether the object is within or outside the detectable scan volume. Red indicates
the object is outside, green indicates the object is inside the detectable reach of the camera. Hold the cam-
era parallel to the surface of the object. Avoid tilting the camera which might effect that parts of the object
drop outside the detectable area
•
When the object appears completely in green you can initiate the scan process clicking on “Start Scan”
Conduct and complete a scan
•
After the countdown reaches zero the display changes and turns to show the
captured areas of the object. Complete the scanning process moving around
the object until it is fully captured
•
Texture at specific areas of interest (e.g. landmarks) can be sharpened by
lingering above the area for a second and moving the camera close to it
•
If tracking is lost the easiest way to regain tracking is returning to an already
captured area or to the starting point. As long as the position has not changed
the software will recover the area and continue tracking
Correct placement
Object too close
Object too far away
On tracking
Off tracking
6
5


