background image

English-1

IMPORTANT SAFEGUARDS


When using your electric skillet, basic safety precautions should always be followed, 

including the following:
1.   Read all instRuctions befoRe use.
2.   Make sure the voltage in your outlet is the same as the voltage indicated on the 

appliance’s rating label.

3.  To protect against the risk of electric shock, do not immerse the cord, plug or unit in 

water or any other liquid.

4.  do not touch hot surfaces. Use handles.
5.  Children should not use this appliance.
6.  Unplug from outlet when not in use and before cleaning. Allow unit to cool before 

cleaning or storing it.

7.  neVeR yank the cord to disconnect the unit from the electrical outlet. Instead, grasp 

the plug and pull it to disconnect.

8.  do not operate any appliance if the cord is damaged. do not use the appliance if 

it malfunctions or has been damaged in any manner. In order to avoid the risk of an 

electric shock, neVeR try to repair it yourself. Take it to the nearest Authorized Oster

®


Service Center for examination and repair. An incorrect re-assembly could present a 

risk of electric shock when the unit is in use.

9.  The use of replacement parts or accessories not recommended by the manufacturer 

may cause fire, electrical shock or injuries.

10. do not use outdoors or for commercial purposes.
11.  do not use this appliance for purposes other than the one for which it was designed.
12. do not let the electrical cord hang over the edge of the table or countertop, or touch 

hot surfaces.

13. do not place on or near a hot gas or electric burner, heated oven or microwave oven.
14. Use it on a heat-resistant, flat level surface only.
15. Extreme caution must be used when moving any appliance containing hot foods or oils.
16. When using this appliance, provide adequate air space above and on all sides for  

air circulation.

17. do not leave unit unattended during use.
18. Use it with a wall receptacle only.
19. When using this appliance, make sure there are no flammable materials close to it, 

such as curtains, paper, plastic, etc.

20. Be sure controls are turned to the MIN “

” position and the Griddle has cooled 

completely before folding. do not tuRn unit on WHile it is in tHe folded 

Position.

21. do not tuRn on WHile tHe cooKinG Plates aRe ReMoVed fRoM tHe unit.
22. This appliance is not intended for use by persons (including children) with reduced 

physical, sensory or mental capabilities, or lack of experience and knowledge, unless 

they have been given supervision or instruction concerning use of the appliance by a 

person responsible for their safety. Children should be supervised to ensure that they 

do not play with the appliance.

23. Close supervision is necessary when any appliance is used near children, or 

incapacitated individuals.

Summary of Contents for CKSTGR3008

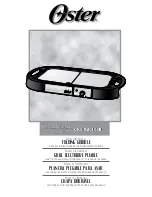
Page 1: ...GRILL ELECTRIQUE PLIABLE LIRE TOUTES LES INSTRUCTIONS AVANT D UTILISER CET APPAREIL Manual de Instrucciones PLANCHA PLEGABLE PARA ASAR LEA TODAS LAS INSTRUCCIONES ANTES DE USAR ESTE APARATO Manual de...

Page 2: ...or commercial purposes 11 DO NOT use this appliance for purposes other than the one for which it was designed 12 DO NOT let the electrical cord hang over the edge of the table or countertop or touch h...

Page 3: ...or HOUSEHOLD USE ONLY No user serviceable parts inside Do not attempt to service this product A short power supply cord is provided to reduce the hazards resulting from entanglement or tripping over a...

Page 4: ...English 3 1 Plate Latches 2 Temperature Indicator Light 3 Grease Tray 4 Ceramic Non Stick Cooking Plates 5 Temperature Control Knob 6 Unit Base DESCRIPTION OF THE APPLIANCE 1 4 6 3 2 5...

Page 5: ...oroughly CAUTION Do not immerse the Unit Base in water or other liquids Place the COOKING PLATES back in the base Align special notch area in COOKING PLATES with unit Hold plates up at a slight angle...

Page 6: ...is ready for use During cooking the INDICATOR LIGHT will go on and off indicating that the surface temperature is being maintained Use only wood nylon or heatproof plastic utensils Metal utensils wil...

Page 7: ...in Turn halfway into cooking time SANDWICHES 175 C 350 F 6 to10 min Butter outside and brown both sides PORK CHOPS 175 C 350 F 20 to 30 min Brown both sides reduce temperature to 135 C 275 F Turn half...

Page 8: ...ater Rinse and dry thoroughly NOTE Do not use steel wool scouring pads or harsh cleaners on any part of the appliance If necessary use a nylon scouring pad STORAGE Insert the COOKING PLATES See BEFORE...

Page 9: ...11 NE PAS utiliser cet appareil pour un motif autre que celui pour lequel il a t con u 12 NE PAS laisser le cordon lectrique pendre sur le bord de la table ou du plan de travail NE PAS le mettre en co...

Page 10: ...R FIL ELECTRIQUE COURT Cet appareil n a t con u QUE POUR UN USAGE DOMESTIQUE Ne contient aucun l ment qui puisse tre r parable par le consommateur Ne pas essayer de r parer cet appareil Le fil lectriq...

Page 11: ...ge des Plaques 2 T moin Lumineux de Temp rature 3 Plateau de R cup ration des Graisses 4 Plaques de Cuisson en C ramique Anti Adh rent 5 Bouton de Contr le de la Temp rature 6 Socle de l Appareil DESC...

Page 12: ...er le Socle de l Appareil dans l eau ou tout autre liquide Remettre les PLAQUES de CUISSON en place sur le socle Aligner l encoche sp ciale des PLAQUES de CUISSON avec l appareil Maintenir les plaques...

Page 13: ...s indiquer que la temp rature de la surface est maintenue N utiliser que des ustensiles de cuisine en bois nylon ou plastique r sistant la chaleur Les ustensiles en m tal risquent de rayer la surface...

Page 14: ...r mi cuisson SANDWICHS 175 C 350 F 6 10 min Beurrer l ext rieur et faire brunir des deux c t s COTES DE PORC 175 C 350 F 20 30 min Faire brunir des deux c t s r duire la temp rature 135 C 275 F Retour...

Page 15: ...r et s cher compl tement REMARQUE ne pas utiliser d ponges abrasives en laine d acier ou de produits nettoyants forts sur le gril ou ses l ments Si n cessaire utiliser une ponge en nylon RANGEMENT Ins...

Page 16: ...nes comerciales 11 NO lo utilice este electrodom stico para fines distintos de aquellos para los cuales fue dise ado 12 NO deje que el cable el ctrico cuelgue del borde de la mesa o el mostrador ni qu...

Page 17: ...IONES INSTRUCCIONES DEL CABLE CORTO Este aparato es SOLO PARA USO DOM STICO En su interior no hay piezas que pueda reparar el usuario No intente reparar este aparato Se incluye un cable de alimentaci...

Page 18: ...1 Trabas de seguridad 2 Luz indicadora de temperatura 2 Bandeja para grasa 3 Placas de cocci n de cer mica antiadherente 4 Bot n de control de temperatura 5 Base de la unidad DESCRIPCI N DEL APARATO 1...

Page 19: ...eque bien PRECAUCI N no sumerja la base de la unidad en agua u otros l quidos Vuelva a colocar las PLACAS DE COCCI N en la base Alinee la parte de la muesca de las PLACAS DE COCCI N con la unidad Suje...

Page 20: ...la cocci n la LUZ INDICADORA se encender y apagar lo que indica que se est manteniendo la temperatura deseada en la superficie Utilice solo utensilios de madera nylon o pl stico a prueba de calor Los...

Page 21: ...empo de cocci n SANDWICHES 175 C 350 F 6 a 10 min Extienda mantequilla por fuera y tueste ambos lados COSTILLAS DE CERDO 175 C 350 F 20 a 30 min Tueste ambos lados reduzca la temperatura a 135 C 275 F...

Page 22: ...agua jabonosa caliente Enjuague y seque bien NOTA no utilice estropajos de aluminio o limpiadores fuertes en ninguna parte del aparato En caso necesario use un estropajo de nylon ALMACENAMIENTO Introd...

Page 23: ...ntos daqueles para os quais o mesmo foi desenvolvido 12 N O deixe o fio el trico pendurado na borda da mesa nem que entre em contato com superf cies quentes 13 N O coloque o eletrodom stico sobre uma...

Page 24: ...O Este eletrodom stico destina se APENAS AO USO DOM STICO O seu interior n o cont m pe as que possam ser reparadas pelo usu rio N o tente consertar este aparelho O aparelho tem um fio el trico curto p...

Page 25: ...vas das chapas 2 Luz indicadora da temperatura 3 Bandeja para coleta da gordura 4 Chapas com revestimento de cer mica antiaderente 5 Bot o de controle da temperatura 6 Base da unidade 1 4 6 3 2 5 DESC...

Page 26: ...outros l quidos Coloque CHAPAS de volta na base do aparelho Alinhe a rea de entalhe especial das CHAPAS com a base do aparelho Incline levemente as chapas insira as nas reas de engate e pressione as...

Page 27: ...apagar indicando que o aparelho est mantendo a temperatura selecionada nas superf cies Use apenas utens lios de madeira nylon ou pl stico resistentes ao calor Os utens lios de metal riscar o as CHAPAS...

Page 28: ...ento SANDU CHES 175 C 350 F 6 a10 min Coloque a manteiga antes de p r na chapa Aloure ambos os lados BISTECAS DE PORCO 175 C 350 F 20 a 30 min Doure ambos os lados reduza a tempera tura para 135 C 275...

Page 29: ...alha de a o ou outros produtos de limpeza abrasivos e fortes em qualquer parte do eletrodom stico Se necess rio use uma esponja macia de nylon ARMAZENAMENTO Encaixe as CHAPAS de volta em seus lugares...

Page 30: ...rtificado www oster com Electric characteristics of series models Caracter sticas el ctricas de los modelos de la serie Caracter sticas el tricas dos modelos da s rie Voltage Voltaje Voltagem Frequenc...

Reviews: