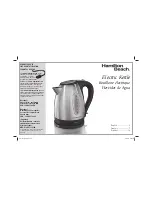
background image

Before first use

Remove any packaging and promotional material from your kettle and position it on a 

stable, secure, dry and level work surface away from the edge.
Before connecting to a power source, make sure your mains supply voltage is the same 

as the one indicated on the appliance. Connect the plug to a suitable power outlet and 

make sure that the power cord does not overhang the work surface. Excess power cord 

can be stored in the power base.  
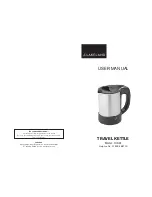
Remove the kettle from the power base and open the lid. Fill your kettle to the maximum 

mark and close the lid.
Place your kettle back onto the power base. Switch your kettle on, allow it to boil 

then discard the water. Repeat twice. This will remove any residue left over from the 

manufacturing process. 

Using your kettle

1.   To fill the kettle, remove it from the power base and lift the lid. Alternatively, the kettle 

may be filled through the pouring spout.

2.   Fill the kettle with the desired amount of water. Always fill the kettle between the 

minimum and maximum marks. Too little water will result in the kettle switching off 

before the water has boiled.

  NOTE: Do not fill the kettle over the maximum level, as water may spill out of the 

spout when boiling.

3.   Push the lid closed firmly until it locks into position.
4.   Place the kettle on the power base and connect the plug into a 220v power outlet. 

Turn the power ON.

5.   Press the ON/OFF button downwards at the base of the kettle. The boiling ring 

around the base of the kettle will illuminate to indicate the kettle is heating. The kettle 

will switch off automatically once the water has boiled.

  NOTE: Ensure that the ON/OFF switch is clear of obstructions and the lid is firmly 

closed. The kettle will not turn off if the ON/OFF switch is constrained or if the lid 

is left open. Do not remove the kettle from the power base while water is heating. 

You cannot switch on the kettle immediately after a boil cycle. There is a minimum 

6-second break between cycles.

6.   Lift the kettle from the power base and pour the water.
  NOTE: Use caution when pouring the water from your kettle, as boiling water will 

scald.

7.   The kettle may be stored on the power base while not in use. The kettle will not re-

boil until the ON/OFF switch is pressed downward.

  NOTE: Ensure the power is turned off at the power outlet when the kettle is not 

in use. Should you accidentally allow the kettle to operate without water, boil-dry 

protection will automatically switch it off. If this occurs, allow the kettle to cool before 

filling with cold water and re-boiling.

English - 4

Summary of Contents for BVSTKE4410

Page 1: ... Instrucciones HERVIDOR ELÉCTRICO LEA TODAS LAS INSTRUCCIONES ANTES DE USAR ESTE APARATO Instruction Manual ELECTRIC KETTLE READ ALL INSTRUCTIONS BEFORE USING THIS APPLIANCE MODELOS MODELS BVSTKE4410 BVSTKE4430 ...

Page 2: ...O opere ningún artefacto con un cable o enchufe dañados después de que el artefacto haya fallado o si se cae al suelo o se daña de cualquier otra manera Regrese el artefacto al Centro de Servicio Oster Autorizado más cercano para examinarlo repararlo o para ajustarlo mecánica o eléctricamente 9 El uso de accesorios no recomendados o no vendidos por el fabricante del artefacto puede causar incendio...

Page 3: ...o de calentamiento Deje enfriar antes de manipular 19 Retire el hervidor de la base de alimentación antes de llenarlo o verterlo No retire el hervidor de la base de alimentación hasta que se apague ya sea manual o automáticamente 20 Use el hervidor solo con la base de alimentación provista 21 Tenga extrema precaución al manipular mover o verter el hervidor que contiene agua hirviendo 22 Si su herv...

Page 4: ... en el cable de extensión o en el cable de alimentación desmontable debe ser igual o mayor a la potencia nominal del dispositivo b Si el artefacto es del tipo de conexión a tierra el cable de extensión debe ser de 3 conductores con conexión a tierra y c El cable más largo debe colocarse de modo que no cuelgue sobre el mostrador ADVERTENCIAS SOBRE EL PRODUCTO 1 Este hervidor está diseñado solo para...

Page 5: ... con bisagra 4 Ventana de nivel de agua 5 Interrumptor de encendido apagado 6 Base de alimentación rotativa de 360 con compartimiento para el cable 7 Iluminación al hervir 1 Spout 2 Filter behind spout 3 Lid 4 Water level window 5 On off switch 6 360 rotational power base with cord storage 7 Illuminates when boiling 1 Spout 2 Filter behind spout 3 Hinged locking lid 4 Water level window 5 On off s...

Page 6: ...l pico al hervir 3 Empuje la tapa firmemente hasta que encaje en su posición 4 Coloque el hervidor en la base de alimentación y conecte el enchufe a una toma de corriente de 220v Encienda la base 5 Presione el botón de ENCENDIDO APAGADO hacia abajo en la base del hervidor El anillo alrededor de la base del hervidor se iluminará para indicar que el hervidor se está calentando El hervidor se apagará...

Page 7: ...e haya enfriado lo suficiente el dispositivo de seguridad se reiniciará Una vez que el dispositivo de seguridad se haya reiniciado levante el hervidor y colóquelo nuevamente en la base de alimentación luego vuelva a llenar el hervidor con agua fría y úselo de la forma habitual Mantenimiento Y Limpieza PRECAUCIÓN Desenchufe siempre el hervidor de agua de la toma de corriente y deje que se enfríe po...

Page 8: ...ras puede ser necesario descalcificar el filtro con un producto desincrustante Use un producto para descalcificar patentado siguiendo las instrucciones del fabricante cuidadosamente El filtro se puede lavar de forma segura en la rejilla de los cubiertos de un lavaplatos automático Vuelva a colocar el filtro en su hervidor Mantenimiento Del Usuario Este electrodoméstico no tiene partes reparables p...

Page 9: ...NOTA Español 8 ...

Page 10: ...ttempt to replace or splice a damaged cord Return appliance to the manufacturer see warranty for examination repair or adjustment 9 The use of accessory attachments not recommended or sold by the manufacturer may cause fire electric shock or injury 10 Do not use outdoors or for commercial purposes 11 Do not let cord hang over edge of table or counter or touch hot surfaces including the stove 12 Do...

Page 11: ...ansers steel wool pads or other abrasive material SAVE THESE INSTRUCTIONS HOUSEHOLD USE ONLY POWER CORD INSTRUCTIONS A short power supply cord or detachable power supply cord is provided to reduce risks resulting from becoming entangled in or tripping over a longer cord Longer detachable power supply cords or extension cords are available and may be used if care is exercised in their use If a long...

Page 12: ...evel window 5 On off switch 6 360 rotational power base with cord storage 7 Boil Illumination 1 Spout 2 Filter behind spout 3 Lid 4 Water level window 5 On off switch 6 360 rotational power base with cord storage 7 Illuminates when boiling 1 Spout 2 Filter behind spout 3 Hinged locking lid 4 Water level window 5 On off switch 6 360 rotational power base with cord storage 7 Illuminates when boiling...

Page 13: ...spill out of the spout when boiling 3 Push the lid closed firmly until it locks into position 4 Place the kettle on the power base and connect the plug into a 220v power outlet Turn the power ON 5 Press the ON OFF button downwards at the base of the kettle The boiling ring around the base of the kettle will illuminate to indicate the kettle is heating The kettle will switch off automatically once ...

Page 14: ...le and allow it to cool When it has cooled down sufficiently the safety device will reset itself Once the safety device has reset lift the kettle and place it onto the power base again and then refill your kettle with cold water and use it as normal Cleaning CAUTION Always unplug the kettle from the mains supply socket and allow it to completely cool down before cleaning or descaling it Do not imm...

Page 15: ... brushing it with a soft brush In hard water areas it may be necessary to descale the filter using a descaling product Use a proprietary descaling product following the manufacturer s instructions carefully The filter may be washed safely in the cutlery rack of a dishwasher Refit the filter back into your kettle User Maintenance This appliance has no user serviceable parts Any servicing beyond tha...

Reviews: