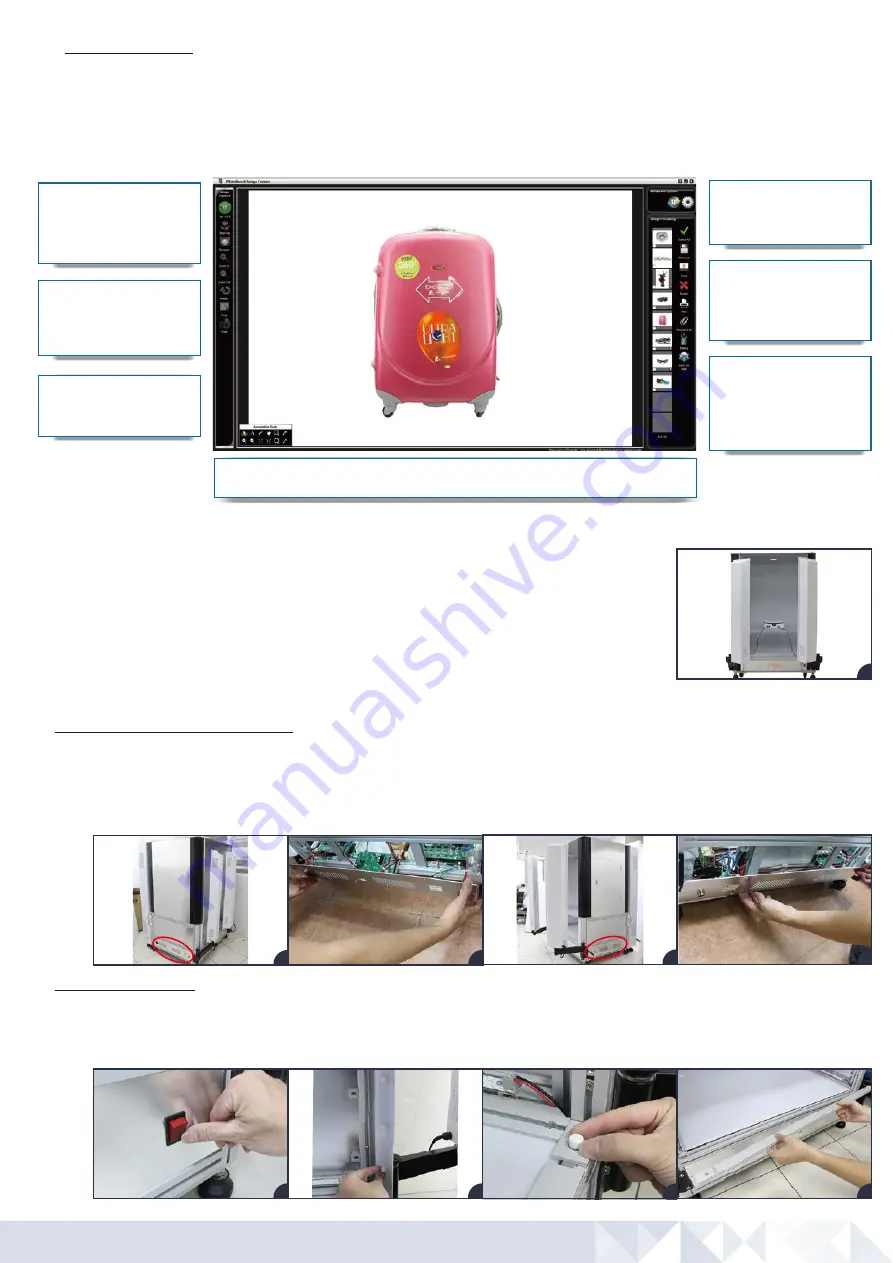
11. Image Processing
The right side of the user interface contains Image Processing commands. Captured images appear as a thumbnail. Selected thumbnails can be bat
ch
saved, edited, watermarked, printed, annotated, sent by email and more. Detailed descriptions of each feature are covered in the Photosimile 220 User
Guide.
a
b
c
d
Software Requirements:
Image Capture
Annotation Tools
Program Link
Advanced Saving
Image Processing
Options
Commands for Preview, Crop,
Camera Settings and for taking
photos.
Mark up images with text,
arrows and drawings to
highlight communication points.
Set software defaults using the
Options button.
Select thumbnails for viewing,
batch saving, editing, export
and more.
Set up Profiles to automate
routine saving patterns for
size, location, file type,
resolution, editing and more.
Quickly select images and send them to Photoshop or other programs.
Lamp Control
Brighten and dim the lamps to
create optimal lighting.
Using Photosimile 220 with PhotoCapture 360 (Sold Separately):
a-b
a-b
c-d
a
Component Replacement:
1. Control Board and Power Supply
Contact an Ortery representative before attempting to access this area of the studio.
To access the control board, unplug the studio then open the bottom left panel. Carefully pull the panel away from the system.
Note:
The wires and the PC board are connected to the panel.
To access the power supply, unplug the studio then open the bottom right panel.
PhotoCapture 360 Turntable is an optional system that allows you to create interactive and professional
360 product views. Automatically capture 360 video or up to 360 individual frames per rotation. Turntable
movement and picture taking are synchronized. Individual images can be immediately exported or edited
and composed into various 360 product views featuring zoom, click-and-drag motion control and more.
2. Lamp Replacement
Turn off and unplug the studio from the wall.
Unscrew and remove the flap plates on both sides of the bottom front corner.
Unscrew and remove the holding bar.
a
b
1
2
3
c
d
a
b
c-d


