


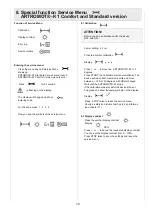


Function of service Menu
Calibration
Display contrast
Error log
Device runtime
Entering the service menu:
Press the menu key until Service Menu
shows up.
ARTRMOT®-K1 Standard Version menu level 3.
ARTRMOT®-K1 Comfort Version menu level 5.
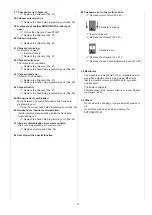
Press
for for 5 seconds,
is flashing on the display.
The display will change and show:
,
Entering code.
For the code press: 1 3 2 4
Now you see the symbols of the service menu
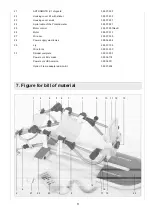
10
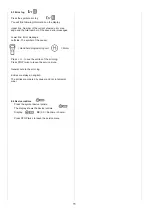
8.1 Calibration
Femur setting: 49 cm.
Press the symbol calibration
.
Display:
Press + or - to move the ARTROMOT®-K1 to 0
degrees.
Press START, the calibration starts automatically. The
device will reach both maximum points and move
between –10 bis 120 degrees with different speed.
Wait until the ARTROMOT®-K1 stops.
If the calibration was succesful the device stops at
0 degrees and show following symbols on the display:
Display:
Press STOP
twice to leave the service menu.
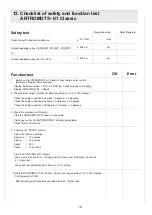
Finally, a safety and fuction test has to be performed
(see chapter 11).
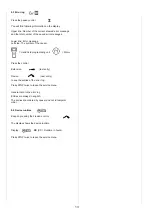
8.2 Display contrast
Press the symbol display contrast
.
Display:
XX %
Press + or - to set up the requested display contrast.
You can set the display contrast from 0 – 100%.
Press STOP twice to save the settings and leave the
service menu.
8. Special function Service Menu
ARTROMOT®- K1 Comfort and Standard version
ATTENTION!
Before you do a calibration switch the device
OFF and ON.


