Arlec Australia Pty. Ltd. ACN 009 322 105 (“Arlec”) gives the Warranty.
Arlec’s telephone number, address and email address are:
Customer Service: (03) 9982 5111
Building 3, 31 – 41 Joseph Street, Blackburn North, Victoria, 3130
Blackburn North LPO, P.O. Box 1065, Blackburn North, 3130
Email: [email protected]
Arlec guarantees this product in accordance with the Australian Consumer Law.
Arlec also warrants to the original first purchaser of this product (“you”)
from a retailer that this product will be free of defects in materials and
workmanship for a period of 12 months from the date of purchase;
provided the product is not used other than for the purpose, or in a
manner not within the scope of the recommendations and limitations,
specified by Arlec, is new and not damaged at the time of purchase, has
not been subjected to abuse, misuse, neglect or damage, has not been
modified or repaired without the approval of Arlec and has not been used
for commercial purposes (“Warranty”).
If you wish to claim on the Warranty, you must, at your own expense,
return the product, and provide proof of original purchase and your name,
address and telephone number, to Arlec at the address below or the
retailer from whom you originally purchased the product within 12 months
from the date of purchase.
Arlec will (or authorise the retailer to) assess any claim you may make on
the Warranty in the above manner and if, in Arlec’s reasonable opinion, the
Warranty applies, Arlec will at its own option and expense (or authorise
the retailer to) replace the product with the same or similar product or
repair the product and return it to you or refund the price you paid for the
product. Arlec will bear its own expenses of doing those things, and you
must bear any other expenses of claiming on the Warranty.
The Warranty is in addition to other rights and remedies you may have
under a law in relation to the product to which the Warranty relates.
Our goods come with guarantees that cannot be excluded under the
Australian Consumer Law. You are entitled to a replacement or refund for
a major failure and for compensation for any other reasonably foreseeable
loss or damage. You are also entitled to have the goods repaired or
replaced if the goods fail to be of acceptable quality and the failure does
not amount to a major failure.
PROFESSIONAL
SuRvEILLANcE SYSTEM
5 mobile device access
6 Warranty
08
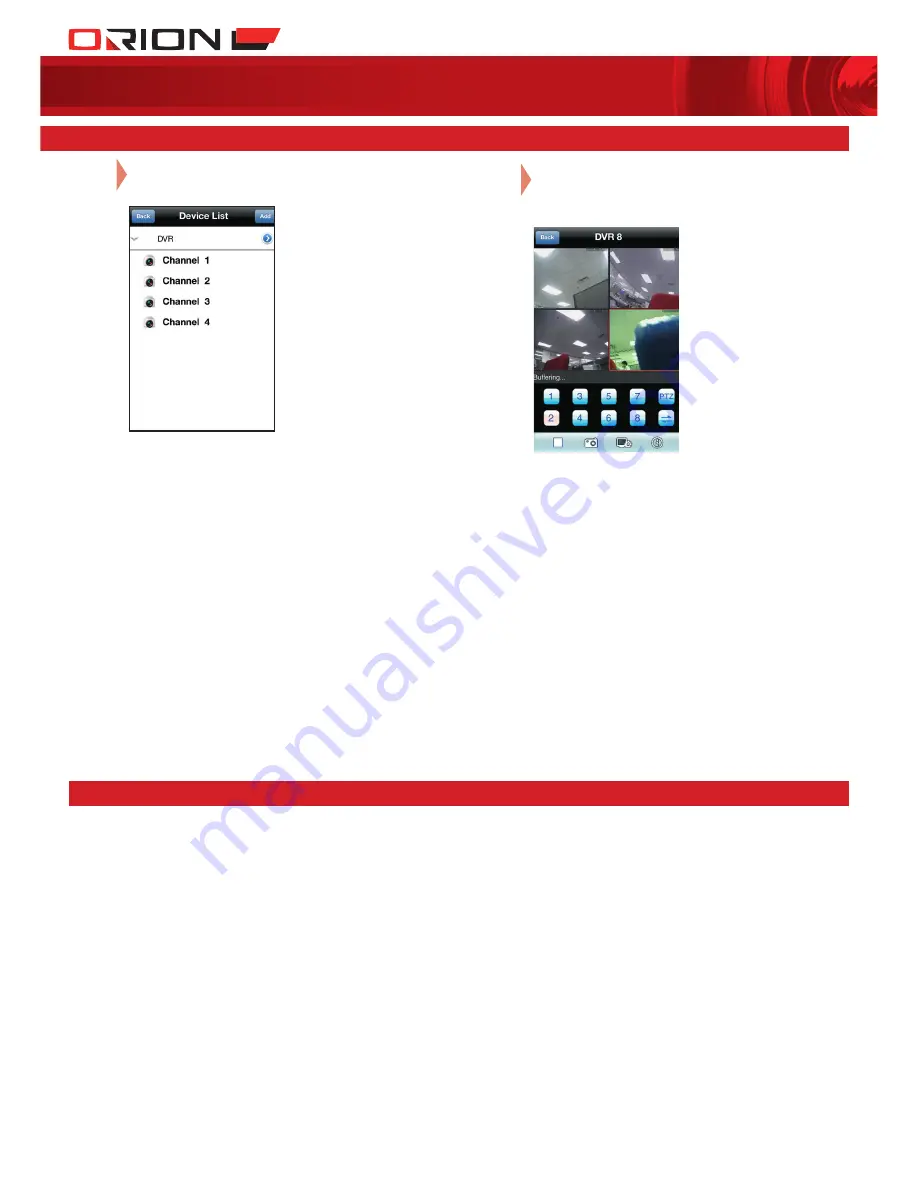
Select DVR and channel to start live monitoring
on mobile device.
09
Repeat steps
7
to
8
on other display windows to
view up to 4 channels simultaneously on Main
Interface.
CPIN002747
Read comprehensive user manual for advance functionality.
Download from
www.orionlive.com.au
or included CD


