background image


101LEDF LED Security Monitor User's Manual 

http://orion-technology.eu 


2.2.


OSD CCTV MENU CONTROLS   

 
Select the menu using the MENU 

[4] 

button in order to access the Menus and Submenus and their functions   

Use of the buttons 


Selection of the Menus 


-


In order to show the main Menu, press the [

2

] button.   

-


In order to change a value (once the option is selected), press the [

3

-

4

] buttons.   

-


In order to confirm the selection, press the [

2

] button.   

-


In order to exit from Menus and Submenus, press the [

4

] button.   


Volume adjustment 


In order to vary the volume without entering the OSD Menu, use [

5

-

6


2.2.1.


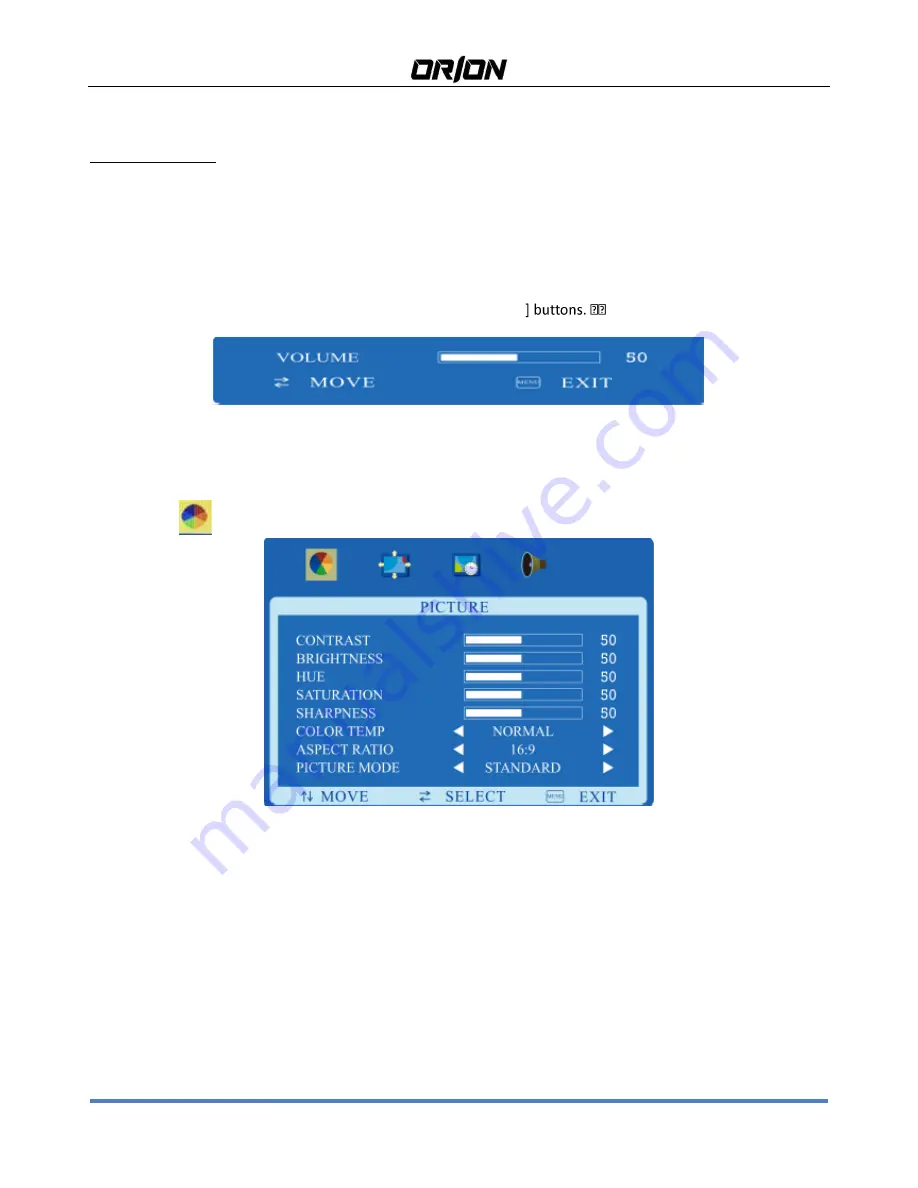
PICTURE   

Selecting the 

  icon, the following screen will appear (depending the signal type):     


CONTRAST: 

It allows to change contrast between white and black areas of the image. A clear resolution of good 

white, black and grey gradation is achieved by a proper setting of contrast. Press “5” and”6” buttons to change the 
values of this parameter.   
 

BRIGHTNESS


It allows to change image brightness, according to ambient light. Press “5” and”6” buttons to change the values of 
this parameter.   
 

HUE 

Adjust the hue,value from 0~100 
 

SATURATION 

Adjust the color saturation,value from 0~100 

Summary of Contents for 101LEDF

Page 1: ...101LEDF LED Security Monitor User s Manual...

Page 2: ...RES 3 1 2 OPENING THE BOX 3 1 2 1 CONTENTS OF THE BOX 3 1 3 WARNINGS 3 1 3 1 POWER 3 1 3 2 SAFETY PRECAUTIONS 3 1 3 3 INSTALLATION PRECAUTIONS 4 1 3 4 CLEANING THE DEVICE 4 1 3 5 PRIVACY AND COPYRIGHT...

Page 3: ...the retailer immediately if parts are either missing or damaged Do not attempt to use the device in this case Send the product back in its original packing if it is damaged 1 2 1 CONTENTS OF THE BOX...

Page 4: ...ized objects away from the device to prevent faults Do not use the device in presence of smoke vapor humidity dust or intense vibrations Wait for a while before operating a device immediately after tr...

Page 5: ...The indicators display the status of the power Indicator Status Lit Red Power off Lit Green Power on Blinking Red Power saving mode POWER CONNECTOR DC Plug the power wire of the adapter provided into...

Page 6: ...ess the 4 button Volume adjustment In order to vary the volume without entering the OSD Menu use 5 6 2 2 1 PICTURE Selecting the icon the following screen will appear depending the signal type CONTRAS...

Page 7: ...ble below 2 2 2 System LANGUAGE It allows to select the desired language ENGLISH DEUTSCH FRANCAIS ESPANOL ITALIANO PORTUGUES POLSKI PYCCKNN Press 5 and 6 buttons to change the values of this parameter...

Page 8: ...lay NOISE REDUCTION It allows to choose from LOW MID HIGH reduces noise of the picture HSTART It allows to change the Horizontal position of the display value from 0 500 HSIZE It allows to change the...

Page 9: ...UT We can choose VGA BNC1 BNC 2 HDMI channel BUZZER It allows to choose ON OFF to set up the alarming TRIGGER TIME It allows to set up the time from 0 100s for alarming TRIGGER OPTION It allows to cho...

Page 10: ...lows to set the automatic volume control ON OFF 3 LCD MONITOR QUALITY AND PIXEL The TFT monitor uses high precision technology manufactured according to industry standards to guarantee trouble free pe...

Page 11: ...re NORMAL WARM COLD USER Video Compatiblity Multi Standard for NTSC PAL Aspect Ratio 16 9 Speaker Multimedia Speakers Right x 1 Left x 1 1W Sound Demodulation Stereo Audio Mute Yes Work Humidity 20 70...

Reviews: