


-Operation-
2
Operating Functions
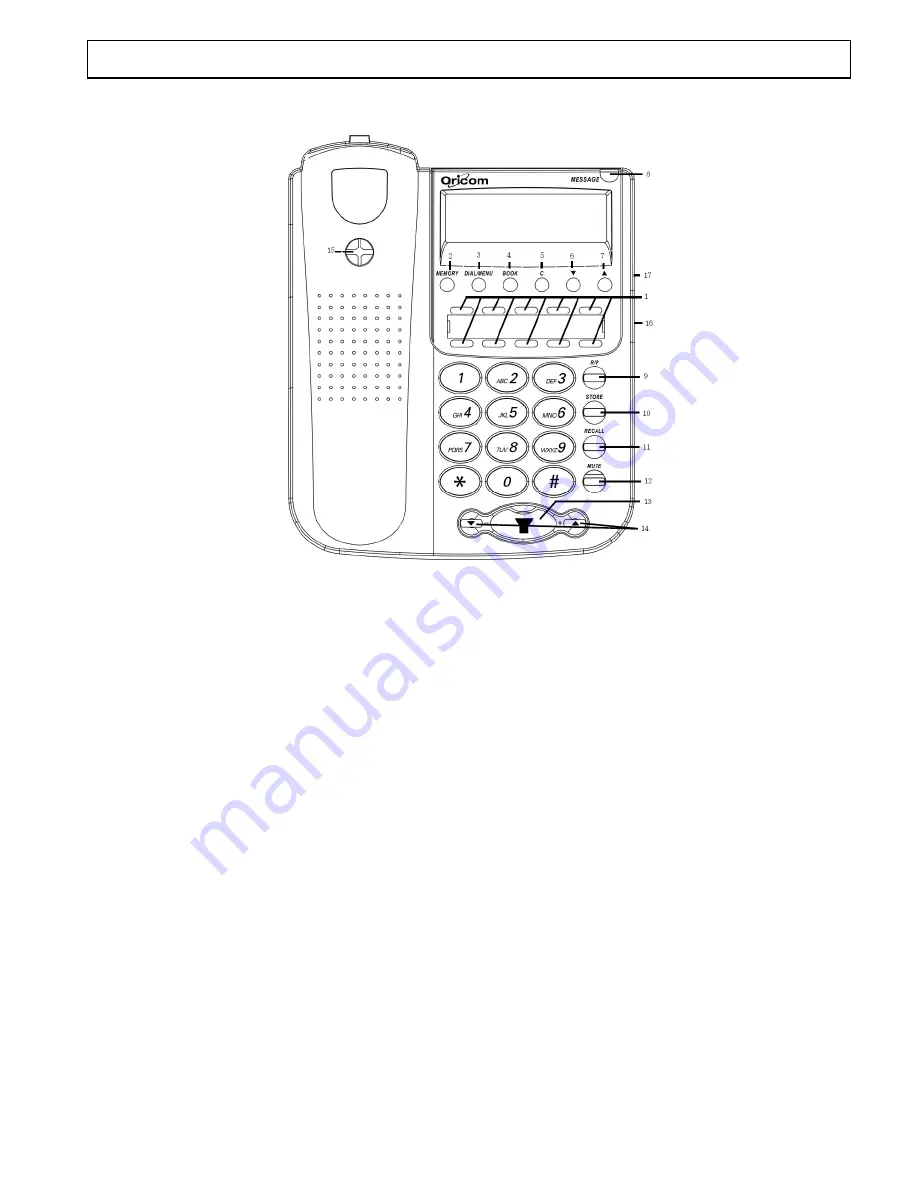
1
One touch buttons A1, A2 to A10
2
Memory button
3
Dial/Menu button
4
Book button
5
Clear button
6
d
button
7
c
button
8
Message indicator
9
Redial/Pause button
10
Store button
11
Recall button
12
Mute button with indicator
13
Handsfree button with indicator
14
Volume adjustment
15
Hanger for handset
16
Connection for Headset cable
17
Speaker/Headset selection switch
Lower surface of the telephone
Ringer adjustment switch
PBX message waiting selection switch
Slots for desk support
Connection for handset curly cord
Connection for telephone cable connection
Battery compartment


