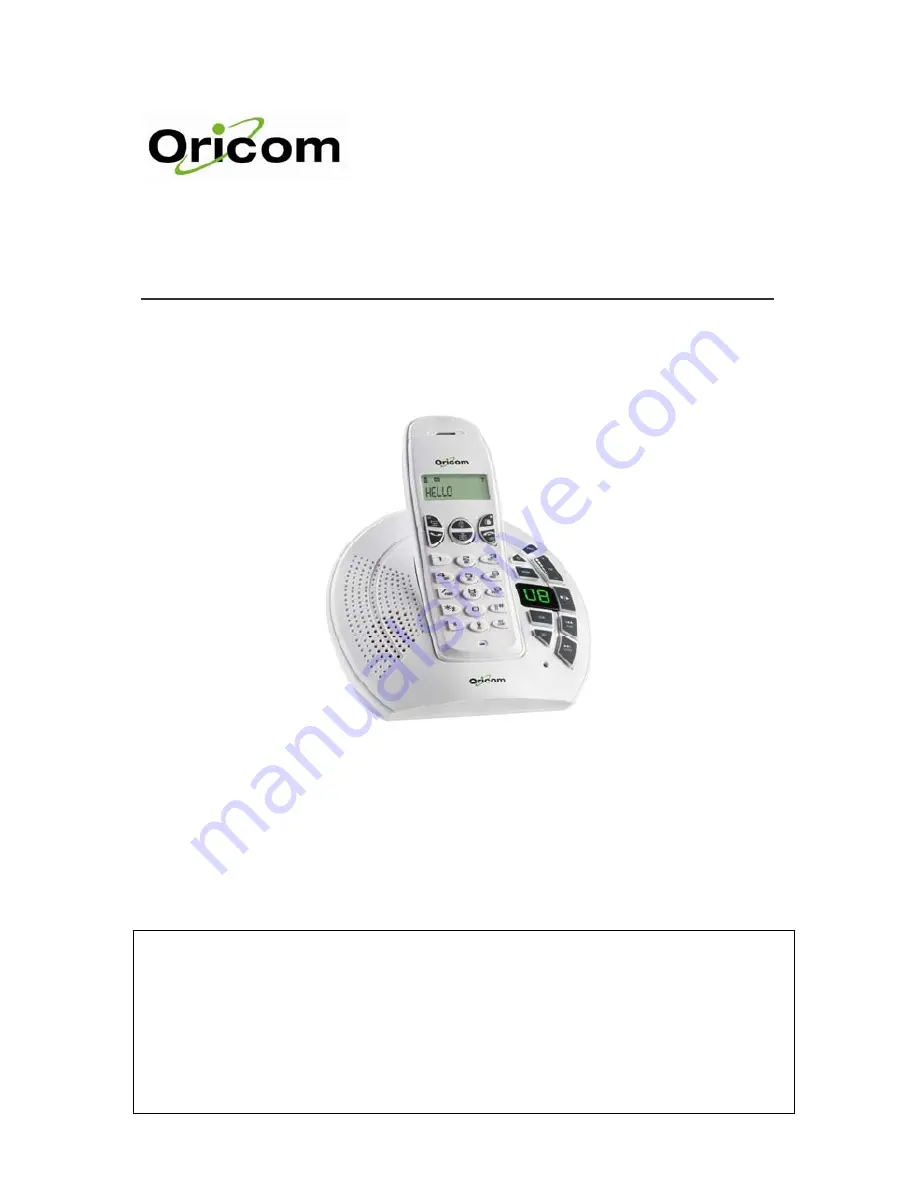
background image


ECO600 Series 

User Guide 


Keep this user guide for future reference 

WARNING 


DO NOT USE STANDARD/ALKALINE BATTERIES IN THIS PRODUCT, AS THERE IS A 

RISK OF EXPLOSION AND/OR INJURY. USE ONLY Ni-MH RECHARGEABLE BATTERIES 

AS SPECIFICED IN THIS USER GUIDE. CONTACT ORICOM FOR REPLACEMENT 

BATTERIES. 

Summary of Contents for ECO600

Page 1: ...de for future reference WARNING DO NOT USE STANDARD ALKALINE BATTERIES IN THIS PRODUCT AS THERE IS A RISK OF EXPLOSION AND OR INJURY USE ONLY Ni MH RECHARGEABLE BATTERIES AS SPECIFICED IN THIS USER GUIDE CONTACT ORICOM FOR REPLACEMENT BATTERIES ...

Page 2: ...s product requires an electrical supply of 220 240 volts single phase alternating current excluding IT installations defined in standard EN 60950 AC Adaptor Base Input 240V AC 50Hz Output 9V DC 500mA AC Adaptor charger Input 240V AC 50Hz Output 6V DC 150mA CAUTION Use only the mains adaptor supplied with this equipment Incorrect adaptor polarity or voltage can seriously damage the unit CAUTION The...

Page 3: ...e disposal of your packing materials exhausted batteries and used phone Wherever possible recycle those materials We advise that this phone should not be used near intensive care medical equipment or by persons with pacemakers Clean with a dry soft lint free cloth Never use cleaning agents particularly aggressive solvents Because the phone works by sending radio signals between base station and ha...

Page 4: ...sets ECO6050HS These may be purchased separately from the retailer where you purchased the product from or direct from Oricom Australia The ECO600 can accommodate a total of 4 cordless handsets Welcome This user guide provides you with information and instruction you need to get the most from your phone HOW TO USE THIS USER GUIDE The following symbols are used to alert you on important information...

Page 5: ...calls 5 End On Off key End current call Exit menu operation Turn handset on off 6 Down Navigation Phonebook key Scroll down menu items Reduce ringer and receiver volume Enter phonebook record review 7 Digit keys Dial digits Enter characters 8 Star Ringer Off key Dial Turn ringer on off 9 Hash Keylock Pause key Dial Enter a pause Lock unlock keypad 10 Recall key Send a recall signal 11 Intercom key...

Page 6: ...ges Use to stop an operation 4 OGM key Use to playback OGM Use to record OGM 9 Rewind Alert key Use to skip backward during playback Use to turn message alert on off 5 Delete key Use to delete messages 10 Forward Screen key Use to skip forward during playback Use to turn call screening on off THE ICONS Each icon gives you a visual message of what is happening on your handset Battery level Call in ...

Page 7: ...ter the phonebook Press to enter the redial log Taking a glance at the menus PHONEBOOK DISPLAY SOUND SETTINGS Add Record Edit Record Delete Delete All Handset Name Handset Base Key Tones Tones Ans Machine Auto Answer Recall SYSTEM INCOMING REDIAL Register Select Base Delete HS Change PIN Low RF Power Reset Save Delete Delete All Save Delete TIP Quick Exit Press and hold to exit from any menu insta...

Page 8: ...l outlet CHARGING YOUR HANDSET 1 Place the 2 rechargeable batteries included into the battery compartment 2 Slide the battery door firmly into place IMPORTANTNOTE DO YOU HAVE BROADBAND If you do you must connect an in line filter not supplied between the telephone socket and your ECO600 phone base to ensure that your broadband and phone work properly Ensure all phone sockets in use have their own ...

Page 9: ...ustralia 1 After the phone is fully charged press during standby mode 2 Enter the country code Country Code AUSTRALIA 23 NEW ZEALAND 168 3 Press Your phone is now ready to use CHECKING THE SIGNAL STRENGTH The signal icon displays the link status between your handset and the base unit A steady icon means your handset and the base unit are linked A flashing icon means your handset and the base unit ...

Page 10: ...mber displays on the screen You can make changes before dialing out 4 Press to dial out the call TIP Press to erase a digit Press and hold to enter a pause P displays on the screen NOTE Signal Strength Check the signal strength before making a call and during a call For details see Checking the signal strength on page 9 NOTE Low Battery During a call you will hear warning tones if your handset is ...

Page 11: ...nswer the call Turning off the ringer You can turn off the ringer for all incoming calls 2 Press and hold during standby displays on the screen For details on the ringer setting see page 18 Adjusting the earpiece volume 1 Press or to adjust the volume during a call Press to confirm Muting the microphone The mute feature allows you to speak to someone in the house privately 1 Press during a call Th...

Page 12: ... button to answer a second call while you are on the phone However this service will need to be turned on For example to turn on Telstra s Call Waiting service 1 Press wait for dial tone then Press 43 2 You will hear a service tone then Press Take two different calls at the same time If you have subscribed to your telephone network operators Call Waiting Caller ID service your phone will display t...

Page 13: ...Press during a call 2 Press the target handset number 3 Press after the other party answers your call The outside call is now transferred to the other handset MAKING A 3 WAY CONFERENCE CALL A 3 way conference call is a call between you an outside caller and another handset user in your house You are talking on the phone with an outside caller and you want to involve another handset user in this co...

Page 14: ... many times as needed for the character to display on the screen Figure 1 Input table Key Characters 0 0 1 space 1 2 A B C 2 3 D E F 3 4 G H I 4 5 J K L 5 6 M N O 6 7 P Q R S 7 8 T U V 8 9 W X Y Z 9 ERASING TEXT AND NUMBERS Erasing a single character 1 Press to delete the character left of the cursor Erasing all characters 1 Press and hold to delete all the characters on screen ...

Page 15: ...cter 1 While at the phonebook press the digit key that contains the character that you want to search CALLING FROM THE PHONEBOOK 2 Press 3 Select the phonebook record you want 4 Press to dial out the call ADDING A RECORD 1 Press 2 Select PHONEBOOK Æ ADD RECORD Press 3 Enter the name Press 4 Enter the number NOTE 2nd Call Service You can make a second call whilst on a call Consult the instructions ...

Page 16: ... RECORD 1 Press 2 Select PHONEBOOK Æ DELETE Press 3 Select the record you want to delete Press twice The handset displays a confirmation request 4 Press to confirm The record is deleted DELETING ALL RECORDS 1 Press 2 Select PHONEBOOK Æ DELETE ALL Press The handset displays a confirmation request 3 Press to confirm All records are deleted NOTE Duplicate Number Phonebook records with identical name ...

Page 17: ...the incoming call log see PAGE 11 SAVING A CALL RECORD TO YOUR PHONEBOOK 1 Press after selecting a call record 2 Select SAVE Press 3 Edit the name if necessary Press 4 Edit the number if necessary 5 Press Your record is saved DELETING A CALL RECORD 1 Press after selecting a call record 2 Select DELETE Press The handset displays a confirmation request 3 Press to confirm The record is deleted DELETI...

Page 18: ...ME Press 3 Select the melody you want Press to confirm The new setting is saved Setting your handset s ringer volume 4 Press 5 Select SOUND Æ HANDSET Æ VOLUME Press 6 Select the volume level Press to confirm The new setting is saved Setting the key tone Key tone is the sound you hear when you press a key on your handset 1 Press 2 Select SOUND Æ KEY TONES Press 3 Select the new setting Press to con...

Page 19: ...operator for more information If this is not working correctly change the setting using the instruction below Selecting recall duration 1 Press 2 Select SETTINGS Æ RECALL Press 3 Select the new setting Recall 1 Australia Recall 2 New Zealand Press to confirm The new setting is saved Extra Features Discover and explore the additional features your phone offers Find out how these features can benefi...

Page 20: ...set s If your handset is not registered you will not be able to make a call or use some of the functions and features on the phone If your handset displays UNREGISTERED follow the steps below to register your handset 1 Press PAGE on the base unit for 4 seconds 2 Press on the handset 3 Select SYSTEM Æ REGISTER Press 4 Enter the system PIN Pre set 0000 Press OK 5 Press 1 to select the base number yo...

Page 21: ...protecting the access rights to some of the other menus The pre set system PIN is 0000 You can personalize the PIN for greater security 1 Press 2 Select SYSTEM Æ CHANGE PIN Press 3 Enter the system PIN Press to confirm Use to make correction 4 Enter the new system PIN Press 5 Enter the new system PIN again for verification 6 Press The new setting is saved NOTE Forgotten PIN Write down your PIN and...

Page 22: ...tting Handset Melody Melody 3 Handset Ringer Volume Level 5 Base Melody Melody 1 Base Ringer Volume Level 3 Handset Key Tones On Receiver Volume Level 2 Handset Tones On Call Log Setting Incoming Call Log Unchanged Dialed Call Log Unchanged Message Waiting Indicator Reset System Setting Base Selection Auto PIN Code 0000 Answering Machine Setting Answer Machine Status On Ring Delay Message Alert On...

Page 23: ... Answer and record This allows the caller to leave a message for you You can also record your own OGM for answer and record mode Hello your call cannot be taken at the moment so please leave your message after the tone Answer only This does not allow the caller to leave a message for you Your answering machine switches to answer only mode if its memory is full Hello we re sorry your call cannot be...

Page 24: ...back press to replay the message from the beginning During the first second of the current message press to play the previous message Skip forward Press to skip to the next message Stop playback Press Delete current message Press Deleting an ICM 1 Press during message playback The current message is deleted Deleting all old ICM 1 Press for 2 seconds The answering machine sounds 2 beeps 2 Press aga...

Page 25: ...or Off MESSAGE ALERT Message alert gives you an indication that you have new message s saved in the answering machine You will hear a short beep periodically 1 Press during standby The answering machine emits one beep for On and two beeps for Off ADJUSTING THE PLAYBACK VOLUME You can adjust the volume of call screening and message playback 1 Press to increase or decrease the volume SETTING RING DE...

Page 26: ...n for verification 6 Press The new setting is saved Accessing your ANSWERING SYSTEM remotely 1 Make a call to your phone 2 Press when OGM starts playing 3 Enter your RA PIN code You now have access to your answering machine 4 Press a key to carry out a function See the Remote Access Commands Tables in the Appendix for a list of available functions NOTE Your phone will hang up automatically if no k...

Page 27: ...nd then clean contacts with a damp cloth Turn on the handset tone See page 18 Handset on the charger does not charge The batteries may be defective Purchase new batteries from your dealer Check that the batteries are inserted correctly Make sure the handset is placed properly on the charger The battery icon animates while charging No display Check that the batteries are charged Check the power and...

Page 28: ...ements for access to emergency services Warranty Australia a Warranty Oricom International Pty Ltd Oricom warrants that the product is free from defects in materials and workmanship for a period of 12 months effective from the date of purchase This warranty in no way affects your statutory warranty under the Trade Practices Act 1974 or any other similar legislation It is important that you read th...

Page 29: ...eplacement batteries and in case of any technical issues you may have with product please consult our website for further information or send us an email for a prompt response to your enquiry In the unlikely event of a fault developing please contact us for assistance If the product is then found to be faulty you will be asked to return it directly to us with a copy of the purchase receipt Austral...

Reviews: