NE
5
HOW TO SET THE ALARMS
To set an alarm:
1. Press
once to enter alarm mode. The
last selected
displayed. If you
have never set
as 0:00.
2. Press
for three seconds. The hour
digits will blink.
3. Enter the hour using [ ] and [ ].
4. Press . The minute digits will blink.
5. Enter the minutes using [ ] and [ ].
6. Press
to exit. The alarm-on icon will
be displayed
arm is activated.
You can activate / disactivate the alarm by pressing the
[ ON / OFF ]
button.
When the alarm sounds, the display will light up for 8-
seconds with the alarm icon flashing.
The four-step crescendo function allows the alarm to start
off gently and step up its intensity for four times. Without
interruption, the alarm will go off for a total of two minutes.
To stop the alarm, you can use either of the three buttons:
[
] ,
or [
ON / OFF
] .
• Pressing [ ] during an alarm will invoke the
snooze function,
arm and let it sound
again after eight
• Pressing
or [
ON / OFF
] will stop
the alarm,
it will go off at the set time the following day.
• If [
ON / OFF
] again, the alarm will be deactivated
all together.
HOW TO RESET THE UNIT
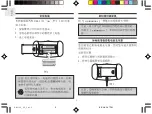
There is a
RESET
function near to the battery compartment.
It allows you to return all settings to its factory values.
To use the RESET:
1. Locate the
RESET
beside the door tab.
2. Use a blunt stylus to press the [
RESET
] once.
PRECAUTIONS
This unit is engineered to give you years of satisfactory
service if you handle it carefully. Here are a few precautions:
1. Do not immerse the unit in water. If you spill liquid over
it, dry it immediately with a soft, lint-free cloth.
2. Do not clean the unit with abrasive or corrosive materials.
They may scratch the plastic parts and corrode the
electronic circuit.
3. Do not subject the unit to excessive force, shock, dust,
temperature or humidity, which may result in malfunction,
shorter electronic life span,damaged battery and distorted
parts.
4. Do not tamper with the unitís internal components. Doing
so will invalidate the warranty on the unit and may cause
unnecessary damage.The unit contains no user-serviceable
parts.
5. Only use fresh batteries as specified in the userís instructions.
Do not mix new and old batteries as the old ones may leak.
6. Always read the userís instructions thoroughly before
operating the unit.
313p en.indd 5
2006.9.26 3:00:10 PM
time of the alarm will be
the alarm before, the time will be displayed
indicating the al
which will stop the al
minutes.
Summary of Contents for RA313P
Page 1: ...PROJECTION CLOCK Model RA313P User Manual...
Page 8: ...1 5 6 p P _ C T _ P 3 1 3 M R M P 9 2 2 4 0 9 8 2 1 RA313P...
Page 10: ...3 AA 1 2 3 8 1 2 UM 3 1 5V 2 3...
Page 15: ...1 RA313P 5 6 p P _ C S _ P 3 1 3 M R M P 5 4 2 6 0 9 8 1...
Page 17: ...3 UM 3 AA 1 5V 1 2 3 1 1 2 2 3 5 6 p P _ C S _ P 3 1 3 M R M P 7 4 2 6 0 9 8 3...
Page 22: ...2006 Oregon Scientific All rights reserved 086L004677 024 C...


