background image

3

IT

PE829 / PE829A – VISTA ANTERIORE E
POSTERIORE

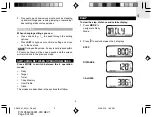
1. Display LCD

2. Tasto 

MODE / SET

3. Tasto   / 

4. Tasto 

RESET 

/   /   / 

5. Tasto 

 / 

6. Clip per cintura

7. Vano batterie

8. Rilevazione dei battiti cardiaci

9. Tasto pulsazioni 

10. Tasto illuminazione LED 

11. Illuminazione LED

12. Levetta antipanico

13. Clip e cordoncino di fissaggio

14. Selettore della frequenza

15.

 Radio Accesa

16.

 / 

 Ricerca della frequenza radio di

17.

 Impostazione del livello del volume

18.

 Radio Spenta

19. Tasto Talk

20. Jack auricolari

PE82X_M_IT_N_R0.p65

2008.2.19, 1:10 PM

3

P/N: 086L003991-079 REV1

Page 19 of 126

Summary of Contents for PE823

Page 1: ...dometer With 7 Day Memory PE823 Pedometer With Pulse Meter PE826 Pedometer With Panic Alarm PE828 Talking Pedometer With FM Radio PE829 PE829A USER MANUAL FRONT COVER P N 086L003991 079 REV1 Page 1 of 126 ...

Page 2: ...Weekly Records 7 View Daily Records 7 Clear All Records 8 Clock User Profile 8 To Set the User Profile for 1st Time Use or After a Battery Change 8 Change Individual Clock or User Profile Settings 9 Alarm 9 Pulse Meter Stress Index Available in PE826 Only 9 How to Use Panic Alarm Available in PE828 Only 11 FM Radio Available in PE829 PE829A Only 11 Scanning and Storing Radio Channels 11 Talk Funct...

Page 3: ...d and calories expended Other key functions include target step distance calories 7 day memory function estimated target finish time and keypad lock function Keep this manual handy as you use your new product It contains practical step by step instructions as well as technical specifications and warnings you should know KEY FEATURES PE823 FRONT AND BACK VIEW PE826 FRONT AND BACK VIEW PE828 FRONT A...

Page 4: ...lse meter 9 Pulse rate button 10 LED light button 11 LED light 12 Panic alarm pin 13 Fastening clip and chord 14 Selects radio channel 15 Radio ON 16 Scan up and down FM frequency 17 Increase and decrease volume 18 Radio OFF 19 Talk button 20 Earphone jack PE82X_M_EN_N_R0 p65 2008 2 19 1 09 PM 3 P N 086L003991 079 REV1 Page 4 of 126 ...

Page 5: ...are in GETTING STARTED SET UP You must set up the device as shown below when you first activate the unit reset it or change the batteries or your pedometer will not work properly 1 To activate the device pull out the insulation tape underneath the battery cover For PE828 insert batteries 2 Set the clock and user profile see Clock User Profile section 3 PE826 only Calibrate the stress index baselin...

Page 6: ...y is not pressed within 30 seconds there will be a beep sound and the screen will return back to the previous mode SWITCHING BETWEEN OPERATION MODES Press MODE to switch between the 6 operation modes Daily Target Timer 7 day Memory User Profile Clock The modes are described in the sections that follow DAILY To view the step distance and calorie display 1 Press MODE to navigate to Daily Mode 2 Pres...

Page 7: ...e you how long it will take to complete your target based on your current pace The target bar at the bottom of the display will move from left to right start to finish to show your progress 3 Press to toggle between the EFT and remaining steps distance or calories left until target is reached 4 When target walk is complete FINISH will appear and a beep will sound 5 To reset the target for the next...

Page 8: ... MODE to navigate to Memory Mode 2 Press to toggle between the total weekly step distance and calorie display VIEW DAILY RECORDS 1 Press MODE to navigate to Memory Mode 2 Press to enter the daily record display 3 Press repeatedly until you reach the day you wish to view When you have selected the day you wish to view a 1 second display will show to advise you if you reached that days target or not...

Page 9: ... below or your pedometer will not work properly 1 The first setting will flash 2 Press to change a value and SET to confirm and move on to the next setting 3 The setting sequence is CLOCK 12 24hr format Hour Minute Day of the week USER PROFILE Upper pulse limit PE826 only Lower pulse limit PE826 only Weight unit Weight Stride unit Stride Age Gender To calculate stride length Individual stride leng...

Page 10: ...o enter the setting mode 4 Press to change a value and SET to confirm and move on to the next setting 5 The setting sequence is Hour Minute On Off To stop the alarm sound press any key PULSE METER STRESS INDEX AVAILABLE IN PE826 ONLY For first time use or after replacing a battery or resetting the unit user must calibrate stress index baseline otherwise no valid reading can be obtained To calibrat...

Page 11: ...llow Normal Red Not relaxed Retry if failed if no reading is showing within 1 minute the pedometer will escape from pulse mode You then press pulse rate button again TIPS Cold fingertips and cold air can affect the measurement You may need to warm your hands before you start The sensor is sensitive to light sources Cover the entire sensor area with your fingertip to block all light Gently touch th...

Page 12: ...hat you quickly test the alarm function every time you use the pedometer FM RADIO AVAILABLE IN PE829 PE829A ONLY To turn the radio ON press and hold To turn the radio OFF press and hold When using the radio make sure the earphones are plugged in will appear on the screen SCANNING AND STORING RADIO CHANNELS The radio receives FM frequency between 87 5 to 108 MHz You can store up to 5 channels To sc...

Page 13: ...e setting sequence is Auto talk ON OFF If ON is selected you will need to set the broadcast interval time to 5 10 or 15 mins appears on the screen when this function is activated Pacer ON OFF If ON is selected you will need to set the pacer frequency which ranges from 45 to 180 beeps per minute This function helps you maintain the pace of your walk run as each beep represents one step Languages av...

Page 14: ...3 Gently push back the battery compartment WARNINGS This product is designed to give you years of service if handled properly Observe the following guidelines Never immerse the unit in water This can cause electrical shock and damage the unit Clean the unit with a slightly damp cloth and mild detergent Do not subject the unit to extreme force shock or fluctuations in temperature or humidity Do not...

Page 15: ... 60 inches 28 to 152 cm Calorie display 0 1 to 9999 9 kcal Body weight range 64lbs to 340lbs 29 to 154kg Pulse range 30 240 bpm Operating temp 14 to 104 0 F 10 to 40 C Storage temp 4 to 140 F 20 to 60 C Dimensions without clip W x H x D and weight PE823 2 1 x 1 9 x 1 0 inches 52 x 47 x 25 mm 33 g 1 16 ounces PE826 2 4 x 2 2 x 1 0 inches 60 3 x 54 9 x 24 mm 38 g 1 34 ounces PE828 2 3 x 2 5 x 1 0 in...

Page 16: ... 800 853 8883 For international inquiries please visit www2 oregonscientific com about international EU DECLARATION OF CONFORMITY Hereby Oregon Scientific declares that this pedometer model PE823 PE826 PE828 PE829 PE829A is in compliance with EMC directive 89 336 CE A copy of the signed and dated Declaration of Conformity is available on request via our Oregon Scientific Customer Service PE82X_M_E...

Page 17: ...azione Delle Rilevazioni Giornaliere 7 Cancellazione Delle Rilevazioni 8 Orologio Profilo Utente 8 Impostare il Profilo Utente per la Prima Volta o Dopo la Sostituzione Delle Batterie 8 Modifica Delle Impostazioni Personali Orologio o Profilo Utente 9 Sveglia 9 Rilevazione dei battiti cardiaci Indice di Sforzo Disponibile Solo nel PE826 9 Come Utilizzare L allarme Antipanico Disponibile Solo nel P...

Page 18: ...a totale coperta e le calorie bruciate Altre funzioni chiave sono impostazione di un obiettivo in passi distanza calorie consumate 7 giorni di memoria dei dati rilevati stima del tempo mancante all arrivo e funzione di blocco tastiera Si consiglia di tenere questo manuale a portata di mano durante l utilizzo del prodotto Il manuale contiene istruzioni dettagliate specifiche tecniche e avvertenze c...

Page 19: ...iaci 9 Tasto pulsazioni 10 Tasto illuminazione LED 11 Illuminazione LED 12 Levetta antipanico 13 Clip e cordoncino di fissaggio 14 Selettore della frequenza 15 Radio Accesa 16 Ricerca della frequenza radio di 17 Impostazione del livello del volume 18 Radio Spenta 19 Tasto Talk 20 Jack auricolari PE82X_M_IT_N_R0 p65 2008 2 19 1 10 PM 3 P N 086L003991 079 REV1 Page 19 of 126 ...

Page 20: ...la rovescia 12 Il dot matrix mostra varie icone per indicare la modalità schermata in cui ci si trova INIZIALIZZAZIONE DEL CONTAPASSI IMPOSTAZIONE Per un corretto funzionamento del pedometro è necessario impostare il dispositivo vedi sotto quando si attiva l unità per la prima volta quando si riavvia o si cambiano le batterie 1 Per attivare il dispositivo togliere il nastro protettivo posto nel va...

Page 21: ...n impostazione e passare alla successiva Quando si è in modalità impostazioni se non viene premuto nessun tasto entro 30 secondi il contapassi emetterà un beep e il display tornerà alla modalità precedente PASSAGGIO TRA LE MODALITÀ OPERATIVE Premere MODE per scorrere tra le 6 modalità operative Giornaliera Obiettivo Timer Memoria 7 giorni Profilo utente Orologio Una descrizione delle modalità si t...

Page 22: ...EMPO STIMATO ALL ARRIVO EFT per avvisare quanto manca al raggiungimento del traguardo al passo attuale dell utente La barra relativa al raggiungimento dell obiettivo si muove da sinistra a destra da partenza ad arrivo per mostrare l avanzamento dell utente 3 Premere per passare dall EFT in passi in distanza o in calorie mancanti per il raggiungimento dell obiettivo 4 Quando il percorso viene compl...

Page 23: ...ha una funzione di memorizzazione dei dati rilevati per 7 giorni è possibile visualizzare le rilevazioni totali dei passi e della distanza percorsa e delle calorie consumate nella intera settimana e in ogni singolo giorno VISUALIZZAZIONE DELLE RILEVAZIONI TOTALI SETTIMANALI 1 Premere MODE per visualizzare la Modalità Memoria Memory Mode 2 Premere per navigare tra le opzioni totali settimanali di p...

Page 24: ...A PRIMA VOLTA O DOPO LA SOSTITUZIONE DELLE BATTERIE Quando viene tolto il nastro adesivo per attivare il pedometro e ogni volta che vengono sostituite le batterie il pedometro chiederà di impostare l orologio e il profilo utente Per il corretto funzionamento del pedometro si consiglia di completare le impostazioni come indicato di seguito 1 La prima impostazione lampeggerà 2 Premere per modificare...

Page 25: ...r modificare un valore e SET per confermare SVEGLIA Mentre si è in Modalità Orologio premere per passare dalla Modalità Orologio alla Modalità Sveglia Per impostare la sveglia 1 Premere MODE per visualizzare la Modalità Orologio Clock Mode 2 Premere per passare alla Modalità Sveglia Alarm Mode 4 Tenere premuto SET per entrare in modalità impostazioni 5 Premere per modificare un valore e SET per co...

Page 26: ...econdi finché non compare la parola FINISH sul display LCD 6 Se la calibrazione non riesce ripetere i passi da 3 a 5 Si consiglia di calibrare il proprio valore di riferimento di sforzo una volta al mese o comunque ogni volta che si intende far riferimento al proprio parametro in situazioni diverse Per misurare il livello di pulsazioni e di sforzo 1 Rimanere in distensione prima e durante la misur...

Page 27: ...vuti Qual è il proprio indice di sforzo La misurazione dell indice di sforzo è basata sulla variabilità del battito cardiaco che indica lo stato del sistema nervoso involontario Una variazione notevole del battito cardiaco è indice del fatto che il sistema nervoso parasimpatico è predominante il che corrisponde generalmente a uno stato di distensione Nel caso di un valore minore significa invece c...

Page 28: ... Per ascoltare una delle stazioni memorizzate premere CH L uso prolungato della radio FM riduce notevolmente la durata della batteria FUNZIONE TALK DISPONIBILE SONO NEL PE829 PE829A La funzione Talk è disponibile per le modalità GIORNALIERA OBIETTIVO TIMER MEMORIA e OROLOGIO Trasmette informazioni relative all attuale schermata LCD ad es in Modalità Giornaliera è possibile sentire Oggi hai effettu...

Page 29: ...o si rilascia il tasto la luce si spegnerà solo PE828 Per attivare o disattivare il blocco tastiera tenere premuto Per riavviare l unità togliere e rimettere le batterie BATTERIE compare quando la batteria è quasi scarica ed è necessario sostituirla Proteggi l ambiente portando le batterie scariche in stazioni di raccolta autorizzate PE823 PE826 Per sostituire la batteria 1 Premere delicatamente i...

Page 30: ...nti che possono essere riparati dall utente Non mischiare batterie nuove con batterie vecchie o con batterie di tipo diverso Non utilizzare batterie ricaricabili con questo prodotto Rimuovere le batterie se si prevede di non utilizzare il prodotto per un lungo periodo di tempo Non graffiare il display LCD Il contenuto di questo manuale e le specifiche tecniche sono soggetti a modifiche senza preav...

Page 31: ...iche nonché allo smaltimento dei rifiuti Il simbolo del cassonetto barrato riportato sull apparecchiatura o sulla sua confezione indica che il prodotto alla fine della propria vita utile deve essere raccolto separatamente dagli altri rifiuti L utente dovrà pertanto conferire l apparecchiatura giunta a fine vita agli idonei centri di raccolta differenziata dei rifiuti elettronici ed elettrotecnici ...

Page 32: ...nformazioni di cui hai bisogno Per ricerche di tipo internazionale puoi visitare invece il sito www2 oregonscientific com about international asp DICHIARAZIONE DI CONFORMITA UE Con la presente Oregon Scientific dichiara che questo contapassi modelli PE823 PE826 PE828 PE829 PE829A è conforme alla direttiva EMC 89 336 CE Una copia firmata e datata della Dichiarazione di Conformità è disponibile su r...

Page 33: ...diennes 7 Suppression de Tous les Enregistrements 8 Heure Profil D utilisateur 8 Pour Régler le Profil D utilisateur Pour la 1ère Fois ou Apres un Changement de Piles 8 Changement des Reglages Individuels de l heure ou du Profil D utilisateur 9 Reveil 9 Compte Pouls Indice de Stress Seulement Disponible Pour PE826 9 Comment Utiliser la Sirene D alarme Seulement Disponible sur pe828 11 Radio FM Seu...

Page 34: ...objectif de pas distance calories la fonction mémoire de 7 jours le temps d arrivée au but estimé et le verrouillage de clavier sont inclues REMARQUE veuillez garder ce manuel à proximité lorsque vous utilisez votre nouvel appareil Il contient des instructions pratiques progressives de même que des caractéristiques et des avertissements que vous devriez connaître CARACTÉRISITIQUES PRINCIPALES PE82...

Page 35: ...piles 8 Compte Pouls 9 Bouton de Pouls 10 Interrupteur de lumière LED 11 Lumière LED 12 Goupille de sirène d alarme 13 Clip d attache et cordon 14 Sélection de stations radio 15 Radio en marche ON 16 Recherche de stations FM 17 Ajustement du volume 18 Radio éteinte OFF 19 Bouton de voix 20 Fiche d écouteur PE82X_M_FR_N_R0 p65 2008 2 19 1 10 PM 3 P N 086L003991 079 REV1 Page 35 of 126 ...

Page 36: ...ciel qui monter les divers icônes pour indiquer le mode l affichage en cours POUR COMMENCER REGLAGE Vous devez régler l appareil comme il est montré ci dessous quand vous l activez pour la première fois le remettez à zéro ou changez les piles sans quoi votre podomètre ne fonctionnera pas correctement 1 Pour activer l appareil retirer le ruban isolateur sous le couvercle de piles Pour PE828 insérer...

Page 37: ...ndant le mode réglage aucune touche n est utilisée dans les 30 secondes il y aura un bip sonore et l écran reviendra au mode précédent NAVIGATION ENTRE LES MODES OPÉRATIONNELS Appuyer sur MODE pour naviguer entre les 6 modes opérationnels Quotidien Objectif Compte à rebour Mémoire 7 jours Profil d utilisateur Heure Les modes sont décrits dans les sections qui suivent QUOTIDIEN Pour voir l affichag...

Page 38: ...de temps il faudra pour compléter l objectif en fonction de votre rythme actuel La barre d objectif en bas de l écran se déplace de gauche à droite départ à arrivée pour indiquer votre progrès 3 Appuyer sur pour naviguer entre EFT les pas la distance ou les calories restants jusqu à ce que l objectif soit atteint 4 Quand l objectif est atteint apparaît et un bip sonore se fait entendre 5 Pour reve...

Page 39: ...yer sur MODE pour naviguer jusqu au Mode Mémoire 2 Appuyer sur pour naviguer dans l affichage du total hebdomadaire des pas de la distance et des calories VISUALISER LES PERFORMANCES QUOTIDIENNES 1 Appuyer sur MODE pour naviguer jusqu au Mode Mémoire 2 Appuyer sur pour entrer dans l affichage des résultats quotidiens 3 Appuyer sur de façon répétée jusqu à ce que vous arriviez au jour que vous voul...

Page 40: ...ns quoi votre podomètre ne fonctionnera pas correctement 1 Le premier réglage clignote 2 Appuyer sur pour changer une valeur et sur SET pour confirmer et aller au prochain réglage 3 La séquence de réglage est HEURE Format 12 24hr Heure Minutes Jour de la semaine PROFIL D UTILISATEUR Limite de pouls maximale seulement PE826 Limite de pouls minimale seulement PE826 Unité de poids Poids Unité d allon...

Page 41: ... SET pour entrer dans le mode réglage 4 Appuyer sur pour changer une valeur et sur SET pour confirmer et aller au prochain réglage 5 La séquence de réglage est Heure Minutes Arrêt Marche Pour arrêter la sonnerie appuyer sur n importe quel bouton PULSOMÈTRE INDICE DE STRESS SEULEMENT DISPONIBLE POUR PE826 REMARQUE Pour le premier usage ou après avoir remplacé les piles ou redémarré l appareil l uti...

Page 42: ...ex 100 5 L écran LCD affiche votre niveau de détente comme suit ICONE COULEUR SIGNIFICATION DE LA BARRE Vert Détendu Jaune Normal Rouge Pas Détendu REMARQUE Essayer encore en cas d échec si rien ne s affiche dans la minute le podomètre sort du mode pouls Appuyer alors sur le bouton de pouls de nouveau CONSEILS Des doigts et de l air froids peuvent affecter les mesures Il peut être nécessaire de se...

Page 43: ...12V neuve peut durer environ 15 minutes si la sirène est activée Il est recommandé de tester rapidement la sirène chaque fois que vous utilisez le podomètre RADIO FM SEULEMENT DISPONIBLE POUR PE829 PE829A Pour allumer la radio appuyez et tenez Pour éteindre la radio appuyez et tenez REMARQUE Quand la radio est utilisées assurez vous que les écouteurs sont branchés apparaît à l écran REMARQUE A for...

Page 44: ...ît quand la fonction vocale émet Pour régler la fonction vocale 1 Appuyer et tenir TALK pour entrer dans le mode réglage 2 Appuyer sur pour changer un réglage et sur TALK pour confirmer et aller au prochain 3 La séquence de réglage est Voix auto ARRET MARCHE ON OFF Si MARCHE ON est sélectionné il faut régler l intervalle d annonces sur 5 10 ou 15 min apparaît à l écran quand cette fonction est act...

Page 45: ...ne pile 23A 12V 3 Remettre le couvercle et serrer la vis PE829 PE829A Pour changer la pile 1 Appuyer doucement sur le bouton avec une pointe émoussée pour ouvrir le compartiment à piles 2 Insérer 2 piles CR2032 3 Fermer le compartiment à piles doucement ATTENTION Cet appareil est conçu pour vous servir pendant de nombreuses années s il est manipulé correctement Observez les directives suivantes Ne...

Page 46: ... pas l écran LCD Le contenu de ce manuel et les caractéristiques techniques de cet appareil sont sujets à changement sans préavis Les images ne sont pas à l échelle CARACTERISTIQUES TECHNIQUES TYPE DESCRIPTION Compteur de pas 0 à 99 999 pas Gamme d objectifs 100 à 99 900 pas de pas Gamme du 0 à 99h 59 min 59 sec compte à rebour Distance parcourue 0 à 999 99 miles 0 à 999 99 km Allonge 11 à 60 pouc...

Page 47: ...ous sur notre site www oregonscientific fr Si vous êtes aux Etats Unis vous pouvez contacter notre support consommateur directement sur le site www2 oregonscientific com service support asp OU par téléphone au 1 800 853 8883 Pour des renseignements internationaux rendez vous sur le site www2 oregonscientific com about international asp DÉCLARATION DE CONFORMITE EUROPÉENNE Par la présente Oregon Sc...

Page 48: ...peicher 7 Wochengesamtwerte anzeigen 7 Tageswerte anzeigen 8 Alle Datensätze löschen 8 Uhr Benutzerprofil 8 Benutzerprofil bei Erstinbetriebnahme oder nach Batteriewechsel einstellen 8 Einstellungen für Uhr oder Benutzerprofil ändern 9 Alarm 9 Pulsmesser Belastungsindex nur bei PE826 verfügbar 10 Verwendung des Panikalarms nur bei PE828 verfügbar 12 UKW Radio nur bei PE829 PE829A verfügbar 12 Such...

Page 49: ...rderlichen Schritte berechnet die zurückgelegte Gesamtdistanz und die verbrauchten Kalorien Weitere Hauptfunktionen beinhalten Schrittzahl Entfernung Kalorien bis zum Ziel 7 Tage Speicherfunktion geschätzte Endzeit bis zum Ziel sowie eine Tastensperre Halten Sie bitte dieseAnleitung bereit wenn Sie Ihr neues Produkt in Betrieb nehmen Sie enthält praktische Schritt für Schritt Anweisungen sowie tec...

Page 50: ... Pulsmesser 9 Pulstaste 10 LED Lichttaste 11 LED Licht 12 Panikalarm Stift 13 Befestigungsclip mit Schnur 14 Radiostationswahl 15 Radio EIN 16 Sendersuchlauf im UKW Frequenzbereich 17 Lautstärke erhöhen verringern 18 Radio AUS 19 Sprechtaste 20 Ohrhörerbuchse PE82X_M_DE_N_R0 p65 2008 2 19 1 11 PM 3 P N 086L003991 079 REV1 Page 50 of 126 ...

Page 51: ...Die Punktmatrix zeigt verschiedene Symbole an um den aktuell gewählten Modus darzustellen ERSTE SCHRITTE SETUP Sie müssen das Gerät wie nachstehend beschrieben einrichten wenn Sie es das erste Mal in Betrieb nehmen es zurücksetzen oder die Batterien wechseln anderenfalls könnte Ihr Schrittzähler nicht ordnungsgemäß funktionieren 1 Um das Gerät zu aktivieren ziehen Sie das Isolierband unterhalb des...

Page 52: ...tätigen und zur nächsten Einstellung überzugehen HINWEIS Wenn eine Taste im Einstellungsmodus nicht innerhalb von 30 Sekunden gedrückt wird ertönt ein Piepsignal und dieAnzeige kehrt in den vorherigen Modus zurück UMSCHALTEN ZWISCHEN BETRIEBSMODI Drücken Sie auf MODE um zwischen den 6 Betriebsmodi umzuschalten Tageswertanzeige Zielwertanzeige Timer 7 Tage Speicher Benutzerprofil Uhr Die Betriebsmo...

Page 53: ...los um den Schrittzähler zu aktivieren Die Anzeige GO erscheint um zu bestätigen dass das Gerät damit beginnt Ihre Fortschritte zu überwachen 2 Während Sie unterwegs sind erscheint regelmäßig die GESCHÄTZTE ENDZEIT EFT um Sie darauf hinzuweisen wie lange es dauern wird bis Sie bei Ihrem aktuellen Tempo Ihr Ziel erreichen haben werden Der Zielbalken im unteren Bereich der Anzeige bewegt sich von li...

Page 54: ...zur Bestätigung auf SET drücken So verwenden Sie den Timer Drücken Sie auf um den Timer zu starten beenden Halten Sie gedrückt um den Timer zurückzusetzen Drücken Sie wiederholt auf um die Timerwerte für die Schrittzahl Entfernung und den Kalorienverbrauch anzuzeigen HINWEIS Im Timer Modus wird das Symbol angezeigt Wenn Sie sich in einem anderen Modus befinden blinkt das Symbol um darauf hinzuweis...

Page 55: ...e gespeichert wurden werden diese ab dem 1 Tag der neuen Woche überschrieben HINWEIS Der Balken an der Unterseite der Anzeige gibt den jeweiligen Tag an für den Sie den Speicherdatensatz betrachten ALLE DATENSÄTZE LÖSCHEN Halten Sie RESET gedrückt UHR BENUTZERPROFIL BENUTZERPROFIL BEI ERSTINBETRIEBNAHME ODER NACH BATTERIEWECHSEL EINSTELLEN Wenn das Installationsband zur Aktivierung des Schrittzähl...

Page 56: ...n Einstellung der Uhr des Benutzerprofils wie im vorigenAbschnitt beschrieben die Uhrzeit ändern oder eine Einstellung im Benutzerprofil bearbeiten möchten gehen Sie einfach wie folgt vor 1 Drücken Sie auf MODE um zum Uhr oder Benutzerprofil Modus zu navigieren 2 Nur im Profil Modus Verwenden Sie um durch die Einstellungen zu blättern die Sie ändern möchten 3 Halten Sie SET gedrückt um den Einstel...

Page 57: ...n zur Überwachung Ihres Belastungsstatus verwenden können Entspannen Sie sich 2 3 Minuten lang bevor Sie mit der Kalibrierung beginnen 1 Drücken Sie auf um den Pulsmodus aufzurufen 2 Drücken Sie auf um die Kalibrierungseinstellung aufzurufen 3 Halten Sie SET gedrückt um mit der Kalibrierung zu beginnen 4 Entspannen Sie sich und drücken Sie die Spitze Ihres Daumens oder Zeigefingers sanft auf den P...

Page 58: ...kuppe um einfallendes Licht abzuschirmen Berühren Sie den Pulssensor behutsam und drücken Sie nicht mit Gewalt darauf Bleiben Sie während der Messung ruhig und gelassen Bewegungen des Körpers können die Ablesung beeinflussen Warten Sie lange genug Die Messungen können 6 12 Sekunden dauern je nach Stabilität der empfangenen Signale Was ist Ihr Belastungsindex Die Messung des Belastungsindex basiert...

Page 59: ...ich dass die Ohrhörer angesteckt sind erscheint in der Anzeige SUCHEN UND SPEICHERN VON RADIOSTATIONEN Das Radio empfängt einen UKW Frequenzbereich von 87 5 bis 108 MHz Sie können bis zu 5 Sender speichern So suchen und speichern Sie einen Radiosender 1 Halten Sie gedrückt um den automatischen Sendersuchlauf zu aktivieren Wenn ein Sender gefunden wurde drücken Sie auf um eine Feinabstimmung vorzun...

Page 60: ...instellung überzugehen 3 Die Reihenfolge der Einstellungen lautet Auto Talk EIN AUS Wurde EIN gewählt müssen Sie die Intervallzeit der Sprachausgabe auf 5 10 oder 15 Minuten einstellen Wenn diese Funktion aktiviert ist erscheint auf dem Bildschirm Pacer EIN AUS Wurde EIN gewählt müssen Sie die Frequenz des Taktgebers Pacer einstellen die von 45 bis 180 Signaltöne pro Minute reicht Mit dieser Funkt...

Page 61: ...ine Batterie des Typs CR2032 ein 3 Schieben Sie das Batteriefach wieder vorsichtig in das Gerät zurück PE828 So wechseln Sie die Batterie 1 Schrauben Sie den hinteren Gehäusedeckel vom Gerät 2 Legen Sie eine Batterie des Typs CR2032 sowie eine 23A 12V Batterie ein 3 Schrauben Sie den Gehäusedeckel wieder fest auf das Gerät PE829 PE829A So wechseln Sie die Batterie 1 Drücken Sie vorsichtig mit eine...

Page 62: ... verursachen Das Gerät enthält keine Teile die vom Benutzer selbst repariert werden dürfen Verwenden Sie keinesfalls neue und alte Batterien oder Batterien eines unterschiedlichen Typs gemeinsam Verwenden Sie keine wiederaufladbaren Batterien Entfernen Sie alle Batterien wenn Sie das Produkt über einen längeren Zeitraum lagern Zerkratzen Sie nicht die LCD Anzeige Der Inhalt dieser Bedienungsanleit...

Page 63: ... der Website finden Sie auch Informationen wie Sie im Bedarfsfall unseren Kundendienst erreichen und Daten herunterladen können Für internationale Anfragen besuchen Sie bitte unsere Website www2 oregonscientific com about international asp EG KONFORMITÄTSERKLÄRUNG Hiermit erklärt Oregon Scientific dass Schrittzählermodelle PE823 PE826 PE828 PE829 PE829A mit der EMC Richtlinie 89 336 CE übereinstim...

Page 64: ...gistros semanales totales 7 Ver registros diarios 7 Borrar todos los registros 8 Reloj Perfil de usuario 8 Para configurar el perfil de usuario por primera vez o después de cambiar las pilas 8 Modificación de la configuración del reloj o del perfil de usuario 9 Alarma 9 Medidor de Pulsaciones Índice de stress Sólo disponible en PE826 10 Cómo usar la Alarma de Pánico Sólo disponible en PE828 11 Rad...

Page 65: ...ro calculando la distancia total recorrida y las calorías gastadas Otras funciones clave son paso distancia calorías objetivo memoria de 7 días tiempo de finalización estimado y función de bloqueo de botones Tenga este manual a mano cuando use el nuevo producto Contiene prácticas instrucciones explicadas paso a paso así como especificaciones técnicas y advertencias que debe conocer CARACTERÍSTICAS...

Page 66: ...idor de pulsaciones 9 Botón de ritmo cardiaco 10 Botón de la luz LED 11 Luz LED 12 Clavija de la alarma de pánico 13 Clip de fijación y correa 14 Selección de canal de radio 15 Radio ON encendida 16 Selección de frecuencia FM 17 Subir o bajar el volumen 18 Radio OFF apagada 19 Botón de voz 20 Toma para los auriculares PE82X_M_ES_N_R0 p65 2008 2 19 1 12 PM 3 P N 086L003991 079 REV1 Page 66 of 126 ...

Page 67: ...ivo 12 La matriz de puntos muestra varios iconos para mostrar el modo pantalla en que se encuentra PARA EMPEZAR CONFIGURACIÓN Debe configurar el dispositivo como se muestra a continuación cuando active la unidad la reinicie o cambie las pilas o su podómetro no funcionará correctamente 1 Para activar el dispositivo retire la cinta aislante que hay debajo de la tapa del compartimiento para pilas Par...

Page 68: ...iguración Pulse SET para ignorar o confirmar un ajuste y pasar al siguiente Si no se pulsa ningún botón en 30 segundos en el modo ajuste se emitirá un pitido y la pantalla volverá al modo anterior ALTERNAR ENTRE DOS MODOS DE OPERACIÓN Pulse MODE para alternar entre los 6 modos de operación Diario Objetivo Cronómetro Memoria de 7 días Perfil de usuario Reloj Los modos se describen en las secciones ...

Page 69: ...cerá la pantalla GO para confirmar que la unidad está empezando a hacer un seguimiento de su progreso 2 Mientras camina se mostrará periódicamente el TIEMPO DE FINALIZACIÓN ESTIMADO EFT por sus siglas en inglés para informarle de cuánto tiempo necesita para completar su objetivo según su ritmo actual La barra de objetivo que aparece al final de la pantalla se moverá de la izquierda a la derecha pr...

Page 70: ...se y manténgalo pulsado para reiniciar el cronómetro Pulse repetidamente para visualizar los valores de paso distancia y calorías del tiempo cronometrado Cuando esté en modo cronómetro se mostrará Si está en otro modo parpadeará para indicar que el temporizador está funcionando MEMORIA El podómetro tiene una función de memoria de 7 días Puede ver su total de pasos distancia y calorías diario o sem...

Page 71: ...S LOS REGISTROS Pulse REINICIO y manténgalo pulsado RELOJ PERFIL DE USUARIO PARA CONFIGURAR EL PERFIL DE USUARIO POR PRIMERA VEZ O DESPUÉS DE CAMBIAR LAS PILAS Cuando se retira la cinta aislante para activar el podómetro y siempre que se le cambien las pilas la unidad le pedirá que configure el reloj y el perfil de usuario Por favor complete los ajustes que se muestran a continuación o su podómetr...

Page 72: ...usuario sólo tiene que 1 Pulse MODE para navegar por el Modo Reloj o Perfil de usuario 2 Sólo Modo Perfil use para desplazarse al ajuste que desea modificar 3 Pulse SET y manténgalo pulsado para acceder al modo de configuración 4 Pulse para modificar un valor y SET para confirmar ALARMA En el Modo Reloj pulse para alternar entre los Modos Reloj y Alarma Para configurar la alarma 1 Pulse MODE para ...

Page 73: ...anténgalo pulsado para iniciar la calibración 4 Relájese y ponga la punta de su pulgar o índica en el sensor de pulsaciones 5 Espere unos 10 segundos hasta que aparezca la palabra FINISH en la pantalla LCD 6 Si la calibración falla repita los pasos 3 5 Es muy recomendable calibrar su índice de stress individual una vez al mes o siempre que quiera para conocer su parámetro en varias situaciones Par...

Page 74: ... afectar la lectura Espere suficiente tiempo las mediciones pueden durar entre 6 y 12 segundos dependiendo de la estabilidad de las señales recibidas Cuál es su índice de stress La medición del índice de stress depende de la variabilidad del ritmo cardiaco que indica el estado involuntario de su sistema nervioso Una gran variación del ritmo cardiaco es una indicación de que el sistema nervioso par...

Page 75: ...ara acceder al modo de almacenamiento de canales 3 Use para seleccionar el número de canal 1 5 Si pulsa mientras se muestra el canal uno o mientras se muestra el canal 5 la unidad abandonará la posición de configuración y volverá a la pantalla de radio FM general 4 Pulse CH para guardarlo Repita todo el proceso para almacenar otro canal Para cambiar el nivel de volumen pulse Para escuchar un canal...

Page 76: ...án La función radio se interrumpirá durante la emisión automática de voz o cuando pulse TALK ILUMINACIÓN PILOTO LED BLOQUEO DE LOS BOTONES REINICIO Pulse para iluminar la pantalla durante 3 segundos Para encender el piloto LED pulse Cuando suelte el botón la luz se apagará sólo PE828 Pulse y manténgalo pulsado para activar o desactivar el bloqueo de botones Para reiniciar la unidad retire las pila...

Page 77: ...sar descargas eléctrica u otros daños a la unidad Limpie el producto con un paño ligeramente humedecido y un detergente suave No exponga la unidad principal a fuerza extrema descargas o fluctuaciones de temperatura o humedad No manipule los componentes internos De hacerlo anulará la garantía de la unidad y podría causar daños La unidad contiene componentes que el usuario no debe manipular No mezcl...

Page 78: ...ncionamiento 14 a 104 0 F 10 a 40 C Temperatura de almacenamiento 4 a 140 F 20 a 60 C Dimensiones sin clip A x A x P y peso PE823 2 1 x 1 9 x 1 0 pulgadas 52 x 47 x 25 mm 33 g 1 16 onzas PE826 2 4 x 2 2 x 1 0 pulgadas 60 3 x 54 9 x 24 mm 38 g 1 34 onzas PE828 2 3 x 2 5 x 1 0 pulgadas 58 7 x 62 4 x 25 mm 61 g 2 15 onzas PE829 PE829A 2 4 x 2 1 x 1 0 pulgadas 61 4 x 53 5 x 26 mm 60 g 2 12 onzas Pilas...

Page 79: ...o de Atención al Cliente por favor visite www oregonscientific es o llame al 902 338 368 Para consultas internacionales por favor visite www2 oregonscientific com about international asp EU DECLARACIÓN DE CONFORMIDAD Por medio de la presente Oregon Scientific declara que el podómetro modelo PE823 PE826 PE828 PE829 PE829A cumple con la directiva 89 336 CE del EMC Tiene a su disposición una copia fi...

Page 80: ... Completa 7 Visualizar os Registros Diários 7 Apagar Todos os Registros 8 Relógio Perfil do Usuário 8 Ajustar o Perfil do Usuário Pela 1ª Vez ou Após a Substituição de Pilhas 8 Alterar o Ajuste do Relógio ou do Perfil do Usuário 9 Alarme 9 Pulsômetro Índice de Estresse Disponível Apenas no PE826 9 Como Utilizar o Alarme de Pânico Disponível Apenas no PE828 11 Rádio FM Disponível Apenas no PE829 PE...

Page 81: ...ndo a distância total percorrida e a quantidade de calorias gastas Outras importantes funções incluem passos distância calorias alvo memória de 7 dias tempo de conclusão alvo estimado e bloqueio do teclado Mantenha este manual à mão ao utilizar seu novo produto Ele contém instruções práticas passo a passo bem como especificações técnicas e avisos que devem ser do seu conhecimento FUNÇÕES PRINCIPAI...

Page 82: ...sômetro 9 Botão pulsação 10 Botão Luz LED 11 Luz LED 12 Pino do alarme de pânico 13 Clipe de fixação e cordão 14 Seleciona o canal de rádio 15 Rádio LIGADO 16 Busca a frequência FM 17 Aumenta diminui o volume 18 Rádio DESLIGADO 19 Botão Falar 20 Entrada dos fones de ouvido PE82X_M_PO_N_R0 p65 2008 2 19 1 13 PM 3 P N 086L003991 079 REV1 Page 82 of 126 ...

Page 83: ...mana da memória e o estado do alvo 12 Matriz de pontos mostra vários ícones a fim de indicar o modo display em que você se encontra PARA COMEÇAR CONFIGURAÇÃO É necessário configurar o aparelho como indicado a seguir ao ativá lo pela primeira vez após reinicializá lo ou substituir as pilhas caso contrário o pedômetro não funcionará corretamente 1 Para ativar o aparelho retire a fita isolante locali...

Page 84: ...e SET para pular ou confirmar um ajuste e passar para o seguinte Durante o modo de ajuste caso uma tecla não seja pressionada dentro de 30 segundos você ouvirá um bip e a tela voltará ao modo anterior ALTERANDO OS MODOS DE FUNCIONAMENTO Pressione MODE para alterar o modo de funcionamento Há 6 modos Diário Alvo Timer Memória de 7 Dias Perfil do Usuário Relógio Os modos estão descritos nas seções se...

Page 85: ...STIMADO EFT aparecerá periodicamente a fim de informar o tempo necessário para atingir seu alvo com base em seus passos atuais A barra alvo na parte inferior da tela moverá da esquerda para a direita início ao fim indicando seu progresso 3 Pressione para alternar entre EFT e passos restantes distância ou calorias remanescentes até que o alvo seja atingido 4 Quando o alvo for atingido a palavra Fin...

Page 86: ...o modo esteja em uso o ícone piscará a fim de indicar que o timer está em funcionamento MEMÓRIA O pedômetro possui uma função de memória de 7 dias É possível visualizar os registros semanal ou diários de passos distância e calorias VISUALIZAR OS REGISTROS DA SEMANA COMPLETA 1 Pressione MODE para navegar ao Modo Memória 2 Pressione para alternar entre o registro semanal de passos distância e calori...

Page 87: ...DO USUÁRIO PELA 1ª VEZ OU APÓS A SUBSTITUIÇÃO DE PILHAS Quando a fita isolante for removida para ativar o pedômetro e sempre que as pilhas forem substituídas será necessário ajustar o relógio e o perfil do usuário Realize os ajustes conforme indicado a seguir caso contrário o pedômetro não funcionará corretamente 1 O primeiro ajuste piscará 2 Pressione para alterar os valores e SET para confirmar ...

Page 88: ...juste 4 Pressione para alterar os valores e SET para confirmar ALARME No Modo Relógio pressione para alternar entre o Modo Relógio e Alarme Para ajustar o alarme 1 Pressione MODE para navegar ao Modo Relógio 2 Pressione para passar para o Modo Alarme 3 Pressione e mantenha pressionado SET para entrar no modo de ajuste 4 Pressione para alterar os valores e SET para confirmar e passar para o ajuste ...

Page 89: ...segundos até que a palavra FINISH apareça na tela LCD 6 Repita as etapas 3 5 caso a calibragem falhe É altamente recomendada a calibragem mensal da linha base do índice de estresse individual ou sempre que desejar referir se a seu parâmetro em situações diferentes Como medir a pulsação e o nível de estresse 1 Mantenha a calma antes e durante a medição 2 Pressione 3 Coloque a ponta de seu dedo pole...

Page 90: ...a na variação da taxa cardíaca que indica o estado do sistema nervoso involuntário Uma grande variação da taxa cardíaca indica que o sistema nervoso parassimpático está em predominância o que geralmente corresponde ao estado da pessoa relaxada Já uma pequena variação indica que o sistema nervoso simpático está ativo o que está relacionado ao estresse mental ou físico COMO UTILIZAR O ALARME DE PÂNI...

Page 91: ...ar o nível do volume pressione Para ouvir um canal armazenado pressione CH O uso prolongado do rádio FM reduzirá significativamente a duração da pilha FUNÇÃO FALANTE DISPONÍVEL APENAS NO PE829 PE829A A Função Falante está disponível para os modos DIÁRIO ALVO TIMER MEMÓRIA e RELÓGIO Esta função permite transmitir informação relacionada à tela LCD atual por exemplo no Modo Diário você ouvirá Hoje vo...

Page 92: ...dos pressione Para ligar a luz LED pressione Ao soltar o botão a luz apaga se apenas PE828 Para ativar desativar o bloqueio do teclado pressione e mantenha pressionado Para reinicializar a unidade retire as pilhas e a seguir recoloque as novamente PILHAS O ícone aparece quando a pilha está fraca e precisa ser substituída Proteja o meio ambiente levando as pilhas esgotadas para os centros de coleta...

Page 93: ...ano ligeiramente úmido e detergente neutro para limpar a unidade Não exponha a unidade principal a forças extremas choques e mudanças de temperatura ou umidade Não tente acessar nem violar os componentes internos do aparelho A não observação desta recomendação anulará a garantia do produto e poderá causar danos desnecessários Aunidade não contém peças cuja manutenção possa ser feita pelo usuário N...

Page 94: ... 104 F 10 a 40 C funcionamento Temperatura de 4 a 140 F 20 a 60 C armazenamento Dimensões sem clipe C x A x L e peso PE823 2 1 x 1 9 x 1 0 polegadas 52 x 47 x 25 mm 33 g 1 16 onças PE826 2 4 x 2 2 x 1 0 polegadas 60 3 x 54 9 x 24 mm 38 g 1 34 onças PE828 2 3 x 2 5 x 1 0 polegadas 58 7 x 62 4 x 25 mm 61 g 2 15 onças PE829 PE829A 2 4 x 2 1 x 1 0 polegadas 61 4 x 53 5 x 26 mm 60 g 2 12 onças Pilhas P...

Page 95: ...to ao Consumidor através do telefone 11 5095 2329 ou e mail sac oregonscientific com br CE DECLARAÇÃO DE CONFORMIDADE A Oregon Scientific declara que este Pedômetro modelo PE823 PE826 PE828 PE829 PE829A está de acordo com a EMC diretiva 89 336 CE Uma cópia assinada e datada da Declaração de Conformidade está disponível para requisições através do nosso SAC PE82X_M_PO_N_R0 p65 2008 2 19 1 13 PM 16 ...

Page 96: ...e Gegevens 7 Alle Gegevens Verwijderen 7 Klok Gebruikersprofiel 7 Om het Gebruikersprofiel in Te Stellen Bij Het Eerste Gebruik of Na het Verwisselen Van de Batterijen 7 Persoonlijke Instellingen Voor Klok en Gebruikersprofiel Aanpassen 8 Alarm 9 Hartslagmeter Stressindex Alleen Beschikbaar op PE826 9 Hoe Het Paniekalarm te Gebruiken Alleen beschikbaar op PE828 10 Fm Radio Aleen Beschikbaar op PE829 ...

Page 97: ... Andere belangrijke functies zijn doel stap afstand calorieën geheugenfunctie voor 7 dagen geschatte voltooiingstijd van het doel en toetsenblokkering Houd deze handleiding bij de hand terwijl u uw nieuwe product gebruikt Deze bevat praktische stap voor stap instructies evenals de technische specificaties en belangrijke waarschuwingen BELANGRIJKSTE EIGENSCHAPPEN PE823 VOORKANT EN ACHTERKANT PE826 V...

Page 98: ...9 Hartslagknop 10 LED licht knop 11 LED licht 12 Paniekalarm pin 13 Bevestigingsklem en koord 14 Selecteert radiozender 15 Radio AAN 16 Voor en achteruit FM frequentie zoeken 17 Volume harder en zachter 18 Radio UIT 19 Spreekknop 20 Hoofdtelefoonaansluiting PE82X_M_NL_N_R0 indd 3 2008 2 19 1 27 09 PM P N 086L003991 079 REV1 Page 98 of 126 ...

Page 99: ...IGHEID De volgende situaties kunnen onjuiste stapgegevens veroorzaken 1 Verschijnt wanneer in DoelModus 2 Verschijnt wanneer in TimerModus en knippert wanneer u in een ander scherm bent en de timer aan staat LCD 12 Dot matrix toont diverse iconen het scherm de modus aan te geven waarin u zich bevindt STARTEN INSTELLEN U moet het apparaat instellen zoals hieronder aangegeven wanneer u het voor het ...

Page 100: ... NUTTIGE TIPS Wanneer u instellingen verandert kunt u Ingedrukt houden om sneller opties te kiezen SET indrukken om de instelling te bevestigen of over te slaan en verder te gaan met de volgende instelling NB Tijdens het instellen zal het apparaat een piep geven en terugkeren naar de vorige modus als gedurende 30 seconden geen knop wordt ingedrukt SCHAKELEN TUSSEN VERSCHILLENDE MODI Druk op MODE o...

Page 101: ...en ingedrukt om in de instellingenmodus te komen 3 Druk om optel of afteltimer te kiezen en druk op SET Als u de afteltimer hebt gekozen moet u uur min sec instelling door op te drukken om een waarde te veranderen en SET om te bevestigen 1 Druk MODE om naar de DoelModus te gaan 2 Druk SET en houd deze gedurende 2 seconden ingedrukt om in de instellingenmodus te komen 3 Druk om STAP AFSTAND of CALO...

Page 102: ...het dagelijkse gegevens scherm te openen 3 Druk herhaaldelijk op totdat u de dag hebt bereikt waarvan u de gegevens wil bekijken Wanneer u de dag hebt bereik die u wil bekijken verschijnt gedurende 1 seconde een scherm dat aangeeft of u die dag het doel bereikt hebt of niet Doel bereikt vrolijk gezichtje en hoge piep Doel niet bereikt sip gezichtje en lage piep 4 Druk op om te schakelen tussen sta...

Page 103: ...eg de volgende instructies KLOK GEBRUIKERSPROFIEL OM HET GEBRUIKERSPROFIEL IN TE STELLEN BIJ HET EERSTE GEBRUIK OF NA HET VERWISSELEN VAN DE BATTERIJEN Wanneer het beschermlipje verwijderd is om de pedometer te activeren en wanneer de batterijen vervangen zijn zal de pedometer u vragen de klok en het gebruikersprofiel in te stellen Voltooi a u b de instellingen zoals hieronder aangegeven anders zal...

Page 104: ...stoppen drukt u op een willekeurige knop HARTSLAGMETER STRESSINDEX ALLEEN BESCHIKBAAR OP PE826 NB Bij het eerste gebruik of na het vervangen van de batterijen of het resetten van het apparaat dient de gebruiker de grondlijn van de stressindex in te stellen anders kan geen geldige meting worden gedaan Om de grondlijn van de stressindex in te stellen De index is volledig individueel dus u moet uw pe...

Page 105: ...ariatie in de hartslag is een teken dat het parasympathisch zenuwstelsel de overhand heeft wat over het algemeen aangeeft dat een persoon ontspannen is Als deze waarde lager uitkomt betekent dit dat het sympathisch zenuwstelsel actief is wat een teken van fysieke of mentale stress is Ontspannen Normaal Niet ontspannen Groen Geel Rood ICOON BALKKLEUR BETEKENIS 5 Wacht ongeveer 10 seconden totdat he...

Page 106: ... dan dat de oortelefoontjes zijn aangesloten verschijnt op het scherm ZOEKEN EN OPSLAAN VAN RADIOZENDERS De radio ontvangt FM frequenties tussen 87 5 en 108 MHz U kunt maximaal 5 zenders opslaan Om zenders te zoeken en op te slaan 1 Houd ingedrukt om automatisch zoeken te activeren Wanneer een zender is gevonden drukt u om het precies in te stellen 2 Houd CH ingedrukt om de zender op te gaan slaan...

Page 107: ...en daarvoor bestemd verzamelpunt NB Als u lang naar de radio luistert zal de batterij du idelijk minder lang meegaan PRAATFUNCTIE ALEEN BESCHIKBAAR OP PE829 PE829A De Praatfunctie is alleen beschikbaar voor DAGELIJKS DOEL TIMER GEHEUGEN en KLOKmodus Het vertelt u informatie over de huidige informatie op het scherm in DagelijksModus hoort u bijvoorbeeld Vandaag heeft u XXXXX stappen gelopen XX XX k...

Page 108: ...n 3 Plaats de batterij in het batterijvak voorzichtig terug WAARSCHUWING Dit product is ontworpen om u vele jaren plezier te geven mits goed behandeld Houd de volgende regels in acht Dompel het apparaat nooit onder in water Dit kan elektrische schokken veroorzaken en het apparaat beschadigen Reinig het apparaat met een licht vochtige doek en een mild schoonmaakmiddel Stel het apparaat niet bloot a...

Page 109: ...ereik Gebruikstemp Opslagtemp BESCHRIJVING 0 tot 99 999 stappen 100 tot 99 900 stappen 0 tot 99uur 59min 59sec 0 tot 999 99km 28 tot 152 cm 0 1 tot 9999 9 kcal 64lbs to 340lbs 29 to 154kg 30 240 bpm 14 tot 104 0 F 10 tot 40 C 4 tot 140 F 20 tot 60 C SPECIFICATIES Gebruik nooit verschillende types of oude en nieuwe batterijen door elkaar Gebruik geen oplaadbare batterijen in dit product Verwijder d...

Page 110: ...nformatie over onze klantendienst voor het geval u ons wenst te contacteren Bij deze verklaart Oregon Scientific dat deze Pedometer model PE823 PE826 PE828 PE829 PE829A in overeenstemming is met EMC richtlijn 89 336 CE Een kopie van de getekende en gedateerde Conformiteits verklaring is op verzoek beschikbaar via onze Oregon Scientific klanten service EU CONFORMITEITS VERKLARING PE82X_M_NL_N_R0 indd...

Page 111: ...den för en Vecka 7 Visa Dagliga Mätvärden 7 Nollställ alla värden 8 Klocka Användarprofil 8 Att Ställa in Användarprofilen Första Gången Eller Efter Batteribyte 8 Ändra Individuella Klock Eller Användarprofilinställningar 8 Alarm 9 Pulsmätare Stressindex Endast för PE826 9 Att Använda Panikalarmet Endast PE 828 11 FM Radio EndastPE829 PE829A 11 Sökning Och Lagring av Radiokanaler 11 Talfunktion En...

Page 112: ... kalorier Andra funktioner är målvärde för steg distans kalorier 7 dagars minnesfunktion förväntad sluttid och tangentlås Ha denna manual till hands när du använder din nya produkt Den innehåller en praktisk steg för steg instruktion samt teknisk specifikation och varningsmeddelanden som du bör känna till HUVUDFUNKTIONER PE823 VY FRAM OCH BAKSIDA PE826 VY FRAM OCH BAKSIDA PE828 VY FRAM OCH BAKSIDA...

Page 113: ...ucka 8 Pulsmätare 9 Knapp för puls 10 LED ljusknapp 11 LED ljus 12 Överfallsalarmstift 13 Fastsättning av clipssnöre 14 Val av radiokanal 15 Radio PÅ 16 FM sökning uppåt och neråt 17 Ökar och minskar volymen 18 Radio FRÅN 19 Talknapp 20 Hörlursjack PE82X_M_SW_N_R0 p65 2008 2 19 1 14 PM 3 P N 086L003991 079 REV1 Page 113 of 126 ...

Page 114: ...isplay du är i ATT KOMMA IGÅNG INSTÄLLNING Du måste ställa in produkten som visas nedan första gången du aktiverar produkten återställer den eller byter batterier eller om din stegräknare inte fungerar som den skall 1 Dra ut isoleringstejpen under batteriluckan för att aktivera produkten Sätt batterier i PE828 2 Ställ in klocka och användarprofil se avsnitt för Klock Användarprofil 3 Endast PE826 ...

Page 115: ...s ner inom 30s när man är i inställningsläget hörs ett bipljud och displayen går tillbaks till föregående läge VÄXLA MELLAN ANVÄNDARLÄGEN Tryck MODE för att växla mellan de 6 användarlägena Dagligt Mål Timer 7 dagarsminne Användarprofil Klocka Lägena beskrivs i de följande kapitlen DAGLIGT För att visa steg avstånds och kaloridisplayen 1 Tryck MODE för att gå till Dagligt Läge 2 Tryck för att växl...

Page 116: ...mellanrum för att du ska veta den ungefärliga tiden det kommer ta att uppnå ditt inställda mål Målstapeln i den undre delen av displayen kommer att flytta sig från vänster till höger start till mål för att visa dina framsteg 3 Tryck in för att växla mellan EFT och återstående steg avstånd eller kalorier innan målet uppnåtts 4 När målet är uppnått kommer FINISH att visas och ett pip kommer att höra...

Page 117: ...avstånd och kalorier VISA TOTALVÄRDEN FÖR EN VECKA 1 Tryck MODE för att gå till Minnesläget 2 Tryck för att skifta mellan totalt antal steg per vecka distans och kalorivisning VISA DAGLIGA MÄTVÄRDEN 1 Tryck MODE för att gå till Minnesläget 2 Tryck för att visa dagliga mätvärden 3 Tryck upprepande tills du får fram den dag du önskar se När du valt den dag du önskar se visas under 1 sek om du har nå...

Page 118: ...ta inställning 3 Inställningsföljden är KLOCKA 12 24tim format Timme Minut Veckodag Användarprofil Övre pulsgräns endast PE826 Nedre pulsgräns endast PE826 Enhetens Vikt Vikt Steglängdenhet Steg Ålder Kön Att kalkylera steglängden Den individuella steglängden varierar Ställ in en passande längd för medelstegslängden För att bestämma steglängden gå 10 steg och dividera avståndet med 10 ÄNDRA INDIVI...

Page 119: ...ff För att stoppa alarmet tryck på valfri knapp PULSMÄTARE STRESSINDEX ENDAST FÖR PE826 NOTERING Vid användning första gången efter byte av batterier eller nollställning av enheten måste man kalibrera stressindexvärdet annars visas inget giltigt värde Att kalibrera stressindexvärdet Indexet är högst individuellt så det är nödvändigt att kalibrera ditt personliga index innan du använder denna funkt...

Page 120: ...släget Tryck sedan pulsknappen igen TIPS Kalla fingertoppar och kall luft kan påverka mätresultaten Du kan behöva värma dina händer före mätning Sensorn är känslig mot ljuskällor Täck hela sensorn med din fingertopp för att blockera allt ljus Tryck inte hårt på pulssensorn Var lugn och still under mätningen Rörelser kan påverka mätresultaten Vänta tills den föreskrivna tiden har fortlöpt mätningar...

Page 121: ... upp till 5 kanaler Att söka och lagra en radiokanal 1 Tryck och håll inne för att aktivera autosökning När en kanal hittats tryck för att finjustera kanalen 2 Tryck och håll inne CH för att gå in i kanallagringsläget 3 Använd för att välja en kanal 1 5 Om du trycker när kanal 1 visas eller trycker när kanal 5 visas kommer enheten lämna inställningsläget och återgå till huvuddisplayen för FM radio...

Page 122: ...lan 45 och 180 bip per minut Denna funktion hjälper dig att hålla takten när du går springer eftersom varje bip representerar ett steg Tillgängliga språk Engelska Franska och Spanska eller Engelska Italienska och Tyska Radiofunktionen pausas när autotalinformation sänds ut eller när du trycker TALK BAKGRUNDSBELYSNING LED LJUS KNAPPLÅS ÅTERSTÄLLNING För att tända bakgrundsbelysningen i 3 sekunder t...

Page 123: ... Detta kan orsaka en elektrisk stöt som förstör produkten Rengör produkten med en lätt fuktad trasa och milt tvättmedel Utsätt inte huvudenheten för extrema krafter stötar eller variationer i temperatur eller luftfuktighet Mixtra inte med interna komponenter Om det händer upphör garantin på produkten och kan dessutom orsaka skada Produkten innehåller inga reparerbara delar Blanda inte gamla och ny...

Page 124: ...rbetstemperatur 14 till 104 0 F 10 till 40 C Förvaringstemperatur 4 till 140 F 20 till 60 C Dimensioner utan hållare B x H x D och vikt PE823 2 1 x 1 9 x 1 0 tum 52 x 47 x 25 mm 33 g 1 16 ounces PE826 2 4 x 2 2 x 1 0 tum 60 3 x 54 9 x 24 mm 38 g 1 34 ounces PE828 2 3 x 2 5 x 1 0 tum 58 7 x 62 4 x 25 mm 61 g 2 15 ounces PE829 PE829A 2 4 x 2 1 x 1 0 tum 61 4 x 53 5 x 26 mm 60 g 2 12 ounces Batterier...

Page 125: ...ehöver på vår hemsida och om du vill komma i kontakt med Oregon Scientific kundkontakt besöker du vår lokala hemsida www oregonscientific se eller www oregonscientific com för att finna telefonnummer till respektive supportavdelning EU FÖRSÄKRAN OM ÖVERENSSTÄMMELSE Härmed intygar Oregon Scientific att denna Stegräknare modell PE823 PE826 PE828 PE829 PE829A överenstämmer med EMC direktivet 89 336 C...

Page 126: ... 2008 Oregon Scientific All rights reserved P N 086L003991 079 BACK COVER P N 086L003991 079 REV1 Page 126 of 126 ...

Reviews: