background image

1

GB

Oregon Scientific

TM

 JUMBO RF CLOCK

with Indoor Thermometer

(JM889/JM889U)

User Manual

TABLE OF CONTENTS

Introduction ........................................................................ 2

Key features ....................................................................... 2

Front view ........................................................................ 2
Back view ........................................................................ 3
LCD display symbols ....................................................... 3

Safety and care instructions ............................................. 4

Safety precautions ........................................................... 4
Caring for your product .................................................... 4

Getting started ................................................................... 4

Unpacking the product ..................................................... 4
Batteries .......................................................................... 5
Placement of unit ............................................................. 5
Indoor temperature display .............................................. 6
Toggling between seconds/day-of-week display ............. 6

Radio reception .................................................................. 6

Radio reception description ............................................. 6

Enabling/disabling radio reception ................................... 7

To set the clock manually ................................................. 7

Language options ............................................................ 8

Alarm functions .................................................................. 8

Basic functions ................................................................ 8
Displaying alarm time ...................................................... 8
Adjusting the alarm time .................................................. 9
Activating / deactivating the alarm ................................... 9

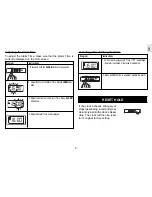
Reset hole ........................................................................... 9

Troubleshooting guide .................................................... 10

Specifications ................................................................... 11

Warnings ........................................................................... 11

Additional resources ....................................................... 12

EC-Declaration of conformity.......................................... 12

Summary of Contents for JM889

Page 1: ...roduct 4 Batteries 5 Placement of unit 5 Indoor temperature display 6 Toggling between seconds day of week display 6 Radio reception 6 Radio reception description 6 Enabling disabling radio reception...

Page 2: ...del JM889U or DCF77 generated fromFrankfurt GermanyforCentralEurope modelJM889 Inadditiontoprovidingstep by stepinstructionsforthisproduct this manual contains important safety and care information Re...

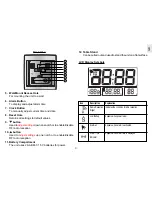
Page 3: ...g the unit to a wall 6 Alarm Button To display and adjust alarm time 7 Clock Button To manually adjust current time and date 8 Reset Hole Returns all settings to default values 9 button Usedtoadjustse...

Page 4: ...cloth Do not use liquid cleaning agents benzene thinner or aerosols Ventilation The vents and other openings are designed for ventilation and should not be blocked or covered Blocking the vents can c...

Page 5: ...me time it is dangerous to mix old and new batteries Contact your local waste disposal authority for instructions on how to dispose of used batteries Used batteries can be harmful to the environment a...

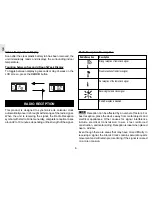
Page 6: ...s dependingonthestrength ofthesignal Radio Reception Description Radio Reception Description Reception can be affected by a number of factors For best reception place the device away from metal object...

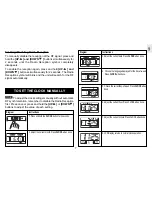
Page 7: ...ettings manually without automatic RF synchronization remember to disable the Radio Reception first Press once or press and hold the UP or DOWN buttons to adjust the value of each setting NOTE Diagram...

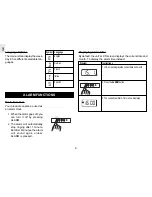
Page 8: ...alarm will automatically stop ringing after 1 minute But after 8 minutes the alarm will sound again unless ALARM is pressed Symbol Language English German French Italian Spanish Displaying Alarm Time...

Page 9: ...e Press ALARM when done 4 Adjusted Alarm Time now displayed Activating Deactivating the Alarm Diagram Instructions Diagram Instructions 1 LCD screen displays Alarm Time If is displayed the alarm is en...

Page 10: ...s Batteries of the unit are low Check LCD Display of the unit Install new batteries into the unit Problem Symptom Check This Remedy Problem Symptom Check This Remedy Clock time is not correctly set No...

Page 11: ...es WARNINGS Do not attempt to repair the product yourself Contact the retailer or our customer service department if it requires servicing Take precautions when handling all battery types They can cau...

Page 12: ...ty Article 3 1 b of the R TTE Directive applied standard s ETS 300 683 1997 Safety of information technology equipment Article 3 1 a of the R TTE directive applied standard s EN 60950 1997 Additional...

Reviews: