.........................................................................................................................
.........................................................................................................................
.........................................................................................................................
.........................................................................................................................
English
Portugu
ê
s
Fran
ç
ais
Deutsch
Italiano
Espa
ñ
ol
English
Portugu
ê
s
Fran
ç
ais
Deutsch
Italiano
Espa
ñ
ol
English
Portugu
ê
s
Fran
ç
ais
Deutsch
Italiano
Espa
ñ
ol
English
Portugu
ê
s
Fran
ç
ais
Deutsch
Italiano
Espa
ñ
ol
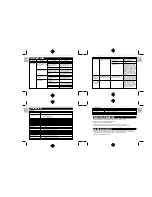
PC Connection
PC does not recognize the
Check the USB cable
Make sure both ends of the USB
camera.
connection.
cable are connected.
Interference from other
Disconnect other USB devices
USB devices.
from the PC.
Check computer
Connect the camera to the PC
with the USB cable and select
[My Computer]
/
[Control Panel]
/
[System]
/
[Device Manager].
In the [Device Manager] window,
delete [Compose USB device] or
[Unknown device] in [Other
devices]. Then disconnect the
camera and install the software
before reconnecting the camera
to the PC.
Camera
Electrostatic discharge
Check if the camera is
Turn off the camera, and then turn
malfunctions
interfered with the camera.
connected to the PC.
it back on. If connected to the PC,
during use.
disconnect the camera from the
USB cord, and turn it off then on again.
Everything on
Camera firmware defect.
Synch firmware with PC.
If the “Camera firmware is out of
the LCD flashes
sync. Update recommended.
and “ 7” or “ 8”
Update firmware?” message
is displayed.
appears when you connect the
camera to your PC with the USB
cable, click the [Yes] button and
update your firmware.
32
33
34
35
Problem
Symptom
Check This
Remedy
FLASH MODULE
Type
Description
Effective Distance
1 to 2 meters
Power Supply
1.5V AAA-size alkaline battery x 1
Dimensions
55 x 22 x 12 mm (width x height x depth)
Unit weight
Approx. 38g (1.3oz.)
Microsoft and Windows are trademarks of the Microsoft Corporation of the United States and other countries.
Windows is an abbreviated term referring to the Microsoft Windows Operating System.
Macintosh is a registered trademark of Apple Computer, Inc.
CompactFlash and CF are trademarks of SanDisk.
Arcsoft Impression and Arcsoft Impression logo are registered trandemarks of Arcsoft Inc.
Autobrite is a registered trademark of SMaL Camera Technologies Inc., Cambridge, Mass., USA.
Visit our website (www.oregonscientific.com) to learn more about your digital camera and other Oregon
Scientific products such as hand-held organizers, alarm clocks, and weather stations. The website also includes
contact information for our customer service department, in case you need to reach us.
© 2003 Oregon Scientific. All rights reserved.
MAIN UNIT
Type
Description
Image Sensor
CMOS sensor with Autobrite® technology.
Total number of pixels: 1.3 millon
Image Size
Selectable from:
SXGA: 1280 x1024 pixels
VGA: 640 x 480 pixels
File Format
JPEG (converted when images are downloaded using the enclosed software).
Lens
F = 3.2, f=6.87mm (equivalent to 47mm on a 35mm camera)
Focus
Fixed
Focal Range
60cm ~
∞
(infinity)
Sensitivity
Equivalent to ISO100
Flash Distance
Approx. 0.8m ~ 2m
Finder
Optical
White Balance
Autobrite®
Shutter Speed
Automatic (1/30 - 1/15000 sec.)
Operation Environment
Temperature: Approx. 0
o
C ~ 40
o
C (32
o
F to 104
o
F)
Humidity: 80% or less (no condensation)
Internal Memory
16MB non-volatile flash memory
Storage Media
SD Memory Card
Digital Output
USB 2.0 interface to PC
Windows Software
Oregon Scientific Photo Album
Product Dimension
86 x 54 x 8 mm (width x height x depth)
Unit Weight
Approx. 40g (1.4oz.)
(including battery, not including accessories)
Battery Specification
Lithium-polymer battery (rechargeable, non-removable)
No Power
Power will not turn on.
Batteries are exhausted.
Recharge the batteries (
/
P.18)
Taking Pictures
Cannot take pictures when
Camera is not turned on.
Turn on the camera.
the Shutter Release Button
No space on the SD
Delete unwanted files (
/
P.13)
is pressed.
Memory card / Internal
or insert a new SD Memory card
Memory
(
/
P.9)
The Auto Power-Off function
Switch the camera on.
has switched the camera off.
Camera will not focus.
Subject is not in the center
Move the subject to the center
of the Lens Viewfinder.
of the Lens Viewfinder.
Check your current Focus
Switch from your current Focus
Mode.
Mode to either the Macro or the
Scene Mode.
Flash does not go off as
Flash is not turned on.
Switch on the Flash Module.
expected.
Flash has not finished
Wait until the Flash icon is
charging.
displayed again (
/
P.11).
Image taken appears too
The camera or subject was
Hold the camera firmly.
dark or blurred.
moving when the shot
was taken.
The subject is too near.
Use the Macro Mode (
/
P.11)
or move away from the subject.
The lens is dirty.
Clean the lens with a soft cloth (
/
P.4).
The pop-up lens is skewed.
Take care to pop the lens up
correctly so that it is not skewed.
Problem
Symptom
Check This
Remedy
TROUBLESHOOTING
SPECIFICATIONS
TRADEMARK INFORMATION
ADDITIONAL RESOURCES

