Connections and Setup
25
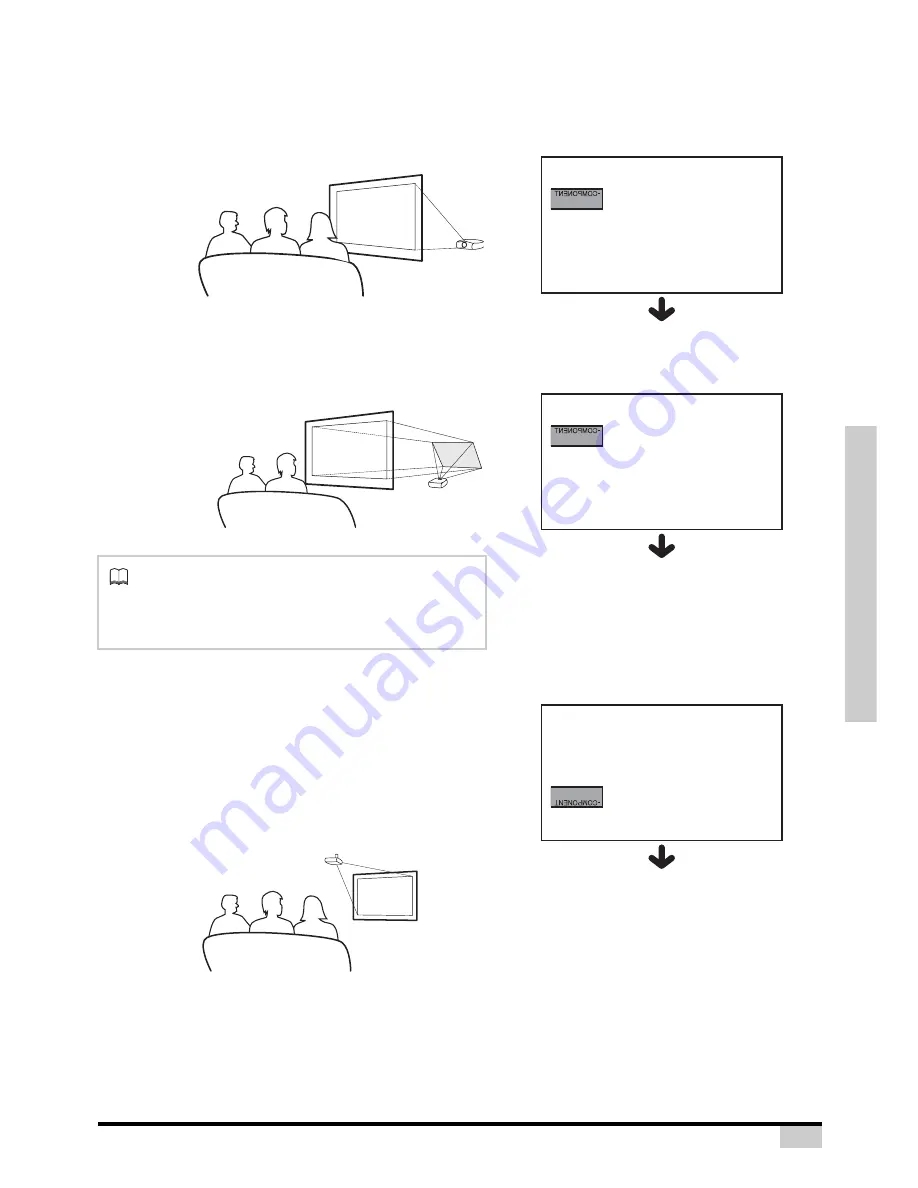
Projection from behind the screen
Projecting a Reversed/Inverted Image
Place a translucent screen between the projector and the
audience.
Set “PRJ Mode” to “Rear” in the “Options” menu.
Projection using a mirror
Place a mirror (normal flat type) in front of the lens.
Set “PRJ Mode” to “Rear” in the “Options” menu, when the
mirror is placed on the side where the audience is.
Ceiling-mount setup
The optional ceiling-mount bracket is recommended for
this installation.
Before mounting the projector, contact your nearest
Authorized Service Center or Dealer to obtain the
recommended ceiling-mount bracket (sold separately).
Adjust the position of the projector to match the distance
(Z) from the lens center position to the lower edge of the
image, when mounting the projector on the ceiling.
Invert the image by setting “C Front” for “PRJ
Mode” in the “Options Menu”.
Info
•
When using a mirror, be sure to carefully position
both the projector and the mirror so that the light
does not shine into the eyes of the audience.
When using the default setting.
T
On-screen Display
The image is reversed.
When using the default setting.
T
On-screen Display
The image is reversed.
When using the default setting.
T
On-screen Display
The image is reversed.
Summary of Contents for ThemeScene HD3000
Page 1: ...0ROFESSIONAL OME 4HEATER 5SERgS ANUAL ...
Page 6: ...6 Introduction Introduction ...
Page 13: ...Connections and Setup 13 Connections and Setup ...
Page 26: ...26 Connections and Setup NOTES ...
Page 27: ...27 Basic Operation Basic Operation ...
Page 39: ...Easy to Use Functions 39 Easy to Use Functions ...
Page 52: ...52 Easy to Use Functions NOTES ...
Page 53: ...Appendix 53 Appendix ...
Page 65: ...Professional Video Scaler and Color Management System HD3000 User s Guide ...


