background image

43

English

Appendices

Replacing the lamp

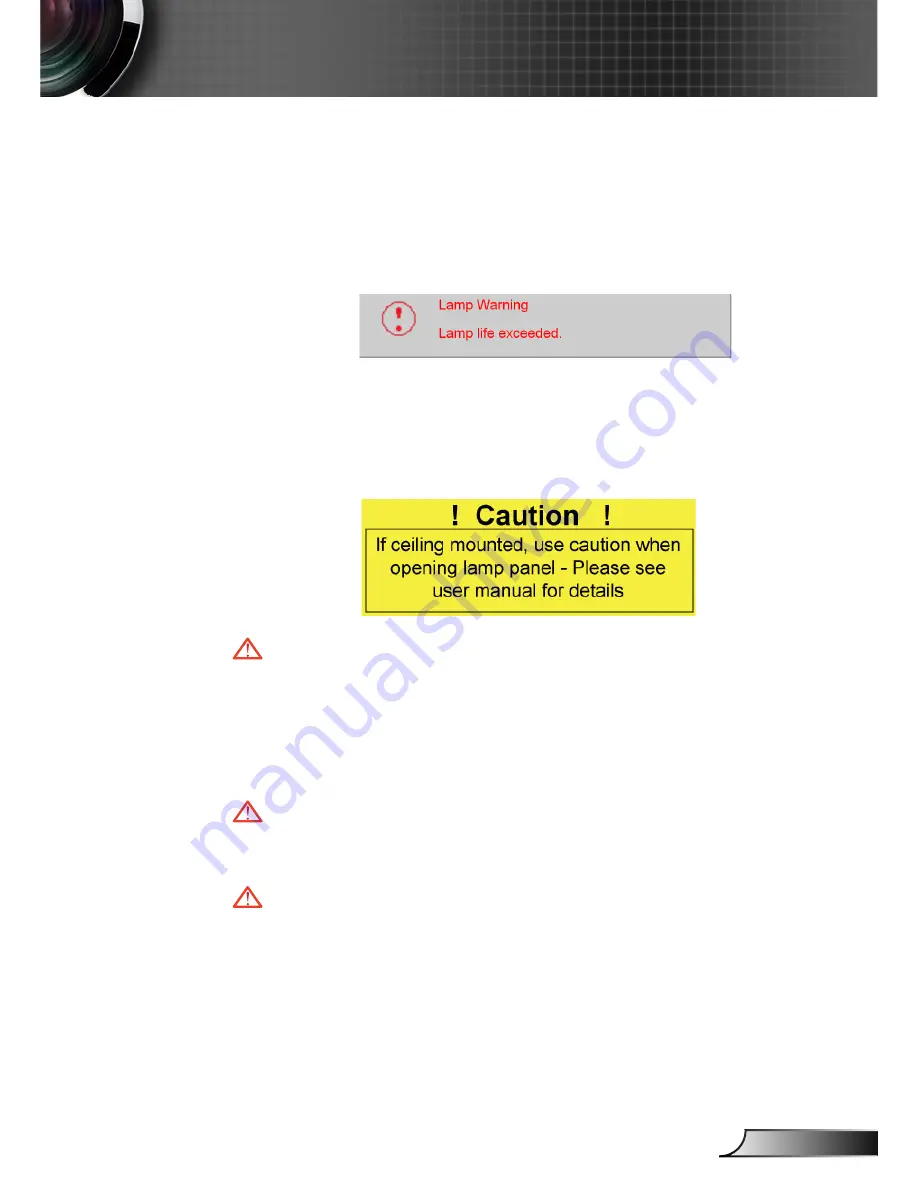
The projector automatically detects the lamp life. When the 

lamp life is nearing the end of use, you will receive a warning 

message.


When you see this message, please contact your local reseller 

or service center to change the lamp as soon as possible. Make 

sure the projector has been cooled down for at l

east 30 min-

utes before changing the lamp. 


Warning: Lamp compartment may be hot! Allow it to cool 

down before changing the lamp!


Warning: To reduce the risk of personal injury, do not drop 

the lamp module or touch the lamp bulb. The bulb may 


shatter and cause injury if it is dropped.


Warning: 

If ceiling mounted, please use caution when 


opening the lamp access panel. It is recommended to wear 

safety glasses if changing the bulb when ceiling mounted. 

“Caution must be used to prevent any loose parts from falling 

out of projector.”

Summary of Contents for HD640

Page 1: ...Indicator 14 Adjusting the Projected Image 15 Adjusting the Projector s Height 15 Adjusting the Projector s Zoom Focus 16 Adjusting Projected Image Size 16 User Controls 17 Control Panel Remote Contro...

Page 2: ...s proper ventilation For example do not place the projector on a bed sofa carpet or similar surface that may block the ventilation openings Do not put it in an enclosure such as a bookcase or a cabine...

Page 3: ...ning This projector will detect the life of the lamp itself Please be sure to change the lamp when it shows warning messages Warning Use the Lamp Reset function from the on screen display Options Lamp...

Page 4: ...t Do not block the ventilation slots and openings on the unit Do not use abrasive cleaners waxes or solvents to clean the unit Do not use under the following conditions In extremely hot cold or humid...

Page 5: ...ojectors are located out of the line of sight from the screen to the audience this ensures that when presenters look at the audience they do not also have to stare at the pro jector lamp The best way...

Page 6: ...ty NTSC M J NTSC4 43 PAL B D I G H PAL M PAL N SECAM B D G K L SDTV compatible 480i p 576i p HDTV compatible 720p 1080i 1080p Auto source detection with user definable settings Full function IR remote...

Page 7: ...mentation User s Manual Warranty Card Quick Start Card Due to the difference in applications for each country some regions may have different accessories 2 x AAA Batteries Projector with lens cap VGA...

Page 8: ...English Introduction 1 Control Panel 2 Zoom 3 Focus 4 Zoom Lens 5 IR Receivers Main Unit Product Overview 6 Elevator Button 7 Connection Ports 8 Power Socket 9 Tilt Adjustment Foot 7 8 9 1 2 3 4 5 6...

Page 9: ...English Introduction Control Panel 1 Enter 2 Menu 3 Power 4 AV Mute 5 Source 6 Re Sync 7 Four Directional Select Keys 8 Temp LED 9 Lamp LED 10 Power LED 2 7 4 3 10 5 6 1 8 9...

Page 10: ...S Video Input Connector 2 VGA SCART Component Input Connector 3 Component Video Input Connector 4 Composite Video Input Connector 5 HDMI Connector 6 Service Connector 7 12V Trigger Relay Connector 8 K...

Page 11: ...Menu Format 7 Enter 8 Four Directional Select Keys 9 Re Sync 10 D Sub Source 11 Video Source 12 YPbPr Source 13 HDMI Source 14 Source 15 EdgeMask 16 Brightness 17 LBX 18 4 3 19 Overscan 20 V Keystone...

Page 12: ...ector Due to the difference in applications for each country some regions may have different accessories 1 Power Cord 2 S Video Cable EMEA and Asia only 3 VGA Cable EMEA only 4 RCA Component Cable for...

Page 13: ...the projector you can select your preferred language from quick menu after the startup screen display 4 Turn on your source computer notebook video player etc The projector will detect your source aut...

Page 14: ...49 Powering off the projector 1 Press the Power button to turn off the projector lamp you will see a message displayed on the projector s screen 2 Press the Power button again to confirm otherwise the...

Page 15: ...utton 2 Raise the image to the desired height angle then release the button to lock the elevator foot into position 3 Use screw in foot to fine tune the display angle To lower the image 1 Press the el...

Page 16: ...h inch size of 16 9 Screen Screen Size W X H 16 9 Projection distance D Offset Hd m feet m feet wide tele wide tele m feet 50 1 11 0 62 3 63 2 04 1 72 1 88 5 64 6 17 0 12 0 39 60 1 33 0 75 4 36 2 45 2...

Page 17: ...SD menu To exit OSD Press Menu again Enter Confirm your item selection AV Mute Momentarily turns off on the audio and video Source Press Source to select the input signal source at the next terminal R...

Page 18: ...he pic ture Menu Press Menu to launch the on screen display OSD menu To exit OSD Press Menu again Re Sync Automatically synchronizes the projector to the input source D Sub Press D Sub to choose D Sub...

Page 19: ...Box Enable the viewing of the letterboxed non anamorphically enhanced movie at full screen width Part of the original image will be lost if the image aspect ratio is less than 1 78 1 4 3 Scale the im...

Page 20: ...ayed use keys to select any item in the main menu While making a selection on a particular page press or Enter key to enter sub menu 3 Use keys to select the desired item and adjust the settings by ke...

Page 21: ...XRPL 6YHQVND 1RUVN DQVN 0DJ DU H WLQD 6OHHS 7LPHU PLQ H SDG RFN 2Q 2II DFNJURXQG RORU ODFN OXH DPS 6HWWLQJV GYDQFHG LQHPD ULJKW 3KRWR 79 8VHU ULJKWQHVV GYDQFHG 7UXH9LYLG 0 _ 9 1 ULOOLDQW RORU HJDPPD 0...

Page 22: ...settings Contrast The contrast controls the degree of difference between the lightest and darkest parts of the picture Adjusting the contrast changes the amount of black and white in the image Press...

Page 23: ...ase the amount of color in the image Tint Adjusts the color balance of red and green Press the to increase the amount of green in the image Press the to increase the amount of red in the image Sharpne...

Page 24: ...adjustable item utilizes a new color processing algorithm and system level enhancements to enable higher brightness while providing true more vibrant colors in picture The range is from 0 to 10 If yo...

Page 25: ...amic image performance manager is active in making sure your greatest pleasure from seeing a movie dynamically with the most dark details revealed vivid and bright image performed all the way Off The...

Page 26: ...Controls Image Advanced Input Source Enable input sources Press into the next menu as below and then use or to select Press Enter to finalize the selection The projector will not search inputs that a...

Page 27: ...in Bias Press into the next menu as below and then use or to select item Use or to select Red Green or Blue for brightness Gain and contrast Bias Color Space Select an appropriate color matrix type fr...

Page 28: ...s not enhanced for Wide screen TV 16 9 This format is for 16x9 input sources like HDTV and DVD enhanced for Wide screen TV LBX This format is for non 16x9 letterbox source and for users who use extern...

Page 29: ...a 2 35 1 content include Anamorphic DVD and HDTV film source that support anamorphic wide is enhanced for 16x9 Display in a wide 2 35 1 image In this case there are no black bars the full lamp power...

Page 30: ...is a Normal 4 3 resolution you must select this setting Examples of Normal resolutions are 640 x 480 800 x 600 1024 x 768 1152 x 864 1280 x 1024 1400 x 1050 All supported resolutions are listed on pa...

Page 31: ...31 English User Controls Language Choose the multilingual OSD menu Press or into the sub menu and then use the or key to select your preferred language Press Enter to finalize the selection Setup...

Page 32: ...translucent screen Front Ceiling When you select this function the projector turns the image upside down for ceiling mounted projection Rear Ceiling When you select this function the projector reverse...

Page 33: ...Synchronize the signal timing of the display with the graphic card If you experience an unstable or flickering image use this function to correct it H Position Press the to move the image left Press...

Page 34: ...hide the searching message Off Choose Off to show the searching message Keypad Lock When the keypad lock function is on the control panel will be locked but the projector can still be operated by the...

Page 35: ...nal being sent to the projector Then projector will automatically power off when the countdown has finished in minutes Sleep Timer min Set the countdown timer interval The timer will begin with or wit...

Page 36: ...age when the changing lamp message is displayed The message will appear 30 hours before suggested replacement of lamp Brightness Mode STD Choose STD to dim the projector lamp which will lower power co...

Page 37: ...PC For Windows 95 98 2000 XP 1 Open the My Computer icon the Control Panel folder and then double click on the Display icon 2 Select the Settings tab 3 Verify that your display resolution setting is...

Page 38: ...he Notebook or PowerBook computer is not displaying your presentation If you are using a Notebook PC Some Notebook PCs may deactivate their own screens when a second display device is in use Each has...

Page 39: ...ou will also need to adjust the aspect ratio by referring to the following Please setup the display format as 16 9 wide aspect ratio type on your DVD player Image is too small or too large Adjust the...

Page 40: ...d may make a loud popping sound If this happens the projector will not turn on until the lamp module has been replaced To replace the lamp follow the procedures in the Replacing the Lamp section on pa...

Page 41: ...41 English Appendices Message Reminders Fan failed Temperature warning Replacing the lamp Out of display range...

Page 42: ...gle for the remote control is approximately 22 5 Make sure there are no obstructions between the remote control and the projector Move to within 6 m 20 ft of the projector Make sure the batteries are...

Page 43: ...own for at least 30 min utes before changing the lamp Warning Lamp compartment may be hot Allow it to cool down before changing the lamp Warning To reduce the risk of personal injury do not drop the l...

Page 44: ...e 2 screws from the cover then push up and remove the cover 5 Use a screwdriver to unscrew the 2 screws from the lamp module 6 Pull up the lamp handle carefully 7 Pull out and remove the lamp module T...

Page 45: ...x 480 85 720 x 400 70 720 x 400 85 SVGA 800 x 600 56 800 x 600 60 800 x 600 72 800 x 600 75 800 x 600 85 XGA 1024 x 768 60 1024 x 768 70 1024 x 768 75 1024 x 768 85 SXGA 1152 x 864 70 1152 x 864 75 11...

Page 46: ...600 85 1024 x 768 60 1024 x 768 70 1024 x 768 75 1024 x 768 85 1280 x 768 60 1280 x 768 70 1280 x 720 60 1280 x 1024 60 1280 x 1024 75 1400 x 1050 60 1600 x 1200 60 Power G4 640 x 480 72 640 x 480 75...

Page 47: ...unt kit please ensure the screws used to attached a mount to the projec tor met the following specifications Screw type M3 Maximum screw length 10mm Minimum screw length 7 5mm Warning 1 If you buy the...

Page 48: ...Tel 44 0 1923 691865 Service service tsc europe com France B timent E Tel 33 1 41 46 12 20 81 83 avenue Edouard Vaillant Fax 33 1 41 46 94 35 92100 Boulogne Billancourt France Service savoptoma optoma...

Page 49: ...Minchiuan Rd Tel 886 2 2218 2360 Shindian City Fax 886 2 2218 2313 Taipei Taiwan 231 R O C Service services optoma com tw www optoma com tw asia optoma com Hong Kong Unit A 27 F Dragon Centre 79 Wing...

Page 50: ...f this device does cause harmful interference to radio or television reception which can be determined by turning the device off and on the user is encouraged to try to correct the interference by one...

Page 51: ...al apparatus complies with Canadian ICES 003 Remarque l intention des utilisateurs canadiens Cet appareil numerique de la classe B est conforme a la norme NMB 003 du Canada Declaration of Conformity f...

Reviews: