background image

8

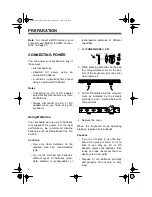
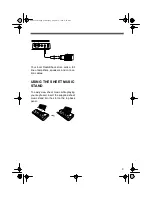
1. Plug the DC adapter’s 5.5 mm outer

diameter/2.1 mm inner diameter
barrel plug into the cable so it reads
– TIP.

2. Set the DC adapter’s voltage switch

to 9 volts.

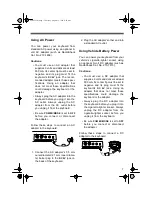
3. Connect the DC adapter’s barrel

plug to the 

DC 9V 

jack on the back of

the keyboard.

4. Plug the DC adapter’s other end into

your vehicle’s cigarette-lighter
socket.

Note: If the keyboard does not operate
when you use the DC adapter, unplug
the cord from the cigarette-lighter socket
and clean any ashes or debris from the
socket. If your keyboard still does not
work, check the fuse in the DC adapter
and replace it if necessary. 

CONNECTING 
HEADPHONES

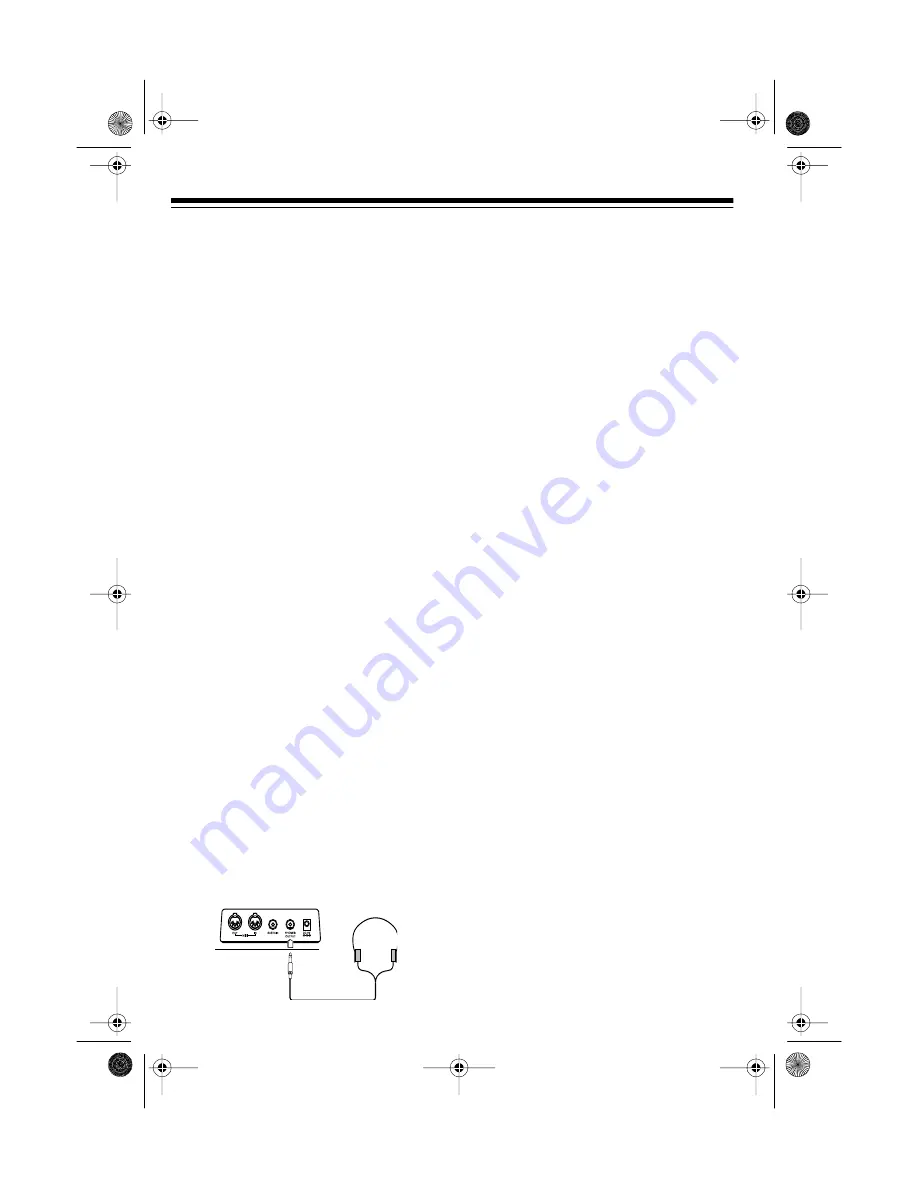
To listen to your keyboard without dis-
turbing others, you can connect an op-
tional pair of stereo headphones with a

1

/

4

-inch (6.4-mm) plug. Your local Ra-

dioShack store sells a wide selection of
headphones.

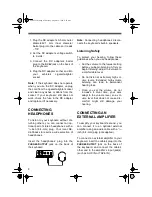
Insert the headphones’ plug into the

PHONES/OUTPUT

 jack on the back of

the keyboard.

Note: Connecting headphones discon-
nects the keyboard’s built-in speakers.

Listening Safely

To protect your hearing, follow these
guidelines when you use headphones.

• Set the volume to the lowest setting

before you begin listening. After you
begin listening, adjust the volume to
a comfortable level.

• Do not listen at extremely high vol-

ume levels. Extended high-volume
listening can lead to permanent
hearing loss.

• Once you set the volume, do not

increase it. Over time, your ears
adapt to the volume level, so a vol-
ume level that does not cause dis-
comfort might still damage your
hearing.

CONNECTING AN 
EXTERNAL AMPLIFIER

To amplify your keyboard’s sound, you
can connect it to an optional external
amplifier using an audio cable with a 

1

/

4

-

inch (6.4-mm) plug (not supplied).

To connect an external amplifier to your
keyboard, insert the cable’s plug into the

PHONES/OUTPUT

 jack on the back of

the keyboard, and connect the cable’s
other end to the amplifier’s input jack(s)
(such as AUX IN or TAPE IN).

42-4038.fm  Page 8  Thursday, August 12, 1999  8:50 AM

Summary of Contents for 42-4038

Page 1: ...Cat No 42 4038 OWNER S MANUAL Please read before using this equipment Concertmate 980 42 4038 fm Page 1 Thursday August 12 1999 8 50 AM ...

Page 2: ...rded Tunes let you hear a sample of what you and the keyboard can do You can play the tunes either one at a time or consecutively and you can turn off the melody or accompani ment portion so you can play along with the tunes 100 Tones you can set your key board to sound like anything from a harpsichord to a honky tonk piano 12 Note Polyphonic Sound lets you play and hear up to 12 notes at the same...

Page 3: ...such as RadioShack Cat No 42 4050 This owner s manual explains how to use this electronic keyboard It does not teach music We recommend you record your key board s serial number here The number is in the battery compartment of the key board Serial Number _________________ THE FCC WANTS YOU TO KNOW This keyboard complies with the limits for a Class B digital device as specified in Part 15 of FCC Ru...

Page 4: ...with a Prerecorded Tune 14 Turning Applause Off On 14 Consecutively Playing Back the Tunes 14 Using the Preset Tones 15 Selecting Playing a Preset Tone 15 Keyboard Split Tones 16 Layered Tones 16 Percussion Sounds 16 Using the Preset Auto Rhythms 17 Selecting Playing an Auto Rhythm 17 Using SYNCHRO 18 Using FILL IN 18 Using Auto Accompaniment 18 Adjusting the Accompaniment Volume 19 Concert Chord ...

Page 5: ...Data 26 Changing MIDI Settings 27 Notes About the MIDI Implementation Chart 27 Troubleshooting 29 Standard Fingering Chord Charts 31 Note Table 34 MIDI Implementation Chart 36 Care and Maintenance 38 Specifications 39 42 4038 fm Page 5 Thursday August 12 1999 8 50 AM ...

Page 6: ...es of the required size and recommended type Do not mix old and new batteries different types of batteries stan dard alkaline or rechargeable or rechargeable batteries of different capacities 1 Set POWER MODE to OFF 2 While pressing both tabs on the bat tery compartment cover on the bot tom of the keyboard pull the cover up to remove it 3 Put six D batteries into the compart ment as indicated by t...

Page 7: ...r s 5 5 mm outer diameter 2 1 mm inner diame ter barrel plug to the DC 9V jack on the back of the keyboard 2 Plug the AC adapter s other end into a standard AC outlet Using Vehicle Battery Power You can power your keyboard from your vehicle s cigarette lighter socket using an optional 9 volt DC adapter such as RadioShack Cat No 273 1815 Cautions You must use a DC adapter that supplies 9 volts and ...

Page 8: ...jack on the back of the keyboard Note Connecting headphones discon nects the keyboard s built in speakers Listening Safely To protect your hearing follow these guidelines when you use headphones Set the volume to the lowest setting before you begin listening After you begin listening adjust the volume to a comfortable level Do not listen at extremely high vol ume levels Extended high volume listen...

Page 9: ...f amplifiers speakers and connec tion cables USING THE SHEET MUSIC STAND To easily view sheet music while playing your keyboard insert the supplied sheet music stand into the slot on the top back panel 42 4038 fm Page 9 Thursday August 12 1999 8 50 AM ...

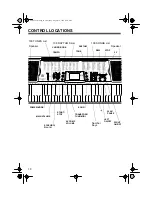
Page 10: ... TUNE MIDI RHYTHM TEMPO START SYNCHRO MAIN VOLUME POWER MODE Number _ TONE SONG 100 TONES List Keys PAUSE 100 SONGS List 100 RHYTHMS List LEFT ON OFF ON OFF RIGHT CHORD BOOK ACCOMP VOLUME REW FF STOP FILL IN 42 4038 fm Page 10 Thursday August 12 1999 8 50 AM ...

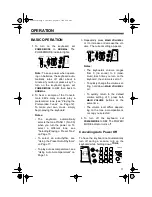
Page 11: ...t an auto rhythm see Using the Preset Auto Rhythms on Page 17 To play auto accompaniment see Using Auto Accompaniment on Page 18 3 Repeatedly press MAIN VOLUME s or t to increase or decrease the vol ume The current setting ap pears Notes The keyboard s volume ranges from 0 no sound to 9 maxi mum Each time you turn on the keyboard the volume is set to 7 To quickly change the volume set ting hold do...

Page 12: ...t time you press SONG after turning the power on 2 Choose a tune from the 100 SONGS list and enter its two digit number on the keypad Or you can press or to move to the next higher or lower numbered tune Notes Precede a single digit number with a 0 For example to select 07 Killing Me Softly with His Song press 0 7 If you enter an incorrect first digit press SONG to clear your entry then enter the ...

Page 13: ...red volume level using the number keys between 0 and 9 or press or within 5 seconds 5 To move to a particular section of a tune hold down REW or FF during play The keyboard rapidly plays the tune either backward or forward like a cassette player does when you review or cue a cassette tape When you hear the section you want release REW or FF to resume normal play 6 To change the tempo press TEMPO t...

Page 14: ...and volume as desired 5 Play along with the tune on the key board Note You can turn the melody on or off by repeating Step 2 even while the current tune is playing 6 To temporarily stop playing the tune press PLAY PAUSE again To stop the tune completely press STOP Turning Applause Off On When you turn off either the melody or accompaniment and then play a tune applause automatically sounds at the ...

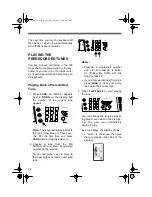
Page 15: ...n the keyboard This is an unavoid able result of multiple sampling and is not a malfunction Some sound effect tones such as PERCUSSION No 99 do not fol low the musical scale when played but change effect as you play them in different octaves on the keyboard Selecting Playing a Preset Tone 1 Press TONE TONE and the current tone s number appears Note Each time you turn the key board on it automatica...

Page 16: ...en you press a key Percussion Sounds PERCUSSION No 99 lets you play the 35 different percussion sounds shown here The symbol for each sound ap pears above the corresponding key on the keyboard Bass Drum Cowbell Side Stick Crash Cymbal 2 Acoustic Snare Claves Hand Clap Ride Cymbal 2 Note When you select the Fingered or Concert Chord mode the keys in the lower 11 2 octaves become the accompa niment ...

Page 17: ... keyboard it automatically selects the rhythm Club Pop No 00 2 To select a different rhythm choose an auto rhythm from the 100 RHYTHMS list and enter its two digit number on the keypad Or repeatedly press or to move to the next higher or lower numbered rhythm Notes Precede a single digit number with a 0 For example press 0 5 to select POP BALLAD No 05 If you incorrectly enter the first digit of th...

Page 18: ...N This feature lets you insert a short 1 to 2 measure variation in the beat pattern of a selected auto rhythm Simply press and release SYNCHRO FILL IN while the auto rhythm is playing The keyboard inserts a 1 to 2 measure variation then the original rhythm auto matically resumes at the end of the cur rent measure USING AUTO ACCOMPANIMENT The 18 keys on the left side of the key board with note labe...

Page 19: ... volume to its default value of 7 press and at the same time Note You can adjust the accompani ment volume separately for your key board play and prerecorded tune playback Concert Chord The concert chord method lets begin ning keyboard players easily select and play a chord The number of accompaniment keys you press determines the type of chord that plays This chart shows the chord type that plays...

Page 20: ...hythm press START STOP Standard Fingering The standard fingering method uses standard formations of three or four notes and lets the experienced musi cian play a wider variety of accompani ment chords This chart shows the 15 chord types you can play on your keyboard by using standard fingering Notes You do not have to press the key marked with parentheses on the keyboard in the preceding chart to ...

Page 21: ...long with the accompaniment press any key s to the right of the accompaniment keys 5 Adjust the tempo MAIN VOLUME and ACCOMP VOLUME to the de sired levels 6 To change chords without interrupt ing the rhythm simply press the auto accompaniment keys required to form the new chord 7 To stop auto accompaniment and the auto rhythm press START STOP USING THE CHORD BOOK You can use your keyboard s chord ...

Page 22: ...at make up the chord on the staff display 5 Use or to scroll through the chords associated with the root chord you entered in Step 3 Or press a different root key to see the chords based on that key Notes If the chord is not recognized by the keyboard only a dash ap pears on the display Since the keyboard automatically changes some chords so you can play them on the accompaniment keyboard the keyb...

Page 23: ...semitones to an F and up 5 semitones to an F a full octave 2 Within 5 seconds press or to lower or raise the key Each time you press or the number on the display decreases or increases by 1 semitone As you raise the key 1 is C 2 is D and so on As you lower the key 1 is B 2 is B 3 is A and so on Notes You can also use the number key pad to quickly raise the key Simply press the semitone change valu...

Page 24: ...ls of its default pitch 2 Within 5 seconds repeatedly press or to lower or raise the key board s pitch Each time you press the key the number on the display decreases or increases by 1 cent Notes You can use the number keypad to raise the pitch by entering the cent change value The keyboard automatically resets the tuning pitch to the default value of 00 cents each time you turn off the keyboard o...

Page 25: ...UT and MIDI IN terminals The cable that connects MIDI devices does not actually carry sound between them like a speaker wire carries sound from a receiver to a speaker Instead MIDI equipped devices communicate with each other using digital codes in structions One MIDI device sends digi tal instructions representing exactly what is being played on it The other MIDI device receives and translates th...

Page 26: ...alue from 0 to 127 Notes The pitch of a note depends on the tone that is being used as shown in the Note Table on Page 34 If the keyboard receives a request to play notes outside of its range higher or lower it automatically selects the same note in the nearest octave Program Change specifies the tone The keyboard sends program change data in the range of 0 to 99 correspond ing to tone numbers It ...

Page 27: ...n 64 Tone Map sets the range of program change values received recognized by this keyboard 1 Repeatedly press TRANSPOSE TUNE MIDI until TonMap N ap pears 2 Within 5 seconds press or to se lect the setting you want N Normal Tone Map This setting allows receipt of 0 to 99 program changes Each program change corresponds to one of the key board s prerecorded tones G General MIDI Tone Map This setting ...

Page 28: ...board automatically assigns any key outside its range to a key within its key range Velocity This number shows how fast the key was pressed or how loud the note should sound Pianissimo 1 is the lowest velocity Fortissimo 127 is the loudest A zero 0 means the key is released Your keyboard can send vol ume level 75 or 100 and receive all vol ume levels from 0 through 127 9n This means that the Note ...

Page 29: ...re battery symbols facing correctly Are the batteries fresh Is the AC or DC adapter connected properly You are pressing too few accompaniment keys while POWER MODE is set to FINGERED Set POWER MODE to NOR MAL or CONCERT CHORD Press 3 or 4 keys to form a chord while POWER MODE is set to FINGERED No sound when con nected to an external amplifier Volume is turned down Repeatedly press MAIN VOLUME s t...

Page 30: ...ve lower Tone map parameter is set to N Set the tone map parameter to G see Changing MIDI Settings on Page 27 Sounds sent to another MIDI device by the key board do not sound correct The other device s MIDI THRU function is turned on Turn off the MIDI THRU function on the other device Trouble Possible Cause Remedy 42 4038 fm Page 30 Thursday August 12 1999 8 50 AM ...

Page 31: ...y most often This illustration shows which fingers on your left hand match the num bers on the charts The illustration also appears on your keyboard s dis play Note You cannot play chords marked with an asterisk in the fingered mode on this keyboard 42 4038 fm Page 31 Thursday August 12 1999 8 50 AM ...

Page 32: ...32 42 4038 fm Page 32 Thursday August 12 1999 8 50 AM ...

Page 33: ...33 42 4038 fm Page 33 Thursday August 12 1999 8 50 AM ...

Page 34: ...34 NOTE TABLE Legend 1 Tone number 2 Maximum polyphony 3 Range type see Page 35 4 Corresponding general MIDI number see MIDI Data on Page 26 42 4038 fm Page 34 Thursday August 12 1999 8 50 AM ...

Page 35: ...DI data Range transposed to nearest octave when receiving MIDI data or using the keyboard s transpose function 1 The received MIDI data is played one octave lower 2 The received MIDI data is played one octave higher 42 4038 fm Page 35 Thursday August 12 1999 8 50 AM ...

Page 36: ...ys Channels X X X X Pitch Bender X O Control Change 1 6 38 7 10 11 64 100 101 120 121 X X X X X O X X X O X O O X O X X X Modulation Data entry Volume Pan Expression Hold1 RPN LSB MSB All sound off Reset all controller Program Change True O 0 99 jjjjjjjjjjjjjjjj O 0 127 4 jjjjjjjjjjjjjjj 4 Depends on GM Tone Map setting When set to N only the 100 normal list tones from 0 to 99 are received When se...

Page 37: ...OMNI OFF POLY O Yes Mode 2 OMNI ON MONO Mode 4 OMNI OFF MONO X No Aux Messages Local ON OFF All notes OFF Active Sense Reset X X X X X X X X FUNCTION TRANSMITTED RECOGNIZED REMARKS 42 4038 fm Page 37 Thursday August 12 1999 8 50 AM ...

Page 38: ...ear of parts Handle the keyboard gently and carefully Dropping it can damage cir cuit boards and cases and can cause the keyboard to work improperly Use only fresh batteries of the required size and recommended type Batteries can leak chemicals that damage your keyboard s electronic parts Wipe the keyboard with a damp cloth occasionally to keep it looking new Do not use harsh chemicals cleaning so...

Page 39: ...pedance 78 Ohms Output Voltage 4V RMS MAX MIDI IN OUT SUSTAIN 1 4 Inch Standard Jack Power Sources DC 6 D batteries Cat No 23 550 AC 120V 60Hz with AC adapter Cat No 273 1656 Vehicle Battery 9V with DC adapter Cat No 273 1815 Power Consumption 7 7 W Dimensions HWD 51 2 377 8 151 16 Inches 139 961 381 mm Weight Without Batteries 11 lb 10 oz 5 4 kg Included Accessories Sheet Music Stand Sheet Music ...

Page 40: ... warranty period take the product and the RadioShack sales receipt as proof of purchase date to any RadioShack store RadioShack will at its option un less otherwise provided by law a correct the defect by product repair without charge for parts and labor b replace the product with one of the same or similar design or c refund the purchase price All replaced parts and products and products on which...

Reviews: