OPTIMUM
M A S C H I N E N - G E R M A N Y
Assembly
Version 1.0 dated 2015-06-18
Page 23
Original operating instructions
S275N | S275NV
GB
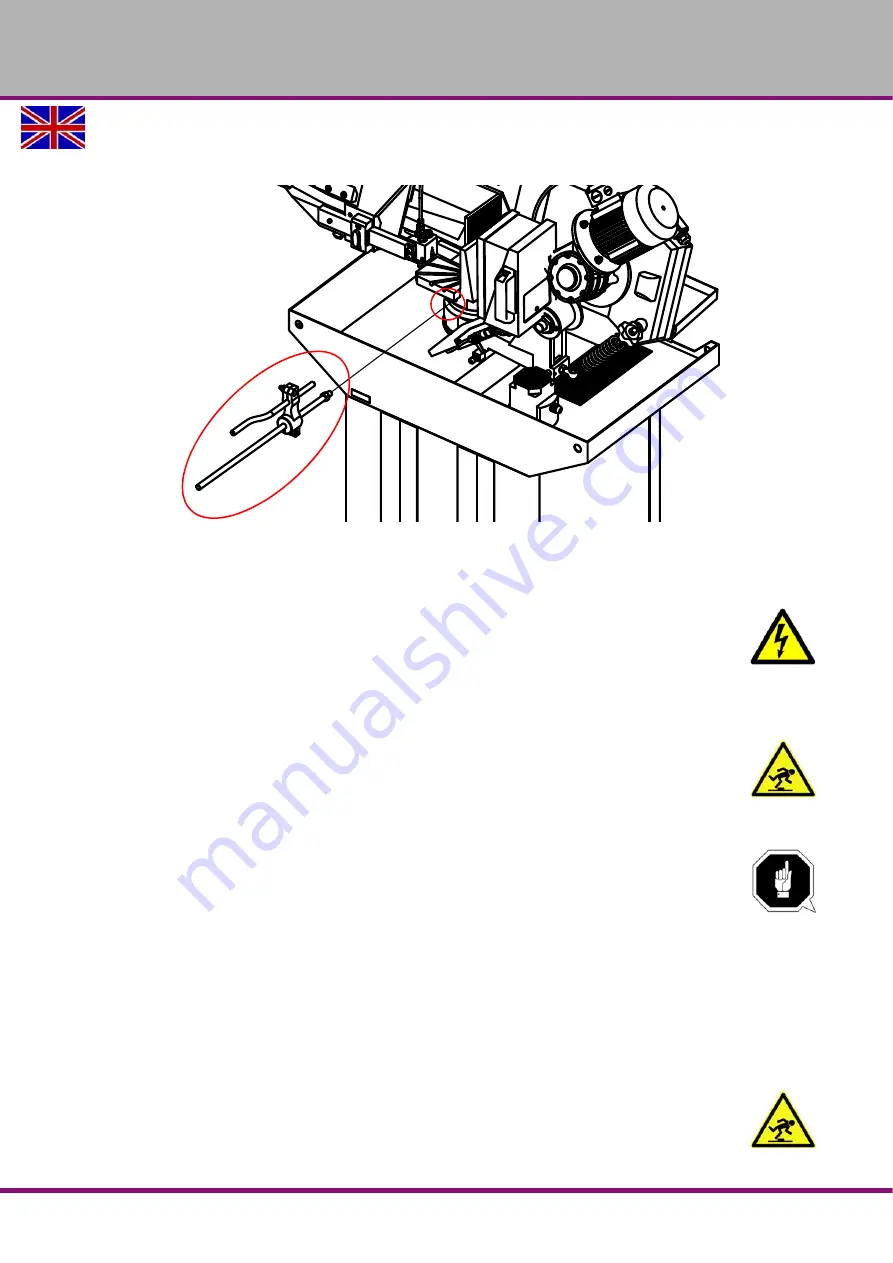
3.5.4 Material stop
Turn the stop bar into the threaded hole and clamp the stop bar with the nut.
3.6
Electrical connection
3.6.1 Electrical connection S275N
WARNING!
The three-phase electrical connection of the S275N may only be performed by an
electrician or under the guidance and supervision of an electrician.
"Qualification of personnel“ on page 9
"Schaltplan - Wiring diagram 400V - S275N“ on page 46
CAUTION!
Install the connection cable of the machine in such a way that people will not stumble
over it.
Connect the three-phase electric cable to the machine.
Check the fusing (fuse) of your electrical supply.
Fusing 10A - 16A
ATTENTION!
Ensure that all 3 phases (L1, L2, L3) and the ground wire are connected correctly. The
neutral conductor (N) of its power supply is not connected.
If the machine is already equipped with a three-phase connector, when connected to
your rotary power the rotation direction can be wrong.
3.6.2 Electrical connection S275NV
The machine is installed and ready to operate. Fusing 10A - 16A
"Schaltplan - Wiring diagram - S275NV“ on page 47
CAUTION!
Install the connection cable of the machine in such a way that people will not stumble
over it.


