background image

Optilia Instruments AB 


www.optilia.eu


Rev D, January-2011 


No.  Lens 

Working distance range 

Standard lens (no additional Close-up) 

245-190 mm 

+5 Close-up lens   (f=200mm) 

103 to 90 mm 

+10 Close-up lens (f=100mm) 

61 to 54 mm 

  
Note: Working distances are measured from front edge of W10x-HD without UV-filter. 


5.  Connect the W10x-HD camera to Y/Pb/Pr Component Video inputs of a FULL HD 

monitor or TV. Turn on W10x-HD and select Component Source of your TV or LCD. 
Laser pointer can be turned on/off via a switch on the back side of the Camera.  


6.  Connect RS232 cable of W10x-HD to COM port of PC, Laptop or external Control 

Unit (optional accessory). Use the included USB-COM converter device if your 
computer only provides Serial COM ports. Connect the camera to Power Supply 
(MiniDin connector). In case of external Control Unit, please refer to its instructions 
manual for more information.  


7.  Install W10x_HD Camera Control software onto your computer.  


8.  Start the W10x_HD Camera Control software. You need to select the camera 

(Highlight camera) first in order to establish the communication. 

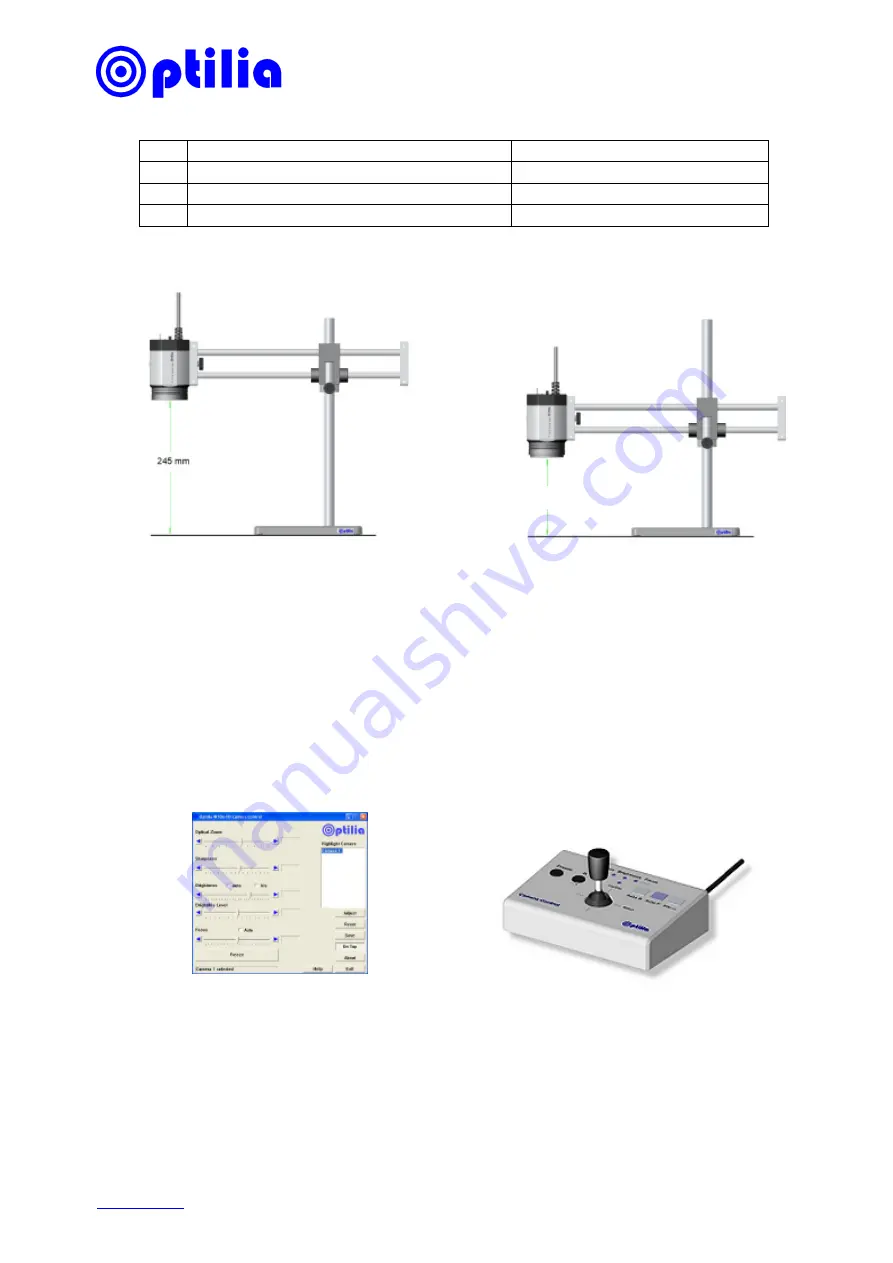
Standard Working Distance without extra lenses  

Working Distance with +5 Close-up lens 

Camera Control Software interface  

Camera Control Unit (Optional) 

103 mm 

Summary of Contents for W10x-HD

Page 1: ...ench and mount the W10x HD camera onto the horizontal Boom 3 Adjust height of the Boom for 245mm Working distance measured from front edge of the camera W10x HD camera with standard optics has a focusing interval of approximately 190 250mm Auto focus will not function properly outside this range 4 Working distance of the camera needs to be decreased according to the bellow if close up lenses are a...

Page 2: ...side of the Camera 6 Connect RS232 cable of W10x HD to COM port of PC Laptop or external Control Unit optional accessory Use the included USB COM converter device if your computer only provides Serial COM ports Connect the camera to Power Supply MiniDin connector In case of external Control Unit please refer to its instructions manual for more information 7 Install W10x_HD Camera Control software ...

Page 3: ...n Auto is selected focus position is automatically adjusted to the high frequency content of the picture in a centre measurement area taking into consideration the high luminance and strong contrast components If camera cannot focus automatically user should focus manually or readjust Brightness Night Vision Manual ON button enables disables the Night Vision mode and sets the picture to black and ...

Page 4: ...Type 2 Reproduces images with deeper contrast NIR Vision Enables the Near Infra Red mode Camera will be sensitive to light wavelengths from 400nm blue to 980nm NIR Video Out Mode Sets the video output system to 1080 59 94i Interlaced 1080 50i Interlaced 750 59 94p Progressive 720 50p Progressive NTSC Corp or PAL corp Hardware restart is required in order to apply the video out mode changes Keyboar...

Reviews: