


14
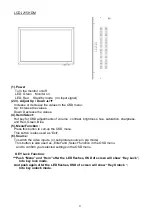
7. Technical specifications
Monitor model
LCDI-215HDM
LCDI-32HDM
System
PAL / NTSC
LCD panel
21.5
“
31.5
“
Visible area (mm)
476.6 x 268.1
698.4 x 392.8
Picture format
16 : 9
Max. resolution
1920 x 1080
Pixel dot pitch (mm)
0.248x0.248
0.36375x 0.37375
Colors
16.7M
Brightness
250 cd/m² [LED]
350 cd/m² [LED]
Contrast
1000 :1
3000 :1
Response time(Tr/Tf)
1.3/3.7 ms
6.5ms
View angle (U/D/L/R)
80/80/85/85
89/89/89/89
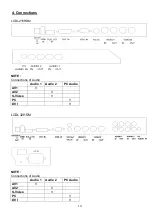
Video input/output
2x / 2x Composite (BNC)
S-Video input
1x 4 Pin Mini Dim
Full HD input
1x Full HD (A Type)
Audio input/output
2x / 2x (RCA)
PC input
1x VGA input (D-Sub 15 pin)
1x DVI-D input
1x Audio input
Speaker
1x built-in speaker (2 watt)
3D Comb Filter
Yes
3D De-Interlace function
Yes
Picture-in-Picture (PIP)
Yes (video/PC)
OSD setting
Yes
Power input
AC 100-240V 50/60Hz, Adapter DC 12V/5A
Power consumption
Approx. 22 watt
Approx. 57 watt
Dimensions (WxHxD) mm
532.3 x 323.3 x 65
761.6x 455.2 x 75
Weight
5.7kg
13kg
Operating temperature
0° to 40° C
Subject to technical changes without prior notice. Error excepted.