User’s Manual
4
2. Software
Installation
Follow the steps below to install VSS to the local computer.
Step 1.
There are 2 ways to start the installation.
Option 1.
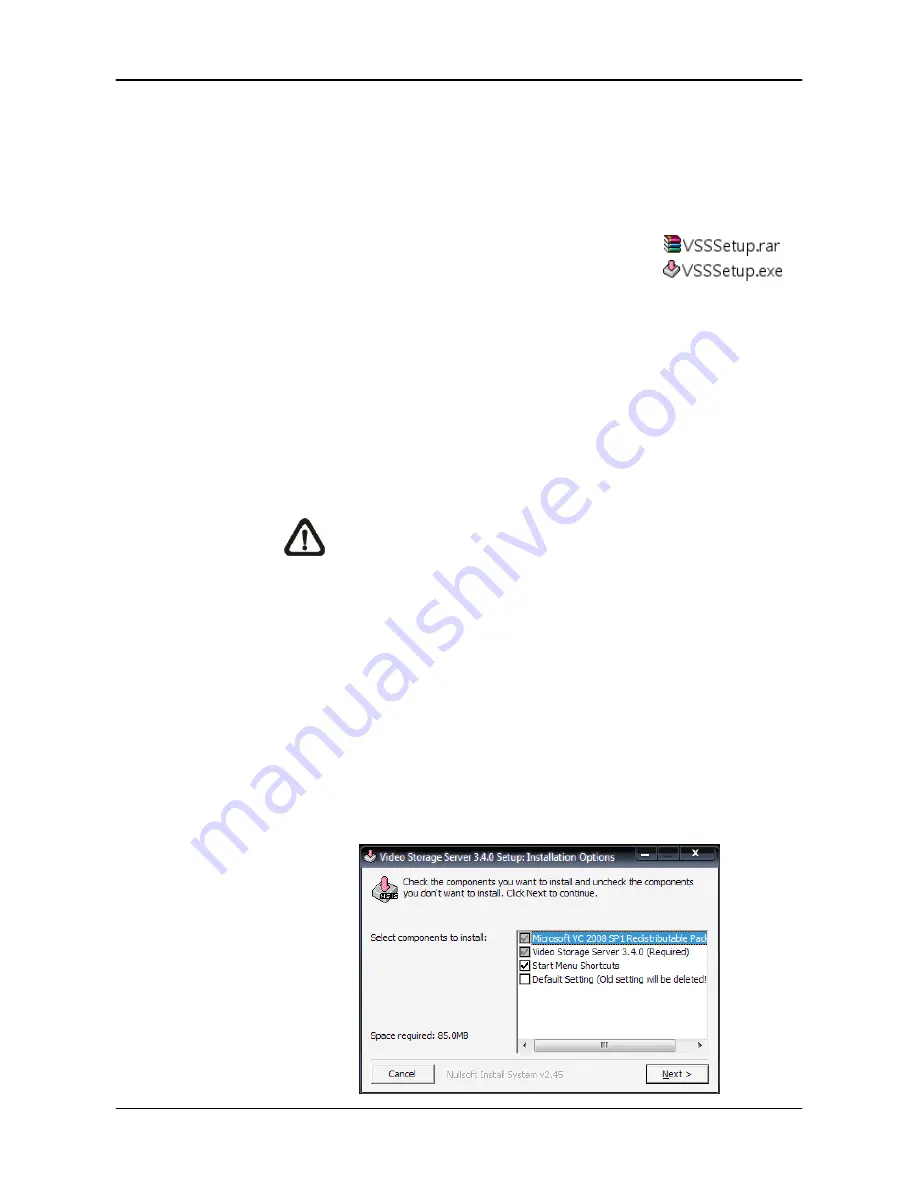
Download the compressed file and
extract it. Click on the VSSSetup.exe
file to start the installation.
Option 2.
If VSS will be installed via a CD, the installation will startup
automatically when the CD is inserted into the CD-Rom.
The <VSS Setup Menu> window will be displayed. Choose
<INSTALL VSS> to start installing VSS. Choose <VSS
USER’S MANUAL> to open the user’s manual. Choose
<EXIT> to exit the <VSS Setup Menu>.
NOTE:
1.
If an older version of the VSS had been installed in the local
computer, a message box will be shown during the
installation. Click <OK> to uninstall the previous version.
2.
After clicking <OK>, an un-installation confirmation dialog
will be displayed. Click <Uninstall> to uninstall the older
version and continue with the next step.
Step 2.
Select the components that are going to be installed. It is strongly
recommended to select the <Start Menu Shortcuts> to create
shortcuts in the Start Menu and on the Desktop. Otherwise when the
program is to be opened, it will have to be found under the path:
“\VSS\EXE\VSS.exe”. Click <Next> to go to next step.