


11
E102894#1
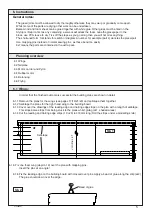
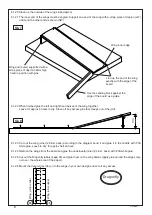
6.3.10 Cut a 7mm piece from the ring made in step 3.4. This ring is the rear end support and should be glued into
the end of the tube with the slot at the bottom (sk.15).
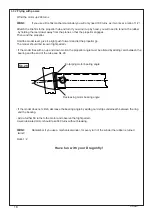
6.3.11 Chamfer the front end of the fuselage tube lightly so that the propellor will fit. The bearing head must sit ex-
actly. To control the fit mark out with a pencil line (sk.16).
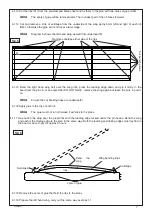
6.3.12 Lay the tailplane boom with the tailplane facing down on to the drawing board (sk.17) Place a piece of 3mm
scrap Depron underneath (sk17) the forward end. Fix the boom to the to the board / plan with pins(sk.17)
6.3.13 Lay the fuselage tube (1) on to the tailplane boom. Place 2 scrap pieces of Depron foam under the front
carrier (6) so that the tube lies exactly on the tail boom.
6.3.14 Check the position of the tube and fix it with 4 mapping pins (sk17) Mark the end where it passes over the
tail boom. Remove the tube. Apply a bead of glue to the tube and glue it to the boom. Add a weight and
leave to dry.
6.3.15 Cut 10 pieces each 18mm long from scrap strip 5 x 10. Add a drop of glue to each piece until a block 25mm
high is formed.
Sk. 15
Sk. 16
Sk. 17
3
1
1
6
1
Lighty chamfer
the front of the
tube
Sanding block
Bleistiftstrich
7mm herausschneiden
Scrap Depron pieces
Scrap Depron pieces
Mark the end of the tube
Tube holding pins
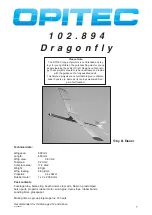
Summary of Contents for Dragonfly 102.894
Page 18: ...18 E102894 1...
Page 20: ...20 E102894 1...
Page 22: ...22 E102894 1...
Page 24: ...24 E102894 1...
Page 26: ...26 E102894 1...
Page 28: ...28 E102894 1...
Page 30: ...30 E102894 1...
Page 31: ...31 E102894 1 Fuselage 2 Scale 1 1...
Page 32: ...32 E102894 1...
Page 33: ...33 E102894 1 Fuselage 3 Scale 1 1 Top Bottom...
Page 34: ...34 E102894 1...


