background image


RealMom


copyright © 2018 Operative Experience 

10002_A


   19 

All rights reserved


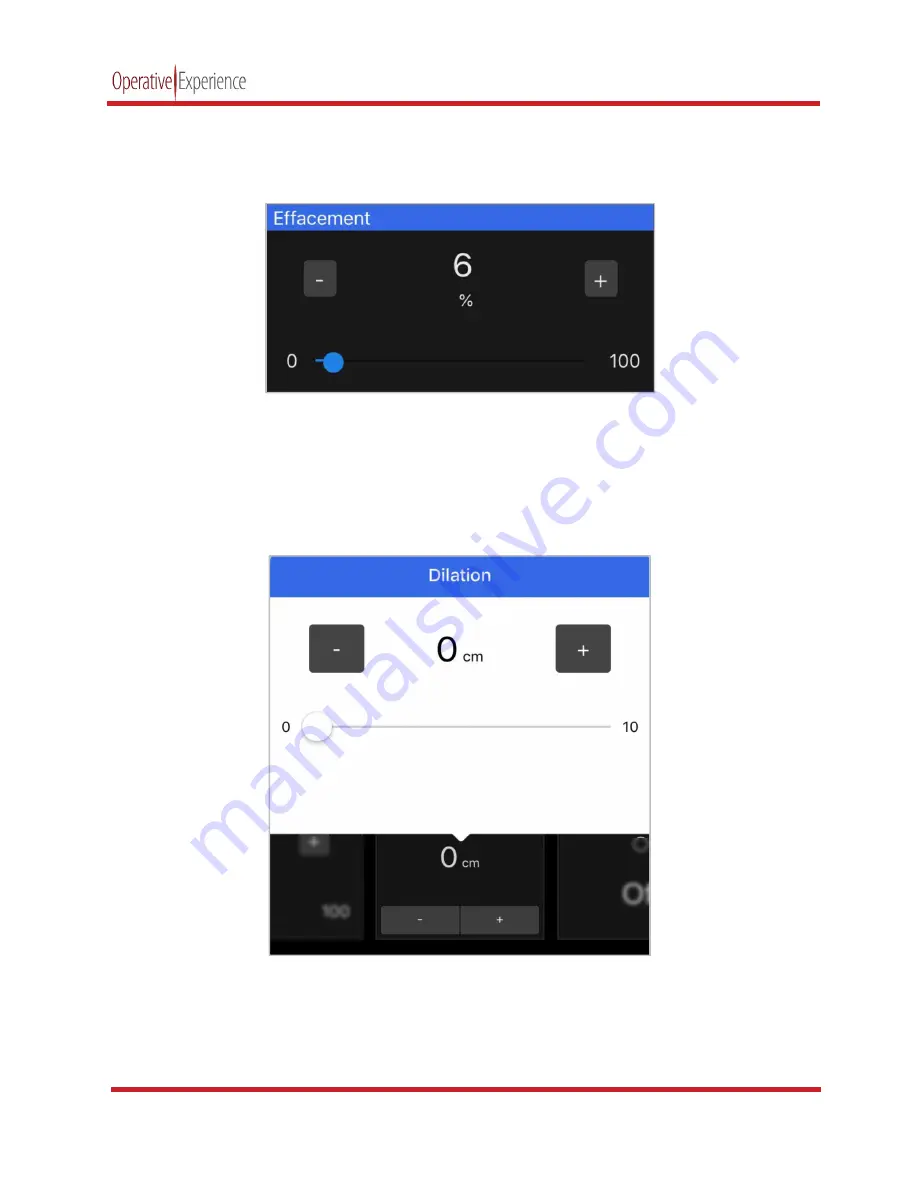
Effacement 

Effacement can be set from 0 to 100% using the slider bar or by using the minus the plus (+) controls on 

either side of the reading. 


Figure 26: Controlling Effacement 

Effacement can be changed during the simulation “on the fly.” 

Dilation 

Effacement can be set from 0 to 10 using the minus (-) and the plus (+) controls. Click on the panel to 

activate the menu to use the slider bar.  


Figure 27: Setting Dilation 

Dilation can be changed during the simulation “on the fly.” 


Summary of Contents for RealMom

Page 1: ...OEI Part Number 10002_A RealMomTM ...

Page 2: ...information retrieval system electronic or mechanical without the written permission of the copyright owner Inquiries regarding permission for use of material contained in this documentation should be addressed to Operative Experience Inc 500 Principio Parkway West Suite 900 North East MD 21901 Phone 410 287 5748 E mail info operativeexperience com Disclaimer This documentation is provided as is w...

Page 3: ...wnloading from the Apple App Store 4 Downloading from the Google Play Store 4 Configuring the Wireless Connection 5 Establishing the Wireless Connection 5 Running the Simulation 6 Connecting the Power 6 Powering On 6 Preparing the Simulators 7 Using the Tablet 9 Controlling the Simulation with the Instructor Interface 9 Viewing RealMom s Condition Using the Trainee Interface Tablet 9 Understanding...

Page 4: ...wing the Simulation Logs 24 Examining Diagnostics 25 Viewing the About Page 27 Operating Your Simulator 28 Inserting the Birth Canal 28 Sealing the Vaginal Opening 31 Connecting the Fluid Supplies 32 Troubleshooting During Operation 34 Shutting Down the Simulator 35 Performing Deliveries 36 Modifying the Delivery 36 Controlling the Postpartum Hemorrhage Control 37 Maintaining Your Simulator 38 Flu...

Page 5: ...G BLEEDING 14 FIGURE 20 CONTROLLING THE BLOOD PRESSURE 15 FIGURE 21 SETTING THE TEMPERATURE 16 FIGURE 22 SETTING THE SPO2 17 FIGURE 23 SETTING THE RESPIRATORY RATE 17 FIGURE 24 SETTING THE FETAL HEART RATE 18 FIGURE 25 CONTROLLING THE STATION 18 FIGURE 26 CONTROLLING EFFACEMENT 19 FIGURE 27 SETTING DILATION 19 FIGURE 28 SHOULDER DYSTOCIA SET TO ON 20 FIGURE 29 RECORDING THE SIMULATION 20 FIGURE 30...

Page 6: ...ULATOR HIGH TEMPERATURE WARNING 34 FIGURE 55 CONNECTION ERROR NOTIFICATION 34 FIGURE 56 DELIVERY ASSISTED BY SUCTION 36 FIGURE 57 DELIVERY ASSISTED BY FORCEPS 36 FIGURE 58 DOWNLOADING THE UPDATE FILE 39 FIGURE 59 OPEN THE MENU ON THE OEI SIM APP 39 FIGURE 60 CLICK SETTINGS 40 FIGURE 61 SEARCHING FOR A FILE MAC OS 40 FIGURE 62 SEARCHING FOR A FILE WINDOWS 40 FIGURE 63 CLICK APPLY UPDATE 41 FIGURE 6...

Page 7: ...ent Two iPads or alternatively two Android tablets are provided for the instructor and trainee but the simulator may also be run on any device with a browser and wireless capabilities Product Components Each wireless full body female simulator comes with all the components needed to perform multiple delivery scenarios RealMom Simulator 1 Baby with Placenta Cord 1 Case with Casters 1 iPad or Tablet...

Page 8: ... but not indestructible RealMom weighs 130 pounds so be sure to take the necessary safety steps to ensure she is lifted and moved properly RealMom is water resistant but not waterproof so do not immerse the simulator in water Cleaning Simulators can be wiped clean with a simple solution of mild soap and water Storage Simulators should be dry fluid free and without clothes during long term storage ...

Page 9: ... cervix for realistic deliveries The full term baby manikin measures 10 H x 5 W x 7 D 25 4cm x 12 7cm x 17 78cm weighs 6 3 pounds 2 85kg and has a realistic placenta and umbilical cord Once placed inside the female manikin the baby may be moved through the fetal stations using software commands Two iPads or Android tablets are included with the simulator with the OEI software used operate the Inst...

Page 10: ...ion about downloading and installing applications Downloading from the Apple App Store For all iOS devices the App Store is a default application on your screen You ll need an Apple ID to download and install the OEI application using either the App Store or iTunes 1 Click the App Store icon to go to the store s page 2 Use the Search field i e the field with the magnifying glass and enter OEI Sim ...

Page 11: ...tion loads Figure The OEI Sim application appears 10002_A Configuring the Wireless Connection When you first configure the wireless connection or if the tablet s Wi Fi doesn t recognize the simulator network a page appears with a field for the Simulator IP Figure 2 Configuring the Wi Fi Connection 10 42 0 1 for the simulator The IP address is always 10 42 0 1 Establishing the Wireless Connection M...

Page 12: ...e light comes on Figure The simulator powers up 2 Turn on the tablets and connect to the WiFi 10002_A Simulation Begin the simulation by powering up the simulator and opening the software on the tablet s DO NOT INSERT THE BABY UNTIL THE SIMULATOR HAS BEEN TURNED ON and HAS COMPLETED Connecting the Power the connection on the right shoulder The Power Cord Connected to the Simulator AC receptacle Be...

Page 13: ...ich moves and calibrates the actuator has completed 1 Once the simulator has been turned on generously lubricate the baby and placenta with Glycerine Figure 7 Lubricating the Baby 2 Generously lubricate the abdominal cavity 3 Lift the abdominal and uterine opening and insert the baby into the cavity Figure 8 Inserting the Baby 4 Position the baby and placenta according to the procedure being pract...

Page 14: ...he head or the posterior Figure 10 Baby s Posterior Opening Figure 11 Pusher Inserted Insert the placenta on top of the baby to lower left of the pelvis Ensure the cord is not blocking Figure 12 Positioning the Placenta lubricate the vaginal area inside and out with Glycerine or cotton seed oil Pull the abdominal skin flap back into place and close the abdomen using the zipper Figure 13 The Abdomi...

Page 15: ...ols appropriate to begin the simulation remembering that not all controls are needed for every simulation 6 Press Play to begin the simulation 7 During the simulation adjust those Physiological Controls appropriate to the scenario 8 Press Stop to end the simulation 9 Click Yes on the dialog box that appears requesting verification that you wish to end the simulation 10 Power down the simulator by ...

Page 16: ...ivate the Instructor tablet the main screen appears displaying the fourteen panels of the OEI Sim application Figure 14 The Instructor Tablet s Main Screen The panel at the top contains the primary operating controls the panels below allow you to set the various physiological features and view an active log of the simulation ...

Page 17: ...s option Clicking the Diagnostics option opens a page with the basic Product Information as well as all System Diagnostics If necessary the Shutdown Simulator or Reboot Simulator functions can be initiated from this page The About option opens a page with the basic details of the system Navigation between these pages is available from the menu For example you can return to the Main Screen from the...

Page 18: ...Each of these can be set independently however the default settings that automatically occur when you change the Heart Rate Condition HR Condition simultaneously affect multiple parameters The Simulation Logs panel records the list of the setting changes along with a timestamp for each change Heart Rate RealMom s Heart Rate can be set from 0 to 220 bpm beats per minute using the slider bar or by u...

Page 19: ...e 19 Selecting a Heart Rate Condition Each setting makes corresponding changes to the Blood Pressure Heart Rate Respiratory Rate and SpO2 Should you choose these parameters can subsequently be modified using the individual panel controls Heart Rate Condition Blood Pressure Heart Rate Respiratory Rate SpO2 Normal 120 60 72 98 5 F 17 Tachycardia 120 65 126 102 F 21 Bradycardia 100 60 50 98 5 F 13 Pa...

Page 20: ...or post partum hemorrhage is controlled using the four settings available when you click on the Bleeding PPH panel None Normal Impressive and Maximum Figure 19 Setting Bleeding Each setting from None through Maximum increases the amount of blood flowing from the simulator Click on the panel to activate the menu ...

Page 21: ...ng the slider bars or by using the minus the plus controls on either side of the readings Click on the panel to activate the menu to access the controls Figure 20 Controlling the Blood Pressure Click Apply once you ve established the readings you want This parameter can be viewed on the Trainee Interface RealMom s blood pressure can be changed during the simulation on the fly ...

Page 22: ...s Temperature can be set from 96 to 106 using the minus and the plus controls Click on the panel to activate the menu to use the slider bar Figure 21 Setting the Temperature This parameter can be viewed on the Trainee Interface RealMom s temperature can be changed during the simulation on the fly ...

Page 23: ...O2 This parameter can be viewed on the Trainee Interface RealMom s SpO2 can be changed during the simulation on the fly Respiratory Rate RealMom s Respiratory Rate can be set from 0 to 60 bpm breaths per minute using the slider bar or by using the minus the plus controls on either side of the reading Figure 23 Setting the Respiratory Rate This parameter can be viewed on the Trainee Interface RealM...

Page 24: ...e 24 Setting the Fetal Heart Rate This parameter can be viewed on the Trainee Interface The fetal heart rate can be changed during the simulation on the fly Station The Station can be set from 3 to 2 using the slider bar or by using the minus the plus controls on either side of the reading The baby moves through the birth canal based on the Station setting Figure 25 Controlling the Station The sta...

Page 25: ...the plus controls on either side of the reading Figure 26 Controlling Effacement Effacement can be changed during the simulation on the fly Dilation Effacement can be set from 0 to 10 using the minus and the plus controls Click on the panel to activate the menu to use the slider bar Figure 27 Setting Dilation Dilation can be changed during the simulation on the fly ...

Page 26: ...estamp recorded for each change As the Physiological Controls are used in the simulation a scrollable list actively updates displaying the new setting In addition to those entries logged when the simulation is started or stopped and any control is set the log automatically records changes to the ECG associated with HR changes and all the presets applied when a Heart Rate Condition is selected Figu...

Page 27: ...l to the right for on showing green or to the left for off which changes the screen to a white background Control Interface Type Using the drop down menu select either the Instructor or Trainee option to configure the tablet Figure 31 Selecting the Control Interface Type Language Choose a Language Selection from the drop down menu English is selected by default Currently Spanish and Chinese are al...

Page 28: ...rainee Interface Often the second tablet is configured as a Trainee interface displaying RealMom s vital signs as well as the fetal heart rate In addition to the parameters set on the Instructor interface an ECG readout related to the HR is displayed Figure 33 The Trainee Interface ...

Page 29: ...or and the trainee tablets Figure Figure 10002_A Dark Mode Set to Off Below is an example of the screen with the Dark Mode set to off The Light Mode is available for both the instructor and the trainee tablets Figure 34 Instructor Interface in Light Mode Figure 35 Trainee Interface in Light Mode RealMom 23 The Light Mode is available for both ...

Page 30: ...the Simulation Sessions Selecting a simulation session displays all the messages recorded for that session under Simulation Log Messages in the right column Figure 36 The Simulation Logs Page The most recent simulation session appears at the top of the left column The Simulation Log Messages column begins at the top with the initial opening of the simulation at 00 00 00 When either of the lists is...

Page 31: ... contains Product Information and shows your simulator s Product Type the firmware version used in running the system and the version of the software on the tablet Figure 37 The Diagnostics Page The lower panel displays the System Diagnostics In addition to displaying the Simulator Temperature five additional systems are shown with their operational status Properly functioning systems display an O...

Page 32: ...e buttons on the System Diagnostics page to shutdown the simulator or in some cases reboot the simulator to reset the systems Clicking the Shutdown Simulator or Reboot Simulator button opens a message box requesting your verification of the shutdown or reboot Figure 39 Reboot Simulator Verification Message Click the Reboot Simulator or Shutdown Simulator button on the message to complete the actio...

Page 33: ... Menu to open the About page which is comprised of two panels In addition to the OEI Mission Statement this page identifies your product and provides you with basic information about the versions of the software and firmware you re running as well as contact information for Operative Experience Figure 41 The About Page ...

Page 34: ...Inserting the Birth Canal The birth canal is inserted through the slit in the abdomen Prior to insertion be sure the uterine bleeding tubes are on top the birth canal and the two tubes located in the abdomen remain accessible during insertion Figure 42 Preparing the Birth Canal 1 Insert the birth canal cervix first followed by the bladder Figure 43 Inserting the Birth Canal ...

Page 35: ...To move the birth canal into position pull from the vaginal opening Figure 44 Pulling the Uterus into Place 3 Using two hands manipulate the birth canal over the guide pins inside the abdomen so that the cervix fits into the vaginal opening Figure 45 Positioning the Birth Canal ...

Page 36: ...Operative Experience 10002_A 30 All rights reserved Once you ve completed insertion the birth canal should lie within the abdomen and the vaginal opening should reveal the cervix Figure 46 Completing the Birth Canal Placement ...

Page 37: ...gether in a ratio of 1 1 Figure 47 Mixing the Adhesive 3 Cover the simulator with a paper towel or cloth to protect the skin from an accidental coating of adhesive 4 Using the application stick spread the adhesive on the inside of the opening Figure 48 Applying the Adhesive 5 Press the skin against the plastic cervix to secure the skin and present a smooth surface Figure 49 Securing the Skin ...

Page 38: ...ng to match the two red tubes and two yellow tubes Figure 50 Connect the Lines in the Abdomen On the left shoulder attach the four fluid lines Each bag of fluid must be attached to a specific port associated with that fluid The fluid lines are connected matching the color of the fluid to the color bars provided on the shoulder Light Pink upper left Lubricant Yellow lower left Urine Dark Pink upper...

Page 39: ...e onto its associated port Figure 52 Connecting the Fluid Lines on the Left Shoulder Once the fluid lines are all connected Bleeding is controlled by the Instructor tablet All the fluids are pushed through the system using the gravity bags Figure 53 The Left Shoulder Fluid Lines Connected ...

Page 40: ...wer off the simulator by holding the Simulator Power Button for four 4 seconds before turning the simulator back on If you receive a Simulator High Temperature Warning shut down the simulator immediately by clicking the Shutdown Simulator button or by holding the Simulator Power Button for four 4 seconds Click Yes on the verification message to complete the process Let the simulator cool before tu...

Page 41: ...Instructor tablet press the Stop button to discontinue the simulation 2 Confirm the simulator is not operating 3 Close the OEI Sim application 4 Turn down the simulator by holding down the button on the right shoulder for approximately four seconds The blue light flashes on and off momentarily before turning off ...

Page 42: ...odifying the Delivery You have the ability to perform common assisted deliveries using forceps or vacuum devices and trainees can perform Leopold Maneuvers as the Station setting is used to move the baby Figure 56 Delivery Assisted by Suction Any obstetric suction device used during a delivery can be used with the simulator Figure 57 Delivery Assisted by Forceps All types of obstetric forceps can ...

Page 43: ...tely 360 around the baby s neck Cord Prolapsed placing the umbilical cord in front of the baby toward the cervix Positioning the placenta Placenta Previa placing the placenta in front of the baby toward the cervix marginal partial and complete Retained Fragments also known as Retained Placenta having the placenta remain in the birth canal Controlling the Postpartum Hemorrhage Control To simulate a...

Page 44: ... the Internet An internet browser supported by the application o Chrome 63 x x or higher o Firefox 54 x or higher o Safari 11 x x or higher o Edge 41 x or Greater Procedure 1 Connect the computer to the Internet 2 Open your browser and go to www operativeexperience com support to download the latest firmware software OEI file e g OEI_Update_X X X oei for your simulator a Select the Software Downlo...

Page 45: ...erifying that no device is connected to the Simulator Network use your computer s network settings to select the Simulator Network Your computer is no longer connected to the Internet 5 In the browser s URL field type http 10 42 0 1 The main screen of the OEI Sim application appears Figure 59 Open the Menu on the OEI SIM APP Click to open the Menu ...

Page 46: ...gs Figure 60 Click Settings The Settings screen appears displaying a Choose Files button 7 Click the Choose Files button The File Picker for Macs or File Explorer for PCs appears 8 Locate and select the downloaded file Figure 61 Searching for a File Mac OS Figure 62 Searching for a File Windows Click Settings ...

Page 47: ... message appears Figure 64 Click OK on the Connection Error Message 10 Click OK When the update has completed the simulator restarts and a screen appears reminding you to reconnect to the simulator Figure 65 The Emergency Airway Neck Band 11 In your computer s settings verify that you re still connected to the Simulator Network 12 Enter the Simulator IP 10 42 0 1 and click Go to reconnect to the s...

Page 48: ...ht 2018 Operative Experience 10002_A 42 All rights reserved The OEI SIM APP appears Figure 66 Open the Menu on the OEI SIM APP 6 Open the Menu and click About Figure 67 Select About Click About Click to open the Menu ...

Page 49: ...t type is correct by reviewing the following a APP Version b Firmware Version c Product Type 15 Once you ve verified that you re running the updated version close the Internet Browser and disconnect the computer from the Simulator Network 16 Start your tablet for operation of the simulator 17 Join the Simulator Network and start the OEI Sim application 18 Using the About screen on your tablet s OE...

Page 50: ...term storage Place the protective cloth in the case before loading the simulator Figure 69 Placing the Simulator in the Storage Case Wrap the simulator in the cloth and secure the simulator using the straps Tighten the straps to prevent movement but DO NOT OVERTIGHEN Close the case and secure the latches Packing can be added when shipping to further prevent movement Figure 70 Securing the Simulato...

Reviews: