background image

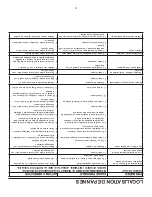
TROUBLE SHOOTING

PROBLEM

POSSIBLE CAUSE

CORRECTIVE ACTION

SMELL OF GAS

SHUT OFF GAS CYLINDER VALVE AT ONCE.
DO NOT USE THE APPLIANCE UNTIL LEAK IS SEALED.

Leak detected at cylinder, 
regulator or other connection.

1. Regulator 

fi

 tting loose.

1. Tighten 

fi

 tting and “Leak Test”. Pg.6

2. Gas leak in hose/regulator or control valves.

2. See authorized service centre.

Flame 

fl

 ashback beneath control 

panel.

1. Venturi blocked.

1. Remove burner, clean venturi. See “Venturi 

Tubes”. Pg.6

Burner will not light.

1. Out of LP Gas.

1. Re

fi

 ll LP Gas Cylinder.

2. Ignitor wire(s) not connected.

2. Connect both main burner and side burner 

electrode wires.

3. Ignitor electrode misaligned on burner.

3. Realign electrode.

4. Ignitor malfunction.

4. Use “Manual Lighting” Procedure.

5. Regulator is not fully connected to the 

cylinder valve.

5. Tighten the regulator hand wheel.

6. Burner valve left open while cylinder valve 

was opened causing excess 

fl

 ow device to 

activate.

6. Close burner and cylinder valves. Open 

cylinder valve slowly, then open burner valve 
to light.

7. A leak in the system causing the excess 

fl

 ow 

device to activate.

7. Leak test connections to determine loose 

fi

 tting. Tighten 

fi

 tting. Leak test system.

8. Venturi blocked.

8. Remove burner, clean venturi. See “Venturi 

Tubes”.

9. Venturi not aligned with valve ori

fi

 ce.

9. Realign venturi to ori

fi

 ce. See “Venturi 

Tubes”.

10. Ori

fi

 ce blocked.

10. Remove burner, clean ori

fi

 ce with a pin or 

fi

 ne wire. Do not attempt to drill ori

fi

 ce.

11. Hose is twisted.

11. Straighten hose. Keep away from bottom 

casting.

Decreasing heat, “popping 
sound”.

1. Out of LP Gas.

1. Re

fi

 ll LP Gas Cylinder.

2. Venturi blocked.

2. Remove burner, clean venturi. See “Venturi 

Tubes”.

Hot spots on cooking surface.

1. Venturi blocked.

1. Remove burner, clean venturi. See “Venturi 

Tubes”.

“Flare-ups” or grease 

fi

 res.

1. Excessive grease buildup.

1. See “Maintenance”.

2. Excessive heat.

2. Turn burner controls to a lower setting.

Humming noise from regulator.

1. Cylinder valve turned on too quickly.

1. Turn cylinder valve on slowly.

Yellow Flame.

1. Some yellow 

fl

 ame is normal. If it becomes 

excessive the venturi may be blocked.

1. Remove burner, clean venturi. See “Venturi 

Tubes”.

2. Burner ports blocked.

2. Remove burner & clean with soft bristle 

brush.

Inside of lid appears to be 
peeling.

1. This is a build up of grease. The inside of the 

lid is not painted.

1. Clean with stiff bristle brush or scraper.

11

Summary of Contents for ANSI Z21.89a-2008/CSA 1.18a-2008ANSI Z21.58a-2008/CSA 1.6a-2008

Page 1: ...APPLIANCE FOLLOW ALL WARNING AND INSTRUCTIONS WHEN USING THE APPLIANCE KEEP THIS MANUAL FOR FUTURE REFERENCE 1 800 265 2150 info omcbbq com PORTABLE GAS BARBECUES CONTENTS SAFETY 2 INSTALLATION 2 L P...

Page 2: ...California Health and Safety Code Sec 25249 6 1 In the U S A this appliance must be installed in accordance with the local code and the relevant national code ANSI Z223 1 NFPA 54 Latest Edition Nation...

Page 3: ...tighten the connection Using a wrench could damage the regulator coupling and could cause a leak QCC CONNECTION 1 Be sure cylinder valve and appliance valves are off 2 Place full LP gas cylinder in L...

Page 4: ...vapor withdrawal The cylinder must include a collar to protect the cylinder valve The cylinder must be installed as per assembly instructions Never fill the cylinder beyond 80 full A fire causing dea...

Page 5: ...regulator and the appliance valve This device will activate if the cylinder valve is opened while the appliance valves are open Be sure the appliance valves are off before the cylinder valve is opened...

Page 6: ...ve tighten the connection and retest Step 5 9 If the leak persists contact your barbecue dealer for assistance Do not attempt to operate appliance if a leak is present KEEP VENTURI TUBE CLEAN Blockage...

Page 7: ...atch follow steps 1 thru 8 above Insert lighted match through the cooking grid using match stick holder Push and turn control knob to HIGH Burner should ignite within 5 seconds 10 CAUTION Check your b...

Page 8: ...s Your gas grill is designed for use with a vaporization system included Do not use lava rock ceramic briquets or any other vaporization system other than the one that came with the barbecue COOKING T...

Page 9: ...th vegetable or olive oil to prevent food from sticking to the grid 6 Hold the salt when cooking meats on the barbecue The meat will stay juicier if the salt is added after cooking 7 To prevent steaks...

Page 10: ...e cooking grid with aluminum foil shiny side down Ignite the burner operate the barbecue on HIGH with the lid closed for 10 minutes or until smoking stops Turn the gas cylinder valve to OFF turn the c...

Page 11: ...device to activate 7 Leak test connections to determine loose fitting Tighten fitting Leak test system 8 Venturi blocked 8 Remove burner clean venturi See Venturi Tubes 9 Venturi not aligned with val...

Page 12: ...rs made of stainless steel depends almost entirely on proper use cleaning and maintenance This warranty does not cover failure due to improper use and maintenance PORCELAIN COOKING GRID Some OMC cook...

Page 13: ...re pour installation ou r parations Les frais de service li s la r paration domicile Responsabilit pour les dommages indirects BR LEUR La dur e de vie des br leurs OMC en acier inoxydable d pend presq...

Page 14: ...il y a des fuites aux connexions pour d terminer si elles sont assez serr es Reserrez V rifi er s il y a des fuites 8 Venturi bloqu 8 Enlever le br leur nettoyer le tube venturi Voir nettoyage et ent...

Page 15: ...ce qu il arr te de faire de la fum e Fermez le robinet de la bonbonne et ensuite les boutons de contr le Lorque le barbecue est refroidi enlevez le papier d aluminium le vaporizer grattez les c t s e...

Page 16: ...le attacher les ailes et les pattes serrement pour viter contact avec la l chefrite 4 Dans la plupart des cas la cuisson au tournebroche est meilleure avec le couvercle ferm et la chaleur r duite 5 Av...

Page 17: ...tte temp rature est utilis e pour le r chauffement du gril et pour la cuisson de steaks et des c telettes R glage moyen La temp rature la surface des grilles est d environ 450 F 230 C avec le couvercl...

Page 18: ...l orifi ce d allumage situ en bas droite du bo tier Pousser le bouton de r glage de droite HIGH Le br leur devrait s allumer dans les 5 prochaines secondes Apr s avoir allum le br leur droit pousser l...

Page 19: ...ne fuite est d tect e fermer le robinet d arr t de la bonbonne reserrer la connexion et retester Etape N 5 9 Si la fuite persiste communiquez avec votre d taillant de barbecues pour assistance Ne pas...

Page 20: ...binet de la bonbonne est ouvert quand les contr les du barbecue sont d ja ouverts Pour emp cher l activation accidentelle assurez vous que les contr les du barbecue sont en position fermer avant que l...

Page 21: ...d un robinet de s ret et de d charge directement reli la phase gazeuse l int rieur du r servoir MANUTENTION 1 Les r glements gouvernementaux interdisent l exp dition de r servoirs de propane pleins Il...

Page 22: ...d alimetation par bouteille de gaz con u pour l limination de la vapeur En soulevant la bouteille tenez la poignee la plus proche de la bouteille de gaz d un main enfoncez la bouteille de propane dan...

Page 23: ...oute surface chauff e AVERTISSEMENT Les combustibles qui sont utilis s dans les appareils qui fonctionnent l huile ou au gaz et leurs produits de combustion contiennent des produits chimiques qui selo...

Page 24: ...INSTRUCTIONS AVANT L ASSEMBLAGE ET L UTILISATION DE CELUI CI SUIVRE TOUS LES AVIS DE PR CAUTIONS ET INSTRUCTIONS LORSQUE VOUS UTILISEZ L APPAREIL CONSERVER CE MANUEL POUR R F RENCE FUTURE TABLE DES M...

Reviews: