Chapter 2: Setting up the System
HOBO U30 Remote Monitoring System User’s Guide
9
If you will be using the optional Smart Sensor expander board (S-ADAPT-
X5-10), you may install it at this time if necessary and plug in additional
Smart Sensors as described in the next section, or wait until you assemble
the system.
If you are using the optional Analog Sensor Port, you will need to configure
that first using HOBOware Pro. See page 32 for details.
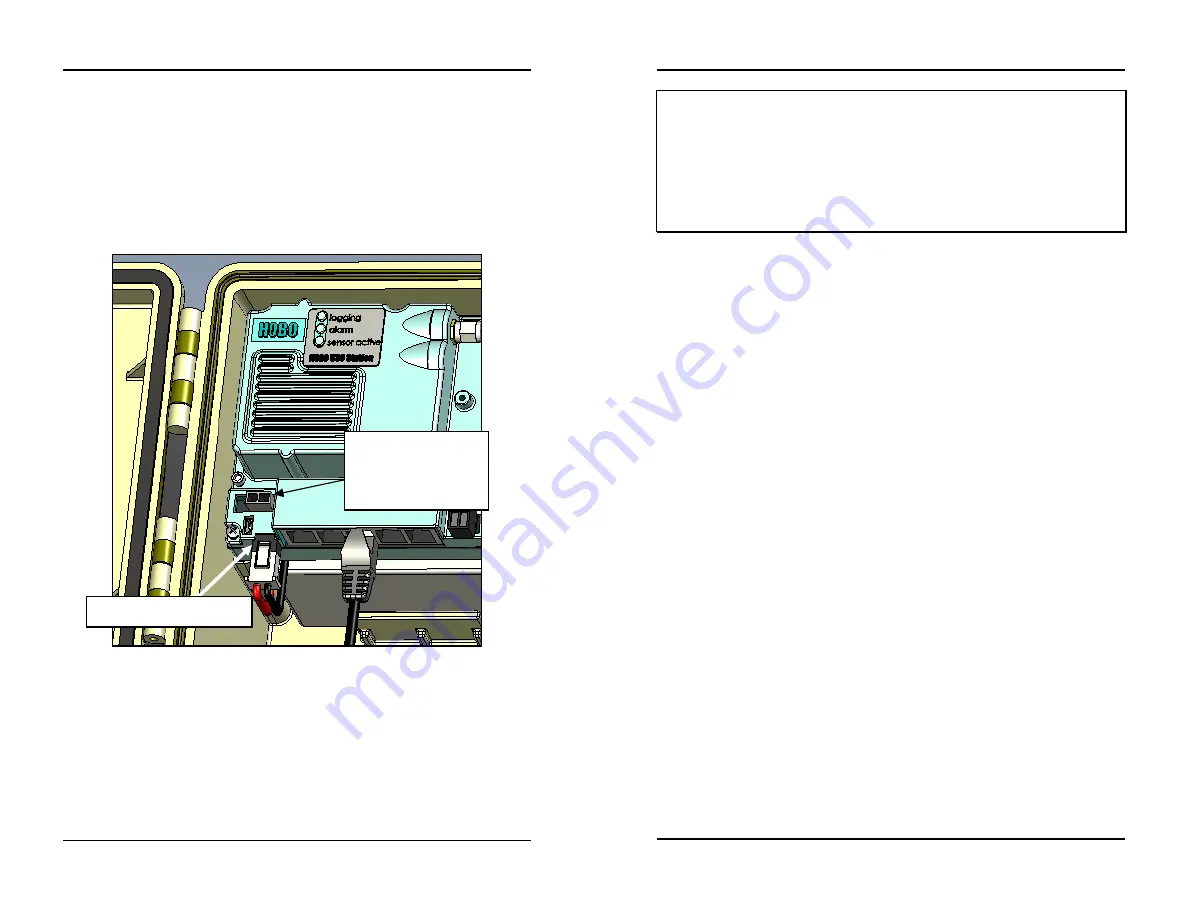
Step 7: Plug in the battery.
Connect the built-in battery cable to the battery
(you do not need the solar panel or AC adapter for this test launch).
Figure 2: Battery cable plugged in
Step 8: Wait for the first connection and check the data.
After the battery
is plugged in, the HOBO U30 Station will automatically connect to the
cellular network and communicate with HOBOlink.com. This process may
take a few minutes. After the HOBO U30 Station completes its first
connection to HOBOlink.com, make sure the data for the Smart Sensors is
there in
HOBOlink under Latest Conditions
as expected. Let the HOBO U30
Station connect a couple of times checking the data after each connection.
Plug in the battery here
Do not plug in the
battery here (this is
for solar panel or
AC adapter)
Chapter 2: Setting up the System
10
HOBO U30 Remote Monitoring System User’s Guide
Important: Once you are satisfied everything is working properly, you may
want to change the logging interval in the Launch Configuration
and the connection interval in the Readout Configuration to a
slower schedule to preserve battery power (see
Maximizing battey
lif
e on page 41). If you are not deploying the system immediately,
you should also disconnect the battery to save battery power and
reduce cellular transmission costs. You can disconnect the
sensors if desired for transporting the system to the field.


