


67
Using a Macro function
Programming the Direct Macro function
With the direct macro function, you can program a series of button
operations as a macro into the DIRECT MACRO button so the
macro can be executed with just one touch. Note that for the direct
macro function, only one macro can be programmed. For example,
to program the macro described on the previous page for the
DIRECT MACRO button, perform the steps given below.
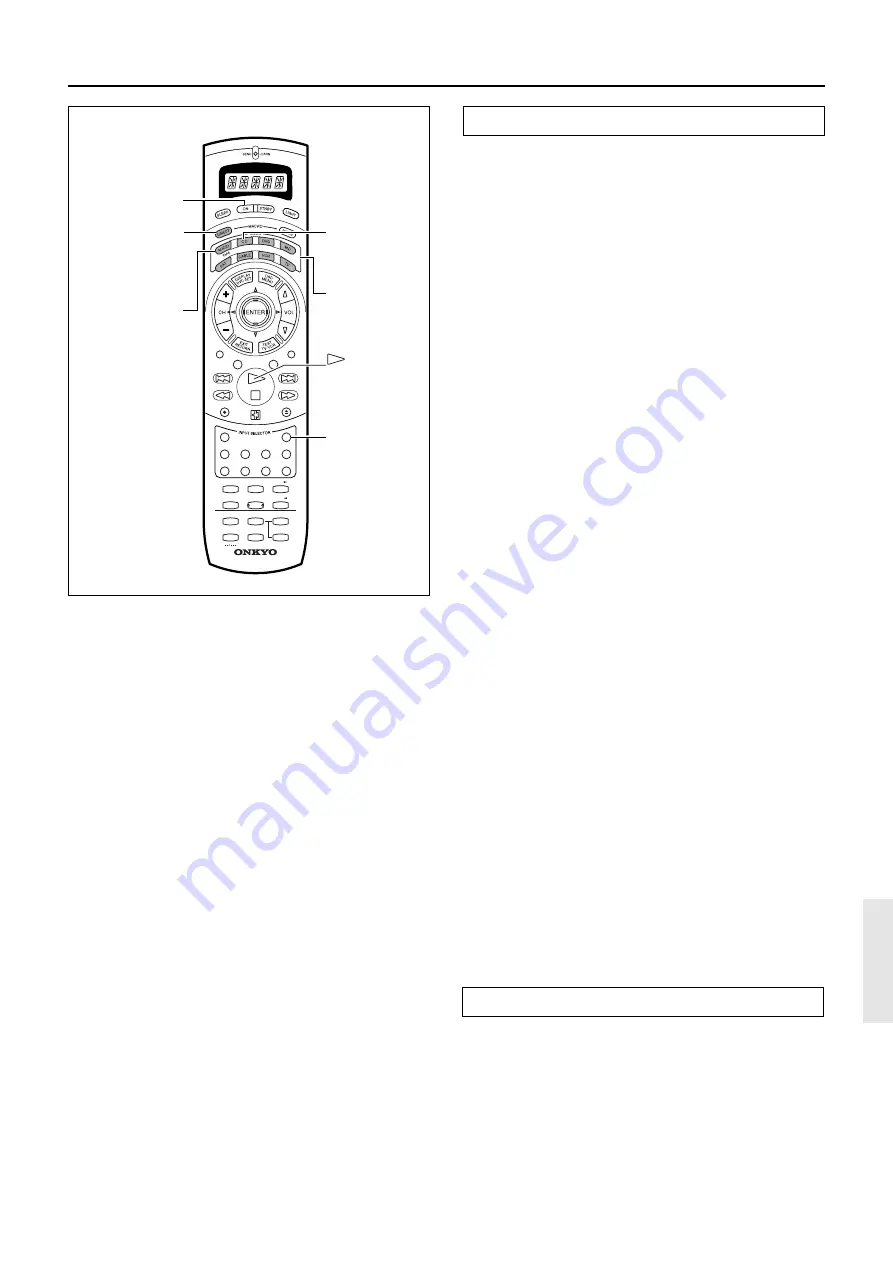
1. Press and hold down any one of the eight
MODE buttons, press the DIRECT MACRO
button, and then release both buttons.
When you press the MODE button, the SEND/LEARN
indicator lights and that mode appears in the display. When
you press the DIRECT MACRO button, the indicator turns off.
When you release the buttons, the indicator flashes briefly and
then lights again and “M 01” appears in the display.
2. Press the operation buttons you wish to
program in order (in this case,
press AUDIO/TAPE MODE
→
ON
→
CD (INPUT
SELECTOR)
→
CD MODE
→
playback button).
When you press each button, the SEND/LEARN indicator
turns off and the display changes from “M 01”
→
“M 02”
→
“M 03”
→
etc. When you release the button, the indicator
lights.
3. Press the DIRECT MACRO button to complete
the procedure.
The SEND/LEARN indicator flashes twice slowly and
“SAVED” appears in the display.
4. Check to see if the macro has been properly
programmed.
Notes:
• You may program up to 16 button operations into each macro
function. If you try to program a 17th operation, it will be
ignored, “SAVED” appears in the display, and programming
is stopped.
• If no button is pressed for more than 30 seconds during the
programming, the SEND/LEARN indicator flashes three
times quickly, “ERROR” appears in the display, and the
remote controller exits the programming mode. Resume from
Step 1.
• If you perform an invalid operation during programming, the
SEND/LEARN indicator flashes three times quickly,
“ERROR” appears in the display, and the remote controller
exits the programming mode. Resume from Step 1.
Running a Direct Macro function
Perform the procedure below to run a direct macro function that
you have programmed into the remote controller. After
programming a direct macro, you should always run it at least once
to make sure that it has been programmed properly.
1. Point the remote controller at the TX-DS787
and press the DIRECT MACRO button.
It may take a while for the macro to finish transmitting, so be
sure to continue pointing the remote controller at the device
until the SEND/LEARN indicator turns off.
Tip:
• If you erase or change the command of a button programmed
in the direct macro, that operation of that button will no longer
work in the macro. In this case, it will be necessary for you to
reprogram the direct macro in order to avoid incorrect
operation.
• The codes programmed into a direct macro will be transmitted
at an interval of 0.5 seconds. However, some devices may not
be able to complete one operation in 0.5 seconds and may miss
the next code. In this case, after pressing one operation button,
you can press the same MODE button again before pressing
the next operation button to add another 0.5 seconds between
the two operations.
OPEN/CLOSE
REC
AUDIO
MUTING
DISC
TRACK
DVD
CD
PH
TUN
T2
T1
V1
STEREO
1
2
3
6
5
4
7
+ 10
0
ENT
8
9
SURROUND
THX
DSP
LEVEL +
CH SEL
Re-EQ
LEVEL –
DIMMER
HOME THEATER CONTROLLER
RC-390M
LATE NIGHT
DIRECT
DSP
V2
V3
V –
DIRECT
MACRO
CD MODE
AUDIO/TAPE
MODE
ON
(CD playback)
CD
(INPUT
SELECTOR)
MODE buttons


