background image

„

Unterstützung für Spotify Connect

Spotify Connect kann durch Aktualisierung der Firmware 
des Geräts unterstützt werden. Klicken Sie einfach auf 
das Symbol Connect und wählen Sie das Gerät auf 
dem Wiedergabe-Bildschirm der Anwendung Spotify, 
um hochqualitatives Musik-Streaming zu genießen. Zur 
Aktivierung von Spotify Connect, installieren Sie die 
Anwendung Spotify zuerst auf Ihrem Smartphone oder 
Tablet. Erstellen Sie dann einen Spotify Premium-Account.

¼

Die Software Spotify benötigt Lizenzen dritter Parteien, die Sie hier finden:
www.spotify.com/connect/third-party-licenses

Hinweise zur Verwendung der Multizonenfunktion

  Zum Genuss von Spotify Musik in einem anderen Raum, 

wählen Sie „NET“ als Eingang für den anderen Raum aus.

  Lautstärken-Einstellung mit der Anwendung 

Spotify ist nur für Ausrüstung möglich, die mit den 
Lautsprecheranschlüssen ZONE2/3 verbunden ist (nur 
kompatibles Modell). Wird für die Verbindung ein anderer 
Anschluss verwendet, passen Sie die Lautstärke an 
der Audio-Ausrüstung an, die in einem anderen Raum 
platziert ist.

  Zum Genuss von Spotify Musik im Hauptraum nach dem 

Abspielen von Spotify in einem anderen Raum, wählen 
Sie „NET“ als Eingang für den Hauptraum aus.

Auto Power Ein

  Einschalten von Netzwerk-Standby ermöglicht Ihnen die 

Verwendung der Auto Power Ein-Funktion, wenn Sie die 
Anwendung Spotify verwenden.

„

Ondersteuning voor Spotify Connect

Spotify Connect kan worden ondersteund door de 
firmware van het toestel bij te werken. Klik simpelweg op 
het pictogram Connect en selecteer het toestel op het 
weergavescherm van de Spotify-toepassing om te genieten 
van hoogwaardige muziekstreaming. Om Spotify Connect 
in te schakelen, installeert u eerst de Spotify-toepassing op 
uw smartphone of tablet. Maak vervolgens een premium 
account voor Spotify.

¼

De software van Spotify is onderworpen aan licenties van derde partijen 
die u hier terugvindt: 
www.spotify.com/connect/third-party-licenses

Opmerkingen voor gebruik van de multi-zonefunctie

  Om te genieten van muziek van Spotify in een aparte 

ruimte, selecteert u „NET” als de invoer van de aparte 
ruimte.

  Volumeregeling met de Spotify-toepassing is alleen 

mogelijk voor de apparatuur verbonden met de 
ZONE2/3-luidsprekeraansluitingen (alleen compatibel 
model). Als een andere aansluiting wordt gebruikt 
voor de verbinding, regel het volume dan op de 
audioapparatuur in een aparte ruimte.

  Om te genieten van muziek van Spotify in de 

hoofdruimte na het afspelen van Spotify in een 
aparte ruimte, selecteert u „NET” als de invoer van de 
hoofdruimte.

Automatisch Inschakelen Aan

  Als u het netwerk in stand-by zet, kunt u de functie 

Automatisch Inschakelen Aan gebruiken wanneer u de 
Spotify-toepassing gebruikt.

„

Stöd för Spotify Connect

Spotify Connect stöds genom att uppdatera enhetens 
firmware. Klicka på Connect-ikonen och välj enheten 
på Spotify-applikationens uppspelningsskärm för 
att njuta av högkvalitativ musik-streaming. För att 
aktivera Spotify Connect, måste du först installera 
Spotify-applikationen på din smartphone eller surfplatta. 
Skapa sedan ett Spotify-premiumkonto.

¼

Spotify-programvaran omfattas av tredjepartslicenser som kan hittas här: 
www.spotify.com/connect/third-party-licenses

Anmärkningar för användning av 
multizonsfunktionen

  För att uppleva Spotify-musik i ett annat rum, välj ”NET” 

som inmatning för det andra rummet.

  Justering av volymen för Spotify-applikationen är 

endast möjlig för utrustningen som är ansluten till 
ZONE2/3-högtalarkontakterna (endast kompatibla 
modeller). Om någon annan kontakt används för 
anslutningen, justera volymen på ljudutrustningen i det 
andra rummet.

  För att uppleva Spotify-musik i huvudrummet efter att 

du har spelat Spotify i ett annat rum, välj ”NET” som 
ingångskälla för huvudrummet.

Automatiskt strömpåslag

  Genom att slå på nätverks-standby kan du använda 

funktionen för automatiskt strömpåslag när du använder 
Spotify-applikationen.

„

Spotify Connect -tuki

Spotify Connect voidaan tukea päivittämällä laitteen 
ohjelmisto. Napsauta Connect-kuvaketta ja valitse 
laite Spotify-sovelluksen toistonäytössä nauttiaksesi 
korkealaatuisesta musiikin suoratoistosta. Ota 
Spotify Connect käyttöön asentamalla Spotify-sovellus 
ensin älypuhelimeesi tai tablettiisi. Luo sitten Spotify 
Premium -tili.

¼

Spotify-ohjelmistoon sovelletaan kolmannen osapuolen lisenssejä, jotka 
löytyvät täältä: 
www.spotify.com/connect/third-party-licenses

Huomautuksia monivyöhyketoiminnon käytöstä

  Nauti Spotify-musiikista erillisessä huoneessa 

valitsemalla erillisen huoneen tulolähteeksi ”NET”.

  Äänenvoimakkuuden säätö Spotify-sovelluksella 

on mahdollista vain laitteella, joka on kytketty 
ZONE2/3-kaiutinliitäntään (vain yhteensopiva malli). Jos 
jotain muuta kaiutinpäätettä käytetään kytkemisessä, 
säädä äänenvoimakkuutta äänentoistolaitteesta joka 
sijaitsee erillisessä huoneessa.

  Kun haluat nauttia Spotify-musiikista päähuoneessa 

sen jälkeen kun Spotify-musiikkia on toistettu erillisessä 
huoneessa, valitse ”NET” tulolähteeksi päähuoneessa.

Automaattinen virta päälle -toiminto

 Kytkemällä verkon valmiustilan päälle voit käyttää 

automaattista virta päälle -toimintoa, kun käytät 
Spotify-sovellusta.

Summary of Contents for PR-SC5530

Page 1: ...PR SC5530 AV CONTROLLER Basic Manual Advanced Manual found here http www onkyo com manual prsc5530 adv en html En ...

Page 2: ...hnology for HDMI video upscaling r All HDMI jacks support displays of 4K resolution at 60 Hz r Supports the HDMI Through function which allows transmission from playback devices to the TV in standby state r Supports HDCP2 2 a strict copy protection for providing high quality content HDMI IN3 OUT MAIN only r Supports ARC Audio Return Channel r Supports USB storage playback r Supports variety of net...

Page 3: ... Channel compatible TV simply making this connection enables transmission of TV sound to a power amplifier connected with this unit If your TV does not support ARC you need in addition to the HDMI OUT MAIN jack connection a digital optical cable connection between the digital audio out optical jack of the TV and the DIGITAL IN OPTICAL jack of the unit or an analog audio cable connection between th...

Page 4: ...lanced connection Use an XLR balanced cable for connection with a player An XLR balanced cable which is less affected by noise when extended over a long distance is suitable for long distance transmission Refer to the position indication for connection beside the BALANCE INPUT jack You have to make an appropriate setting to play audio of the device connected to this jack For more information see t...

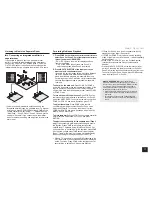
Page 5: ...nt or rear wall There are other types of Height speakers Wide speakers Placing IJ speakers makes the front sound field even wider It also give smoother transitions between front and back surround sounds Height speakers arrangements Dolby Atmos There are several types of height speakers other than those mentioned in the previous section See the next section Combination patterns for Height speakers ...

Page 6: ... Use Dolby Enabled Speaker Surround Dolby Enabled Speaker Back Height speakers1 Dolby Enabled Speaker Surround Height speakers 2 cannot be used Height speakers1 Dolby Enabled Speaker Back Height speakers 2 cannot be used r When front speakers are bi amp connected you can select a pattern for Height speakers 2 from the following options Not Use Front High Top Front Top Middle Dolby Enabled Speaker ...

Page 7: ... power amplifier r If you use one subwoofer system only connect it to the SW1 PRE OUT RCA jack Connection to the PRE OUT XLR jack Connect the XLR balanced input jack of your subwoofer and the SUBWOOFER 1 2 PRE OUT XLR jack of the unit with an XLR balanced cable Subwoofer with built in power amplifier r If you use one subwoofer system only connect it to the SUBWOOFER 1 PRE OUT XLR jack Connecting t...

Page 8: ... and DLNA by connecting the unit to LAN The unit can be connected to the router with an Ethernet cable or to the wireless LAN router with Wi Fi connection In case of wired connection connect the Ethernet cable to the Ethernet port See 4th Step Network Connection of Step 2 Setting Up Internet radio Router PC NAS Headphones connection QPPGEV UVGTGQ JGCFRJQPGU YKVJ C UVCPFCTF RNWI KPEJ or ø 6 3 mm to...

Page 9: ...tup and press ENTER Select the language first In the next screen the summary of the setup wizard as below will be displayed Select Yes in this screen and press ENTER on the remote controller Welcome to initial setup Have you connected all the speakers and devices Before starting please connect speakers and sources Now would you like to start initial setup 1st Step AccuEQ Room Calibration 2nd Step ...

Page 10: ... speaker If this happens THX recommends setting the speakers and the subwoofer manually 7 When Please unplug setup microphone is displayed disconnect the microphone 2nd Step Source Connection You can check whether or not each input source is connected correctly 1 When the Source Connection start screen is displayed select Yes Continue with the cursors and press ENTER This step will start to check ...

Page 11: ...method Enter Password Enter the password of the access point to establish connection 1 Select Enter Password with the cursor buttons and press ENTER 2 Enter the password on the keyboard screen select OK with the cursor buttons and press ENTER Select Shift and press ENTER to toggle between upper and lower case Select or and press ENTER to move the cursor to the selected direction Select Back Space ...

Page 12: ...PLAYLIST PLAYLIST SETUP RETURN TV REMOTE MODE INPUT SELECTOR HOME PREV CH MENU GUIDE TOP MENU RC 884M RECEIVER SOURCE REPEAT RANDOM MODE SEARCH ZONE 3 GREEN 2 RED REMOTE MODE SLEEP VOL INPUT 1 2 3 4 5 6 7 8 9 0 10 CLR ENTER ALBUM CH DISC Q GAME TUNER TV CD BD DVD PC AUX PHONO STB DVR CBL SAT MUTING MODE RECEIVER TV VOL MOVIE TV MUSIC THX GAME ALL OFF MY MOVIE MY TV MY MUSIC BLUETOOTH USB NET 7 8 9...

Page 13: ...ep the clear midrange and effectively enhance the bass Muting Temporarily Press MUTING on the remote controller To cancel the muting press MUTING again or press VOLj l Changing the Display Brightness Press DIMMER on the remote controller The display brightness changes each time you press the button Checking the Input Format Press DISPLAY on the remote controller several times to switch the display...

Page 14: ...a main window current input video and sub windows other input videos To switch the current input select the desired sub window with the cursor buttons and press ENTER r A black sub window is shown for the input with no video signals r InstaPrevue cannot be selected if the video is being input from HDMI IN 5 6 or 7 or if there is no signal from the input currently selected r If Zone2 Monitor Out is...

Page 15: ...y set to each input r The setting is effective in the signals of 48 kHz or less The setting is not effective in the bitstream signals r It cannot be set if the listening mode is Pure Audio or Direct Re EQ Re EQ THX Adjust the soundtrack that was processed to enhance its high pitch range in order to make it suitable for home theater r In Re EQ the following listening modes can be used Dolby Digital...

Page 16: ...t audio sources for the main room and separate room For example if NET has been selected in the main room and then USB is selected as playback source in the separate room the input in the main room will change to USB accordingly r When listening to AM FM broadcasting you cannot select different stations for the main room and separate room Therefore broadcasting of the same station will be heard in...

Page 17: ...within 8 seconds press OFF To adjust the volume Press ZONE on the remote controller several times to select Zone 2 or Zone 3 and adjust with VOLj l To control on the main unit press ZONE 2 or ZONE 3 and within 8 seconds adjust with the MASTER VOLUME control To mute temporarily Press ZONE on the remote controller several times to select Zone 2 or Zone 3 and press MUTING To adjust the sound quality ...

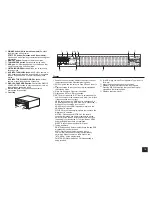
Page 18: ... standby mode when the HDMI Through network standby or Wakeup from Bluetooth function is enabled G PHONES jack Stereo headphones with a standard plug are connected H ZONE 2 button ZONE 3 button and OFF button Controls the multi zone function I TONE and Tone Level buttons Adjusts the high tone and low tone J MONITOR OUT button Allows you to select the HDMI jack to output the video input signals tha...

Page 19: ...ic Optimizer is enabled 5 Lights when NET or USB is controlled 6 NET Stays lit when the NET input is selected and the unit is connected to the home network LAN It will flash if the connection is not correct USB Stays lit when the USB input is selected and a USB storage device e g USB memory is connected It will flash if the connection is not correct HDMI Stays lit when HDMI signals are input and t...

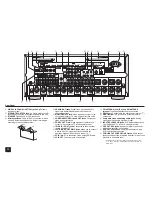
Page 20: ... jacks Allows you to connect a device with 12V trigger input jack to enable link operation between the device and the unit G PC IN jack PC is connected via an analog RGB cable H AC INLET The power cord is connected I 06 00 LCEM ŝ CPF 06 00 terminal The supplied antennas are connected J RS232 port Connected to the home control system K GND terminal The ground wire of the turntable is connected L Co...

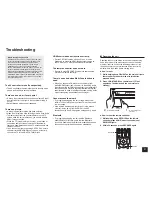
Page 21: ...roller does not work r Be sure to press RECEIVER first before operating the unit with the remote controller There is no sound when Multi Zone function is used r When you connect a CD player or such other player without HDMI output jack connect it to the analog audio input jacks of the unit Multi zone output is not possible if the connection is only with digital optical cable or digital coaxial cab...

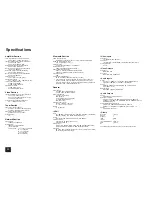
Page 22: ...g on factors such as obstacles between devices magnetic fields around a microwave oven static electricity cordless phone reception sensitivity antenna s performance operating system software application etc General Power Supply AC 120 V 60 Hz North American AC 220 240 V 50 60 Hz Others Power Consumption 0 6 A North American 60 W Others 0 1 W Stand by North American 0 13 W Stand by Others 55 W No s...

Page 23: ...otected by certain intellectual property rights of Microsoft Use or distribution of such technology outside of this product is prohibited without a license from Microsoft Windows and the Windows logo are trademarks of the Microsoft group of companies QR Code is a registered trademark of DENSO WAVE INCORPORATED Safari is a trademark or registered trademark of Apple Computer Inc in the United States...

Page 24: ...e teistele asjakohastele sätetele ΜΕ ΤΗΝ ΠΑΡΟΥΣΑ Ο ΚΑΤΑΣΚΕΥΑΣΤΗΣ Onkyo Corporation ΔΗΛΩΝΕΙ ΟΤΙ PR SC5530 ΣΥΜΜΟΡΦΩΝΕΤΑΙ ΠΡΟΣ ΤΙΣ ΟΥΣΙΩΔΕΙΣ ΑΠΑΙΤΗΣΕΙΣ ΚΑΙ ΤΙΣ ΛΟΙΠΕΣ ΣΧΕΤΙΚΕΣ ΔΙΑΤΑΞΕΙΣ ΤΗΣ ΟΔΗΓΙΑΣ 1999 5 ΕΚ Por la presente Onkyo Corporation declara que este PR SC5530 cumple con los requisitos esenciales y otras exigencias relevantes de la Directiva 1999 5 EC Par la présente Onkyo Corporation déclare...

Page 25: ...diante la actualización del firmware de la unidad Simplemente haga clic en el icono Connect y seleccione la unidad en la pantalla de reproducción de la aplicación Spotify para disfrutar de transmisión de música de alta calidad Para habilitar Spotify Connect instale primeramente la aplicación Spotify en su teléfono inteligente o tableta A continuación cree una cuenta Spotify premium El software de ...

Page 26: ...otify in een aparte ruimte selecteert u NET als de invoer van de hoofdruimte Automatisch Inschakelen Aan Als u het netwerk in stand by zet kunt u de functie Automatisch Inschakelen Aan gebruiken wanneer u de Spotify toepassing gebruikt Stöd för Spotify Connect Spotify Connect stöds genom att uppdatera enhetens firmware Klicka på Connect ikonen och välj enheten på Spotify applikationens uppspelning...

Reviews: