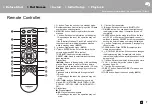
> Install
> Playback
Supplementary information | Advanced Setup | Others
4
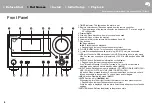
Front Panel
Part Names
1. TIMER indicator: This lights when the alarm is set.
2. Remote control sensor: Receives signals from the remote controller.
0
The signal range of the remote controller is within about 23
y
/7 m, at an angle of
30° to either side.
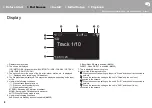
3. Display (
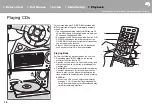
4. Disc tray: Place discs here. 8-cm discs can also be used.
5.
<
button: Open or close the disc tray.
6. Volume dial: Adjust the volume. Adjust between 0 and 50.
7. Play buttons:
∫
: Stops playback.
1
/
;
: Plays or pauses playback.
0
Depending on the input, the operation may not start.
8.
Í
ON/STANDBY button: Turns the unit on or into standby mode.
9.
jack: Stereo headphones with a mini plug (Ø1/8
z
/3.5 mm) are connected.
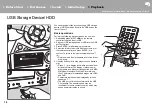
10.USB port: Connect a USB storage device or HDD (hard disk drive) to play music
files. You can also supply power (maximum 5 V/0.5 A) to USB devices with a USB
cable.
11. DISPLAY button: Switches the information on the display.
0
Depending on the input, the operation may not start.
If the "Bluetooth Wakeup / Clock Call" setting is On, then the current time is
displayed when pressed while in standby mode. (
12.INPUT button: Switches the input to be played. (CD / NETWORK / BLUETOOTH /
USB / COAXIAL / OPTICAL / LINE / DAB (CS-N575D) / FM)
button: When pressed for about 5 seconds, the buttons on the main unit are
locked and unable to be operated. To unlock, press and hold again.
13.MENU button: Displays the menu. (
14.ENTER button, skip (
:
/
9
) dial:
When playing, turn left or right to select the folder or file, then press to confirm.
0
Depending on the input, the operation may not start.
While the menu is displayed, turn the dial to select items and press to confirm the
settings.
15.RETURN button: Returns the display to the previous state.


