4
5
All glued fi ttings and pipe work should be allowed to dry to atmos-
phere for 24 hours before closing installation. Failure to do so could
cause injury or installation failure.
INSTALLATION
FILTER INSTALLATION
1. Place fi lter on solid Horizontal surface. (Concrete slab recommend.)
NOTE: Allow suffi cient height clearance for cartridge removal!
PCF60 = 330mm
PCF75 = 450mm
PCF100 = 650mm
PCF150 = 450mm
PCF180 = 450mm
2. Fit interconnecting plumbing between pump and fi lter.
Pump discharge should be plumbed up to the outlet marked ‘IN’
Outlet marked ‘OUT’ should return to Pool or Spa
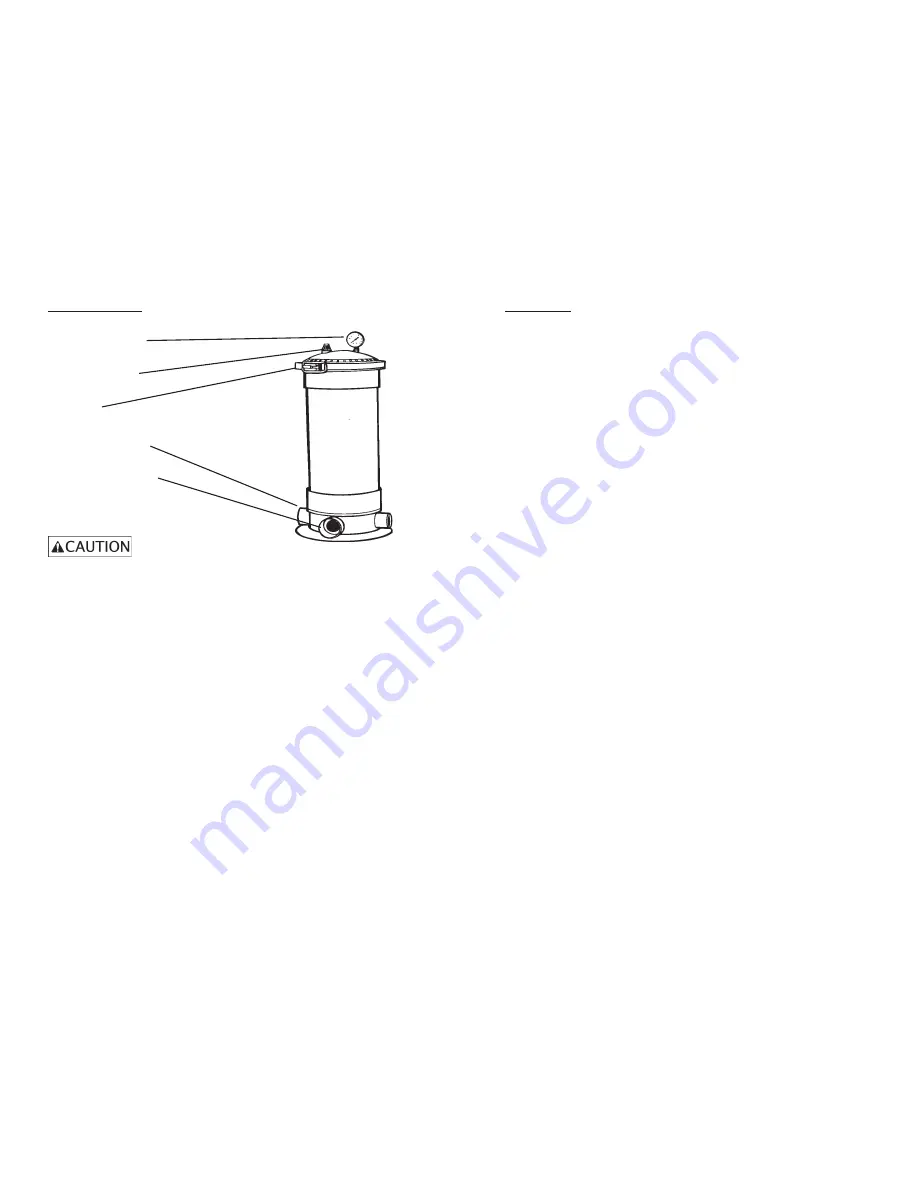
3. Fit manual air bleed and pressure gauge to top of fi lter.
4. Fix fi lter base to foundation surface via holes on ring on base.
5. Blank off unused inlet and outlet connections using blanks provided
NOTE:
1. Ensure the fi lter clamp band is correctly fi tted and fi rmly in place.
Failure to fi t clamp correctly may result in fi lter lid lifting off in a violent move-
ment.
2. If you are not familiar with fi tting of fi lter clamp band - do not attempt this
operation - consult your pool serviceman or ring your local pool store.
Pressure Guage
Air Relief Valve
Inlet Connection
Outlet Connection
Clamp
Operation
1. Ensure pool is fi lled with water - water level must be ¾ of the way up to skimmer
opening.
2. Open manual air bleed at fi lter, air will be expelled from the fi lter as it fi lls with water
from the pool. Close manual air bleed when water is released.
3. Switch on Pump - ensure water fl ows freely through system and back to pool.
4. Record the startup pressure - when a 70 kPa rise from start up pressure is detected
clean the cartridge.
5. To clean the cartridge refer service and maintenence
6. If the time period between fi lter cartridge "cleans" becomes progressively shorter
it maybe necessary to "soak" or clean the cartridge with a propriety cleaner.
7. If the cartridge element is mechanically damaged then correct fi ltration conditions
cannot be maintained - the cartridge element must be replaced. Periodic replacement
approximately every 24 months is recommended.
8. For Spa Pools, with hot water and higher bather loads, clean cartridge on regular
basis - minimum fortnightly.
Cartridge Maintenance
To Clean the cartridge.
A) Switch off the pump and isolate from mains power.
B) Shut off any valves to isolate the fi lter from the plumbing system.
C) Release the air relief valve to relieve any built up pressure in the fi lter
housing
D) Remove fi lter clamp ring - take care to note how to reassemble the
clamp ring correctly
E) Lift cartridge element out of housing and hose clean with a strong jet
from a garden hose.
- If the time period between fi lter cartridge ‘cleans’ becomes
progressively shorter it maybe necessary to ‘soak’ the
cartridge with a propriety cleaner.
F) Replace cartridge Element and refi t lid and fi lter clamp ring.
G) Open any previously closed valves and follow start up fi lter procedure.


