background image

Quick Start

Quick Start Instructions

1. Plug the AC adapter into the Digital Photo Frame and plug it into a wall outlet.

2. Insert a memory card into the slot.

Memory cards that can be used in this device are: Secure Digital™, MultiMedia Card™, 
Memory Stick™, Memory Stick Duo™ and Memory Stick Pro™.

3. Turn on the Power Switch located on the side of the Digital Photo Frame.

4.  Once  the  Digital  Photo  Frame  has  been  turned  on,  the  demo  slide  show  will  run 

automatically.

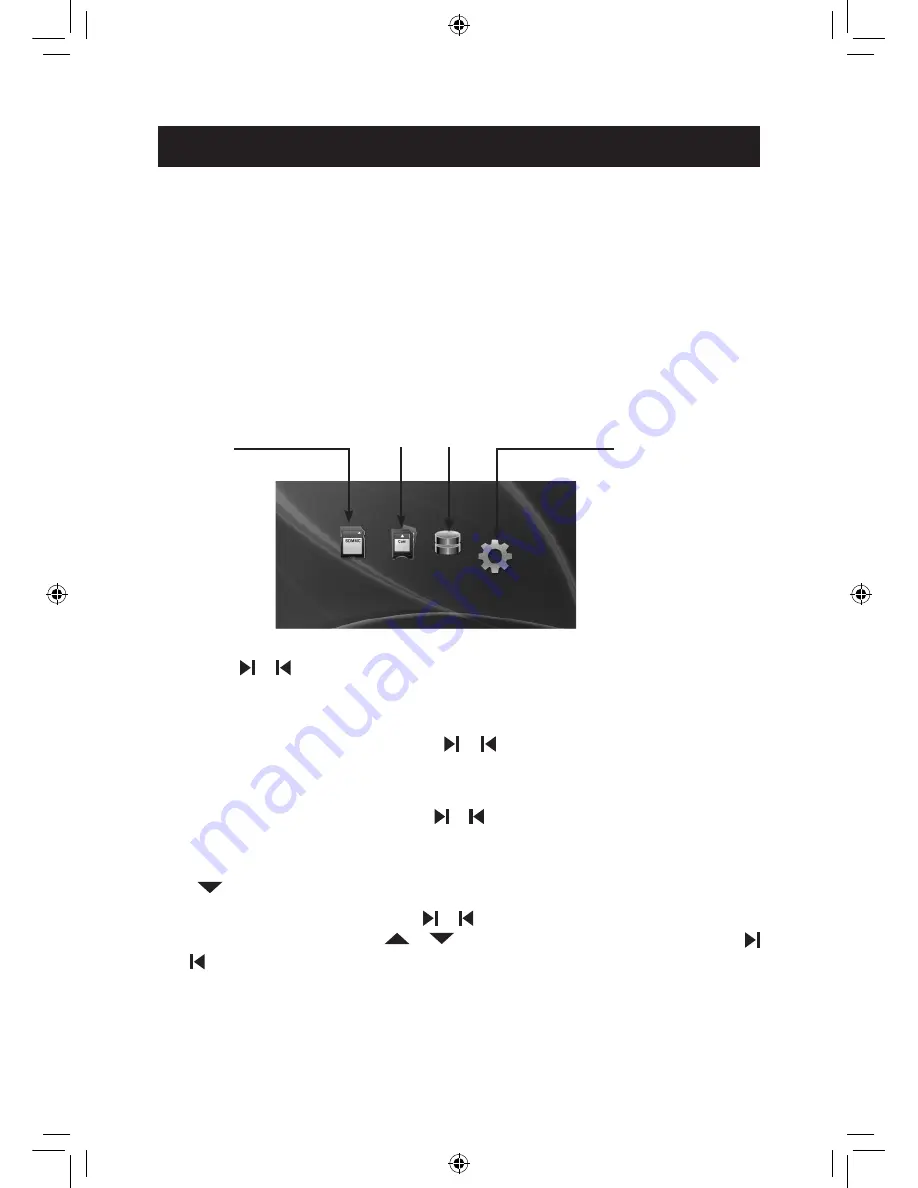
5. In slide show mode, continuously press the MENU/EXIT button twice to enter the “Select 

Card” page. 

SD/MMC

Internal Memory

SETUP

Select Card Page

MS

6. Press the   or   button to select a type of memory card and press the OK


button to enter 

Photo mode. Thumbnails of your images will be shown on the screen. In Photo mode, press 
the MENU/EXIT button once to enter the “Select Card” page.

7. Using the procedure in Step 6, press the   or   button to select a picture, and press the 

MENU/EXIT button for few seconds to enter “Copy/Delete” page. You can copy or delete the 
current picture under this menu.

8. Using the procedure in Step 6, press the   or   button to select a picture and press the OK


button to view it in full screen. Press the MENU/EXIT button to return to Select Card Page.

9. When viewing a picture, press the OK button again to enlarge the current picture, and press 

the 

 button to rotate the picture. Press the MENU/EXIT button to return to Photo mode.

10. On the “Select Card” page, press the   or   button to select the SETUP mode and press 

the OK


button to enter. Press the 

 or 

 button to select a setting item, and press the    

or   button to adjust parameters you prefer. In the SETUP mode, you can setup “Language” 
“Slide Show Effect”, “Slide Show Speed”, “Display Mode”, “Auto Slide Set” ,“Color Enhancement” 
and “Default”.

a706 user manual July.18.indd   4

7/18/08   5:17:19 PM

Summary of Contents for 16838

Page 1: ...OM6118NA001 manual Cover Printing 4C CMYK Size 145x210mm...

Page 2: ...c Instructions 5 6 Control Button Functions 5 Control Button Functions continued 6 Demo Slide Show 6 Connecting Your Digital Photo Frame to PC 6 Frequently Asked Questions 7 Frequently Asked Questions...

Page 3: ...cture Frame to rain water moisture or high humidity Do not place it in a bathroom or kitchen near a sink or where it may come in contact with water Never place heavy or sharp objects on the LCD panel...

Page 4: ...vice Remember to keep this User s Manual in a convenient location for future reference Important Save the original box and all packing material for future shipping needs Controls Packaging Content Lis...

Page 5: ...tton once to enter the Select Card page 7 Using the procedure in Step 6 press the or button to select a picture and press the MENU EXIT button for few seconds to enter Copy Delete page You can copy or...

Page 6: ...Zigzag Bottom Box Blinds Shutter Spiral Bardoor1 Bardoor2 Cross Cross Comb Stripe Mask Dissolve Bar Push Diagonal1 Diagonal2 Fade Brick Checker Stretch Random Select style of transition Slide Show Sp...

Page 7: ...y cards Power on the Digital Photo Frame and the demo slide show will run automatically Connecting Your Digital Photo Frame to PC Using the supplied USB cable which is no bundle USB cable you can conn...

Page 8: ...al Photo Frame Second ensure that the memory card is inserted all the way into the correct slot Third press the EXIT button until you reach the Select Card page If the memory card is properly inserted...

Page 9: ...wing steps 1 Pull the clasper up to the top side as illustrated 2 Attach and press the adjustable base on the device 3 Push the base towards as illustrated direction till it is locked Also you can rem...

Page 10: ...duct contains electrical or electronic materials The presence of these materials may if not disposed of properly have potential adverse effects on the environment and human health Presence of this lab...

Page 11: ...e product for any and all damage resulting from shipping and for all shipping charges to return the product to Staples This warranty does not apply to normal wear or damage from misuse abuse improper...

Page 12: ...de base 5 6 Fonctionnalit s du bouton de contr le 5 Fonctionnalit s du bouton de contr le suite 6 Diaporama de d monstration 6 Branchement du cadre photo num rique un ordinateur 6 Foire aux questions...

Page 13: ...in ou dans une cuisine pr s d un vier ni dans tout lieu o il pourrait entrer en contact avec de l eau Ne placez jamais d objets lourds ou coupants sur le panneau ACL le cadre ou le cordon d alimentati...

Page 14: ...as de conserver ce manuel d utilisateur dans un endroit pratique pour r f rence future Important conserver la bo te d origine et tous les mat riaux d emballage pour des besoins d exp dition ult rieurs...

Page 15: ...la proc dure l tape 6 appuyez sur le bouton ou pour s lectionner une image et appuyez sur le bouton MENU EXIT pendant quelques secondes pour acc der la page Copier Supprimer Sous ce menu vous pouvez...

Page 16: ...le bas Bo te Stores Obturateur Spirale BarCan Bardoor1 Bardoor2 Croix Cross Comb Bande Masque Dissolution Barre Pouss e Diagonale1 Diagonale2 Fondu Brique chiquier tirement Al atoire Pour s lectionner...

Page 17: ...e photo num rique en marche et le diaporama de d monstration commencera automatiquement Branchement du cadre photo num rique un ordinateur En utilisant le c ble USB fourni qui n est pas un c ble USB g...

Page 18: ...i e Puis appuyez sur le bouton EXIT jusqu ce que vous arriviez la page S lectionner une carte Si la carte m moire est bien ins r e dans la fente l ic ne repr sentant cette carte m moire sera mise en s...

Page 19: ...es tapes suivantes 1 Tirez la pince vers le haut tel qu illustr 2 Fixez la base ajustable sur l appareil et appuyez pour l ins rer 3 Glissez la base tel qu illustr jusqu ce qu elle se verrouille en pl...

Page 20: ...at riaux lectriques ou lectroniques La pr sence de ces mat riaux peut avoir un effet n gatif sur l environnement et la sant humaine s il n est pas mis rebut correctement La pr sence de cette tiquette...

Page 21: ...tion ainsi que tout frais d exp dition encouru pour retourner le produit Staples Cette garantie ne couvre pas l usure normale ni les dommages caus s par la mauvaise utilisation l utilisation abusive l...

Page 22: ...Part No OM6118NA001 Printed in China a706 user manual July 18 indd 11 7 18 08 5 23 33 PM...

Reviews: