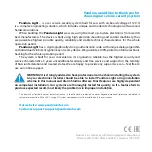
Remote Transmitter Operations
Page - 5
Pressing the PANIC button
for 2 seconds will activate the system; a further
press of this button will deactivate the system,
into the disarmed state. If desired, this button
can be programmed to operate the additional
optional output instead of the panic feature.
Transmitter part number: #104-07
PANIC
OPTION
LOCK
Pressing and releasing the
OPTION button twice arms
or disarms the system without
the confirmation horn chirps.
Pressing for two seconds can be
used to activate an optional
function such as trunk release.
Pressing and releasing
the UNLOCK button
disarms the system, and
unlocks the doors unless
the system is activated.
The unlock operation may
be configured so that
pressing the unlock button
once disarms the system
and unlocks only the driver's
door, and pressing a
second time will unlock all
of the doors.
Pressing and releasing
the LOCK button arms
the security system and
locks the doors.
Pressing and holding for
2 seconds will, in addition
to the arming and locking,
also activate the optional
additional output.
Pressing the LOCK and
UNLOCK buttons together
for 2 seconds will activate
and deactivate the remote
starting feature.
UN
LOCK
Page - 6
Arming and Disarming the System
the system from the transmitter, but with the indication that a protected circuit is not
secure. After arming, the bypassed circuit will automatically be reinstated for
protection should it become operative, i.e., if the trunk is closed, 3 seconds later
protection of this circuit is restored. When a circuit is in a bypassed state, all other
operating circuits will be protected normally. If desired, this feature may be custom
programmed to also operate if a door is open upon when arming the system with the
transmitter.
Passive Arming: The system can be custom programmed to arm itself
automatically when the vehicle's last door is closed; this is the Last Door Arming
feature. If this feature is programmed to operate, the moment the last open door is
closed the horn chirps once and the parking lights flash once to confirm that all points
of entry are closed, and that the arming sequence has begun. The arming period lasts
30 seconds, and is indicated by a fast-flashing LED status light. Thirty seconds after
the last door was closed, the horn will chirp again, the parking lights will flash once,
confirming completion of the Last Door Arming sequence. Three seconds later, the
LED status light changes to flashing slowly, and the system is fully armed. If a point
of entry is reopened before the single chirp and parking light flash occurs at 30
seconds, the Last Door Arming sequence stops, but will start over again when the
opened point of entry is closed again. To temporarily prevent the system from Last
Door Arming (example: while vehicle is being refueled), you should put the system into
Valet Mode or leave the vehicle's door open (in most cases, turning on
Page - 7
"Arming" the Model One system locks the doors places the security system into
a state in which the vehicle is monitored for intrusion attempts. There are two different
methods of arming the system: "active" arming by use of the remote transmitter, and
automatic, or "passive" arming, which is programmable.
Active Arming: The system can always be armed with the remote transmitter,
provided the ignition switch is "off" and the system is not in Valet Mode.
Simply press the transmitter LOCK button once. The doors will lock, the parking and
interior lights will flash once, the vehicle's horn will chirp once, the LED Status Light
will begin flashing, and the starter interrupt circuit engages to prevent any attempt to
start the vehicle. Three seconds after the horn chirp the system becomes fully armed,
as indicated by the LED status light changing from a rapid flashing to a slow flashing.
Once armed, the system will activate if an intrusion attempt is detected. If desired, the
system may be armed without the normal confirmation horn chirp by pressing and
releasing the transmitter's OPTION button twice within 3 seconds.
Upon active arming, if any protected circuit except for the doors is inoperable, the
horn will chirp three times and the parking and interior lights will flash three times. This
is Arming Bypass, and when it occurs, protection for the affected circuit will be
temporarily bypassed. For example, if the trunk is left open, you can still actively arm
the dome light will suffice). The "Last Door Arming" feature offers a high level of
security, since you do not have to remember to arm the system each time you exit
from your vehicle, and may qualify you for an insurance discount.
A separate programmable feature may be utilized to have the doors automatically
lock when the 30 second horn chirp and light flash occurs. The previously mentioned
Arming Bypass feature cannot operate with Last Door Arming; it only works when
actively arming the system from the transmitter because all protected entries must
be closed to initiate Last Door Arming. Of course, you can still arm the system
instantly from the remote transmitter at any time during the 30 second Last Door
Arming sequence.
Disarming: Press and release the remote transmitter's UNLOCK button once to
disarm the system and unlock either the driver's door only, or all of the doors. How
the doors unlock is determined by the installation configuration of the doorlock
interface. Disarming is confirmed by the horn chirping twice and the parking lights
turning on for 30 seconds to illuminate the way to your vehicle; the UltraOne will also
illuminate the interior lights. During this 30 second period of illumination, if the ignition
switch is turned "on" the lights will immediately turn off.
If the transmitter is not available or inoperative, the system must be disarmed by
use of the Selectable Code Override, which is explained in detail on pages 12-14.
Page - 8
on pages 12-14.


