7
2
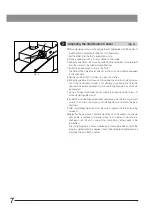
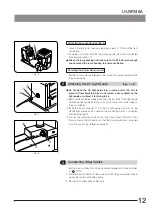
Adjusting the Illumination Center
(Fig. 3)
}This adjustment consists of aligning the UV light guide with the center of
the MApo100X objective for 248 nm UV observation.
1. Set the MX61A to the “BF” observation mode.
2. Place a specimen with a mirror surface on the stage.
3. Bring the specimen into focus by switching the objectives for visible light
from the lowest to the highest magnifications.
4. Switch the observation mode to the “DUV.”
The MApo100X objective for 248 nm UV light is automatically engaged
in the light path.
5. Set the shutter switch to “Open” to open the shutter.
6. Bring the specimen into focus by observing the monitor for UV observa-
tion. If the observation image is not displayed or abnormally dark, the
illumination center is deviated. In this case, the light guide mount should
be adjusted.
7. Using a Phillips screwdriver, loosen slightly the three clamping screws @
of the UV light guide mount.
8. Insert the provided Allen screwdriver alternatively into the two adjustment
screws ² and turn the screws until the brightest observation image is
obtained.
9. After completing the adjustment, be sure to tighten the three clamping
screws @.
}Hereafter, the illumination center adjustment is not required until the UV
light guide is replaced. However, when a combined microscope is
changed or an AF unit is added, the illumination center needs to be
readjusted.
The UV light guide is a consumable part. It should be replaced when the
image is deteriorated to a degree it cannot be rendered brighter even by
adjusting the illumination center.
Fig. 3
@
²
Summary of Contents for U-UVF248A
Page 17: ...MEMO ...
Page 18: ...MEMO ...
Page 19: ......
Page 20: ...Manufactured by Distributed by AX7680 03 Printed in Japan on December 25 2012 M 000 03 ...


