6
3
OPERATION
1
1
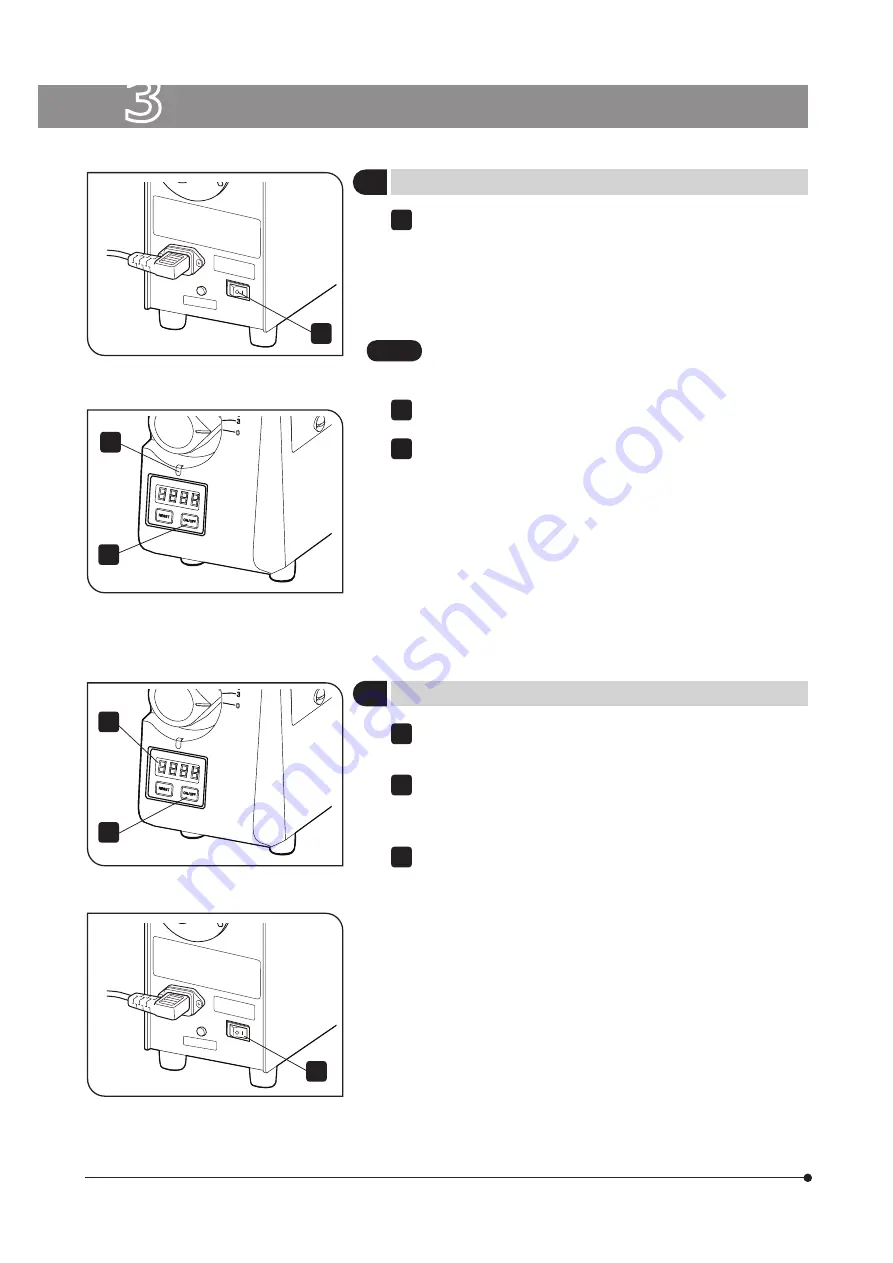
Turning ON the lamp
Turn
/
(ON) the power switch on the back side of the light source
unit. The software version appears in the counter, and then (after
approximately 3 seconds), the accumulated lighting time of the lamp
appears. When the accumulated lighting time of the lamp appears,
each switch can be operated.
2
Press the lamp switch in front of the light source unit.
• Before lighting the lamp, confirm that the lamp replacement
cover is closed completely.
CAUTION
2
Turning OFF the lamp
1
Press the lamp switch in front of the light source unit for a period of
time (0.5 seconds) to turn off the lamp.
After the lamp is turned off, the countdown of the cooling time (300
seconds) is displayed in the counter. Any operations by the buttons
are locked until the indication of the countdown becomes “0”.
Turn O (OFF) the power switch of the light source after the indication
of the countdown became “0”.
?
As the lamp is heated immediately after turning it off, it is hard to
turn on the lamp again. If you want to turn on the lamp again, wait
for approximately 10 minutes after having it turned off. If the lamp is
turned on while heated, the lifetime of the lamp may be shortened.
?
The fan of the light source stops working automatically 60 seconds
after the lamp switch has been pressed for a period time (approx.
0.5 seconds).
3
The lighting display LED is turned on in blue. If the lamp is not turned on,
the lighting display LED is turned on in red. In this case, refer to page 8.
?
The light volume of the lamp stabilizes approximately 90 seconds
after turned on. If you want to stabilize the light volume more stably,
wait approximately 5 minutes after having it turned on.
?
In case the lamp switch is pressed for a period time to turn off the
lamp within 2 minutes after the lamp was turned on, the lighting
display LED is turned on in blue and starts blinking. The lamp is
turned off 2 minutes after it was turned on, and light display LED
stops blinking.
1
2
3
1
Fig. 6
Fig. 7
Fig. 8
(Figs. 6 & 7)
(Figs. 8 & 9)
2
3
2
3
Fig. 9


