background image

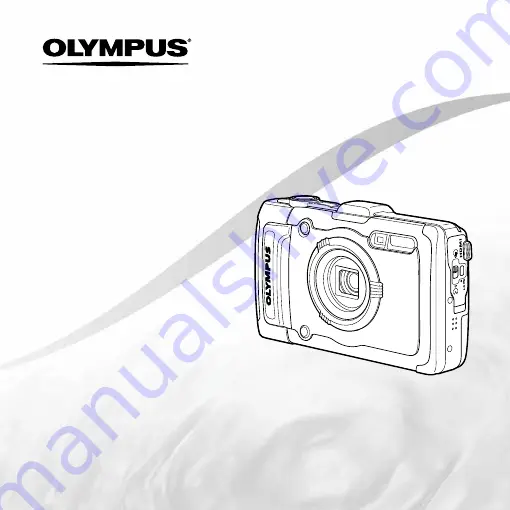
DIGITAL CAMERA

Instruction Manual

TG-1

  Thank you for purchasing an Olympus digital camera. Before you start to use your new camera, please read these 

instructions carefully to enjoy optimum performance and a longer service life. Keep this manual in a safe place for 
future reference.

  We recommend that you take test shots to get accustomed to your camera before taking important photographs.

  The screen and camera illustrations shown in this manual may differ from the actual product.

Summary of Contents for TG-1

Page 1: ...ad these instructions carefully to enjoy optimum performance and a longer service life Keep this manual in a safe place for future reference We recommend that you take test shots to get accustomed to...

Page 2: ...2 3 5 4 6 7 8 10 9 12 13 11 14 3 1 Connector cover 2 Connector cover lock 3 LOCK knob 4 Speaker 5 Multi connector 6 HDMI micro connector 7 Strap eyelet 8 Self timer lamp LED Illuminator AF illuminato...

Page 3: ...button 6 Zoom buttons 7 R button shooting movies 8 Mode dial 9 q button switching between shooting and playback 10Arrow pad INFO changing information display erase 11 A button OK 12 button Attaching t...

Page 4: ...ll images p 32 66 11 Recording with sound movies Wind noise reduction Recording Volume p 40 12 Image size movies p 40 67 13 Recording length movies p 18 14 Movie recording icon p 18 15 GPS icon p 16 S...

Page 5: ...6 12 30 0 12 0 34 0 12 0 34 10 10 4 30 4 30 3D 3D 1 10 9 2 1 24 28 10 3 4 7 5 6 26 Still image Movie Advanced display 4 30 4 30 12 02 26 12 30 10 10 3D 3D 12M 2 0 2 0 1 1000 1 1000 100 0004 100 0004 A...

Page 6: ...can be accessed using the buttons Arrow pad H left G down erase p 22 44 F up INFO changing information display p 20 23 I right A button Shutter button p 18 59 Zoom buttons p 19 23 R button shooting mo...

Page 7: ...guides displayed on the screen indicate that the button A button or zoom buttons can be used 4 30 MENU On Camera Menu 1 Image Stabilizer Reset Reset Compression AF Mode Digital Zoom Normal Face iESP...

Page 8: ...u Press H during shooting to display the function menu The function menu provides access to frequently used shooting settings 4 4 NOR P P 0 0 0 0 AUTO WB AUTO WB AUTO ISO AUTO ISO MENU MENU 12M Progra...

Page 9: ...Power Save Off Pixel Mapping Info Off 10sec TV Out English File Name Reset MENU Settings Menu 2 Back Power Save Power Save Pixel Mapping Info Off TV Out File Name MENU Settings Menu 2 Back On Off Subm...

Page 10: ...ie Mode R Movie sound recording Wind Noise Reduction Recording Volume c q Playback Menu p 41 Slideshow Photo Surfing Edit Erase Print Order R Protect Upload Order dd Settings Menu 1 p 45 Memory Format...

Page 11: ...ght until it clicks into place Turn off the camera before opening the battery card compartment cover When using the camera be sure to close and lock the battery card compartment cover Slide the batter...

Page 12: ...to be used for charging and playback Do not take pictures while the USB AC adapter is connected to the camera Be sure to unplug the power plug of the USB AC adapter from the wall outlet when the char...

Page 13: ...ll be displayed Click OLYMPUS Setup to display the Setup dialog If the Setup dialog is not displayed select My Computer Windows XP or Computer Windows Vista Windows 7 from the start menu Double click...

Page 14: ...tall the camera manual Click the Camera Instruction Manual button and follow the on screen instructions Macintosh Macintosh 1 Insert the supplied CD in a CD ROM drive Double click the CD OLYMPUS Setup...

Page 15: ...ime p 50 5 Use HI to select the x time zone and then press the A button Use FG to turn daylight saving time Summer on or off 12 02 26 12 30 Seoul Tokyo Summer The menus can be used to change the selec...

Page 16: ...ssure 9 Altitude Water depth 0 Current date and time FGHI Select a landmark A Update GPS data Some countries or regions may regulate the use of GPS devices Follow all local regulations Turn GPS off wh...

Page 17: ...era P mode indicator P P 0 0 0 0 AUTO WB AUTO WB AUTO ISO AUTO ISO 12M 4 4 NORM 0 34 0 34 Number of storable still pictures p 66 Monitor standby mode screen 3 Hold the camera and compose the shot Hori...

Page 18: ...shooting movies When the set shooting mode is some modes or P some modes shooting is performed in P mode Sound will also be recorded 2 Press the R button again to stop recording 4 Press the shutter bu...

Page 19: ...ed Image Size then enter the digital zoom range if Digital Zoom is On Photographs taken with the zoom bar displayed in red may appear grainy Using the zoom Pressing the zoom buttons adjusts the shooti...

Page 20: ...re not displayed when Remote Flash p 38 is set to Off Changing the shooting information display The display of the screen information can be changed to best match the situation for example the need fo...

Page 21: ...ck Fast forward Press I to fast forward Press I again to increase the fast forward speed Rewind Press H to rewind The speed at which the recording rewinds increases each time H is pressed Adjusting th...

Page 22: ...dvance or rewind Resuming playback Press the A button to resume playback To stop movie playback To stop movie playback Press the button To play back movies on the computer the included PC software is...

Page 23: ...w enables quick selection of a desired image Close up view up to 10 magnification allows checking of image details 1 Press the zoom buttons 12 30 12 02 26 12 02 26 12 30 4 30 4 30 12 30 12 02 26 12 02...

Page 24: ...by rotating the mode dial Mode dial p 6 Shooting with automatic settings M mode The camera will automatically select the optimal shooting mode for the scene The shooting condition is decided by the ca...

Page 25: ...hotos with the To take photos with the V V Beauty setting Beauty setting Depending on the picture the editing may not be effective 1 Select V Beauty 2 Press G to go to the submenu MENU MENU 5M Recomme...

Page 26: ...cture is taken automatically To cancel Auto Release see Using the self timer p 29 To take panoramic photos To take panoramic photos Panorama Panorama 1 Use HI to select Auto Manual or PC and press the...

Page 27: ...and 4 to take a third frame After the third frame is taken the camera automatically processes the frames and the combined panorama image is displayed To exit the panorama function without saving an im...

Page 28: ...AUTO WB AUTO WB 12M 1 12 Pop Art Icon indicating P mode that is set Shooting mode Option Magic Filter 1Pop Art 2Pin Hole 1 3Fish Eye 4Drawing 1 2 5Soft Focus 1 6Punk 7Sparkle 1 8Watercolor 1 9Reflect...

Page 29: ...o T position 3 The zoom is automatically fixed 4 ISO sensitivity p 31 is automatically fixed to ISO Auto The flash p 20 and zoom p 19 cannot be set when a Super Macro or N S Macro LED is selected Usin...

Page 30: ...button Adjusting to a natural color scheme White balance For more natural coloring choose a white balance option suited to the scene 1 Select the white balance option in the function menu 0 0 0 0 AUTO...

Page 31: ...3 0 0 0 0 MENU MENU 12M 1 400 F3 3 AUTO WB AUTO WB AUTO ISO AUTO ISO 6400 ISO ISO 100 ISO ISO 100 HIGH ISO ISO HIGH 6400 ISO Auto 2 Use HI to select the setting option and press the A button to set O...

Page 32: ...first frame is shot Selecting the image size for still images Image Size 1 Select the image size option in the function menu MENU MENU 5M 8M 12M 16 9S AUTO WB AUTO WB AUTO ISO AUTO ISO 0 0 0 0 12M 4 4...

Page 33: ...m an operation when the LED illuminator is on it will illuminate up to approx 90 seconds LED illuminator The LED illuminator turns off if no operation is performed for approx 30 seconds Even when the...

Page 34: ...erased collectively If the group includes images you want to keep expand the group and protect them respectively Playing back panorama images Panorama images that were combined together using Auto or...

Page 35: ...arefully 1 Connect the 3D compatible device and camera using the HDMI cable For the connection and setting method see Connection via HDMI cable p 49 2 Use FG to select 3D Show and then press the A but...

Page 36: ...and cards p 66 67 Brightening the subject against Brightening the subject against backlight Shadow Adjust backlight Shadow Adjust z Camera Menu 1 Shadow Adjust Submenu 2 Application Auto Automatically...

Page 37: ...creen When set to ESP the center may appear dark when shooting against strong backlighting Shooting at higher magnifications than Shooting at higher magnifications than optical zoom Digital Zoom optic...

Page 38: ...Select depending on designated optional conversion lenses FCON T01 TCON T01 Taking pictures with the Olympus Wireless RC Flash System p 67 Use the conversion lens sold separately p 68 Using the AF il...

Page 39: ...icon guides Icon Guide Displaying icon guides Icon Guide z Camera Menu 2 Icon Guide Submenu 2 Application Off No icon guide is displayed On The explanation of the selected icon will be displayed when...

Page 40: ...image size and frame rate Number of storable pictures still images Continuous recording length movies in the internal memory and cards p 66 67 Recording sound when shooting Recording sound when shoot...

Page 41: ...slideshow press I to advance one frame H to go back one frame Searching for images and playing back Searching for images and playing back the related images Photo Surfing the related images Photo Surf...

Page 42: ...GHI to move the frame Cropping frame MENU Back 3 Press the A button after you have selected the area to trim The edited image is saved as a separate image Adding sound to still images Adding sound to...

Page 43: ...mark information recorded on the images Landmark recorded on the images Landmark q Playback Menu Edit Landmark You can change the landmark information such as place names and names of buildings record...

Page 44: ...settings to the image data Saving print settings to the image data Print Order Print Order q Playback Menu Print Order Print reservations DPOF p 57 Print reservation can be set only for still images t...

Page 45: ...m Mode Setup The screen to select the Custom Mode1 or Custom Mode2 is displayed Submenu 2 Application Set Save current settings Reset Return to the default setting The default settings of the function...

Page 46: ...later Windows Vista Windows 7 set to Storage Even if a computer has USB ports proper operation is not guaranteed in the following cases Computers with USB ports installed using an expansion card etc...

Page 47: ...or the file name is reset to 0001 Adjusting the image processing Adjusting the image processing function Pixel Mapping function Pixel Mapping d Settings Menu 2 Pixel Mapping This function has already...

Page 48: ...NTSC PAL NTSC Connecting the camera to a TV in North America Taiwan Korea Japan and so on PAL Connecting the camera to a TV in European countries China and so on HDMI Out 480p 576p 720p 1080i Set the...

Page 49: ...DEO an input jack connected to the camera 4 Turn on the camera and use FGHI to select the image for playback The TV video signal system varies depending on the countries and regions Before viewing cam...

Page 50: ...For details on changing the input source of the TV refer to the TV s instruction manual When the camera and TV are connected by both an AV cable and an HDMI cable the HDMI cable will take priority Dep...

Page 51: ...ion time zone z Restoring data in the camera Restoring data in the camera Reset Database Reset Database d Settings Menu 3 Reset Database Playback will become available by performing Reset Database whe...

Page 52: ...o select the current altitude water depth and press the A button to set MENU 1200m 1200m Calibrate Back Setting the units of elevation depth Setting the units of elevation depth etc m ft settings etc...

Page 53: ...he right or the left Return to the shooting mode Tap the top side of the camera twice Take a picture Tap the back of the camera twice Only for the a Snow mode When tapping the camera s top To adjust t...

Page 54: ...at intervals of 10 seconds Save Create a track log manually Country Region Off When the country or region is not to be displayed On When the country or region is to be displayed State Province Off Whe...

Page 55: ...s instruction manual For details on the available paper types loading paper and installing ink cassettes refer to the printer s instruction manual Printing images at the printer s standard settings E...

Page 56: ...u 4 Application Off On 1 The image is printed with a border around it Off The image is printed to fill the entire paper On The number of images per sheet varies depending on the printer The number of...

Page 57: ...g FG and then press the A button 11Press the button 12When the message Remove USB Cable is displayed disconnect the USB cable from the camera and printer Print Reservations DPOF 1 In print reservation...

Page 58: ...57 2 Use FG to select U and press the A button 3 Follow Steps 5 and 6 in Resetting all print reservation data 1 Follow Steps 1 and 2 in p 57 2 Select either or U and press the A button 3 Use FG to se...

Page 59: ...n automatic shutdown If this occurs remove the battery from the camera and wait until the camera has sufficiently cooled The camera s external temperature may also increase during use however this is...

Page 60: ...image on a computer If the image still cannot be viewed the image file is corrupted Error message Corrective action The Image Cannot Be Edited Problem with selected image Use photo retouch software e...

Page 61: ...tomatically to focus on it continuously Taking a picture of subjects where autofocus is difficult In the following cases after focusing on an object by pressing the shutter button halfway down with hi...

Page 62: ...and the face is brightened Taking pictures using n for ESP n p 37 Brightness is matched with a subject in the center of the screen and the image is not affected by background light Taking pictures us...

Page 63: ...he center prevents shifting of the image When taking pictures of close objects in particular pivoting with the lens end at the center produces favorable results To take panoramic photos Panorama p 26...

Page 64: ...t is well ventilated Periodically insert the battery and test the camera functions Avoid leaving the camera in places where chemical products are handled since this may result in corrosion Using a sep...

Page 65: ...enable writing LOCK Checking the image saving location Checking the image saving location The memory indicator shows whether the internal memory or card is being used during shooting and playback Curr...

Page 66: ...ximate The actual capacity varies with shooting conditions and the card used Still images Still images Image Size Compression Number of storable still pictures Internal memory SD SDHC SDXC card 4 GB 5...

Page 67: ...pictures with the Olympus Wireless RC Flash System You can take pictures with a wireless flash when using a flash compatible with the Olympus Wireless RC Flash System The camera s built in flash is us...

Page 68: ...lfunction due to interference with each other When the camera flash is set to RC the camera built in flash is used for communication with the wireless flash It cannot used for taking pictures Use the...

Page 69: ...Please observe the following care instructions for your camera 1 As determined by Olympus pressure testing equipment in accordance with IEC Standard Publication 529 IPX8 This means that the camera ca...

Page 70: ...re 40 C 104 F or more or at low temperature 10 C 14 F or less Failure to do so may break down water resistance Do not use chemicals for cleaning rust prevention anti fogging repairing etc Failure to d...

Page 71: ...imer of Liability OLYMPUS IMAGING CORPORATION AND ITS LICENSORS INCLUDING THEIR LICENSORS AND SUPPLIERS SHALL NOT BE LIABLE TO YOU IN RESPECT OF ANY CLAIM DEMAND OR ACTION IRRESPECTIVE OF THE NATURE O...

Page 72: ...fectures municipalities or other territorial divisions from image data files in which they are included is forbidden Neither you nor any third party shall by any means reproduce copy modify disassembl...

Page 73: ...ral Republic of Nigeria NIGERIA Kingdom of Lesotho LESOTHO Kingdom of Morocco MOROCCO Republic of Angola ANGOLA Country or regions Screen display Republic of Ghana GHANA Republic of Mozambique MOZAMBI...

Page 74: ...l Guinea EQUATORIAL GUINEA Republic of Guinea GUINEA Republic of Guinea Bissau GUINEA BISSAU Republic of Liberia LIBERIA Republic of Madagascar MADAGASCAR Country or regions Screen display Republic of...

Page 75: ...ds gymnasiums Golf courses Amusement parks Museums Art museums art galleries Zoos Botanical gardens Aquariums Recreation grounds Leisure parks Places of interest Places of interest tourist destination...

Page 76: ...zustaendigen Behoerden entnommen Great Britain Contains Ordnance Survey data Crown copyright and database right 2010 Contains Royal Mail data Royal Mail copyright and database right 2010 Greece Copyri...

Page 77: ...try to remove the card by force If you find that the USB AC adapter is extremely hot or notice any unusual odors noise or smoke around it unplug the power plug from wall outlet immediately and stop us...

Page 78: ...prevent condensation or mold from forming inside the camera After storage test the camera by turning it on and pressing the shutter button to make sure that it is operating normally The camera may mal...

Page 79: ...a cool location for storage Please recycle batteries to help save our planet s resources When you throw away dead batteries be sure to cover their terminals and always observe local laws and regulati...

Page 80: ...the features and contents of this publication or software without obligation or advance notice FCC Notice FCC Notice Radio and Television Interference Changes or modifications not expressly approved b...

Page 81: ...orized service personnel unless repair by others is made with the written consent of Olympus c defects or damage to the Products resulting from wear tear misuse abuse negligence sand liquids impact im...

Page 82: ...r that sold you the Product or ship it postage prepaid and insured to any of our Olympus Service Centers When returning Products for service your package should include the following 1 Sales receipt s...

Page 83: ...Any defect or damage that occurs due to transport a fall shock etc after purchase of the product d Any defect or damage that occurs due to fire earthquake flood damage thunderbolt other natural disast...

Page 84: ...ranty Certificate 4 This Warranty applies to the product only the Warranty does not apply to any other accessory equipment such as the case strap lens cap and batteries 5 Olympus sole liability under...

Page 85: ...ogy Industries Association JEITA THIS PRODUCT IS LICENSED UNDER THE AVC PATENT PORTFOLIO LICENSE FOR THE PERSONAL AND NONCOMMERCIAL USE OF A CONSUMER TO i ENCODE VIDEO IN COMPLIANCE WITH THE AVC STAND...

Page 86: ...2 0 to 4 9 Equivalent to 25 to 100 mm on a 35 mm film Photometric system Digital ESP metering spot metering system Shutter speed 4 to 1 2000 sec Shooting range Normal 0 6 m 2 0 ft to Macro mode 0 15 m...

Page 87: ...on battery LI 90B Product type Lithium ion rechargeable battery Model No LI 90B Standard voltage DC 3 6 V Standard capacity 1270 mAh Battery life Approx 300 full charges varies on usage Operating envi...

Page 88: ......

Page 89: ...VM297601...

Reviews: