


18
If an error code is displayed
If an error code appears on the camera’s monitor during direct print setting
or printing, see the following table.
For more details, refer to the printer’s instruction manual.
TIPS
• If an error code other than those shown above is displayed, refer to
“Error codes” (
P.117).
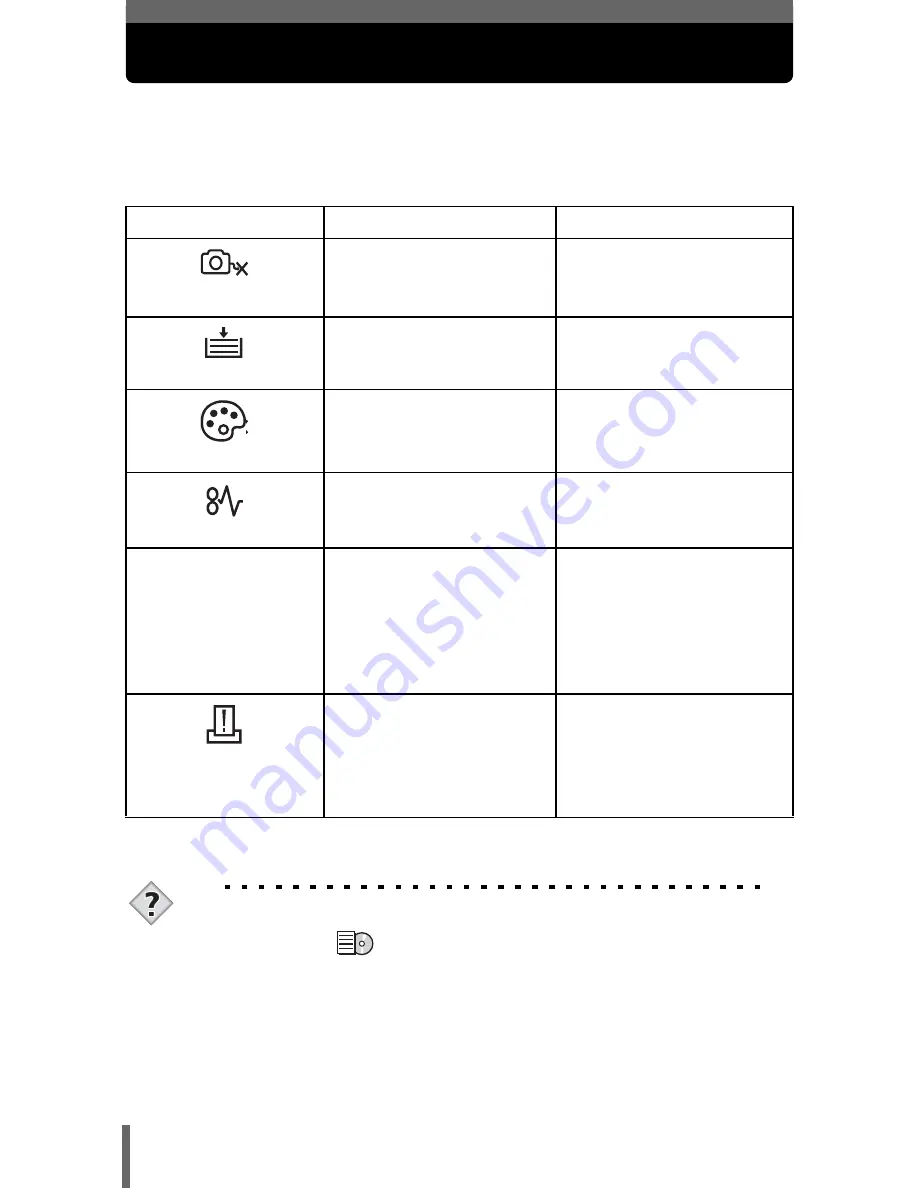
Monitor indication
Possible cause
Corrective action
NO CONNECTION
The camera is not
connected to the printer
correctly.
Disconnect the camera
and connect it again
correctly.
NO PAPER
There is no paper in the
printer.
Load some paper in the
printer.
NO INK
The printer has run out of
ink.
Replace the ink cartridge
in the printer.
JAMMED
The paper is jammed.
Remove the jammed
paper.
SETTINGS CHANGED
The printer’s paper
cassette has been
removed or the printer
has been manipulated
while making settings on
the camera.
Do not manipulate the
printer while making
settings on the camera.
PRINT ERROR
There is a problem with
the printer and/or
camera.
Turn off the camera and
printer. Check the printer
and remedy any
problems before turning
the power on again.


