Olympus R1000 Series Quick Reference Manual Download Page 30

28 

counter. For the deriving of the hopping sequence the entire LAP (24 
bits), 4 LSB's (4 bits) (Input 1) and the 27 MSB's of the clock (Input 
2) are used. With this input values different mathematical procedures 
(permutations, additions, XOR-operations) are performed to 
generate the sequence. This will be done at the beginning of every 
new transmission. 


Regarding short transmissions, the Bluetooth system has the 
following behavior: 


The first connection between the two devices is established, a 
hopping sequence is generated. For transmitting the wanted data, 
the complete hopping sequence is not used and the connection ends. 
The second connection will be established. A new hopping sequence 
is generated. Due to the fact that the Bluetooth clock has a different 
value, because the period between the two transmission is longer 
(and it cannot be shorter) than the minimum resolution of the clock 
(312.5  s). The hopping sequence will always differ from the first 
one. 
 

6. Receiver Input Bandwidth, Synchronization and Repeated 
Single or Multiple Packets 


The input bandwidth of the receiver is 1 MHz. In every connection, 
one Bluetooth device is the master and the other one is the slave. 
The master determines the hopping sequence (see section 5). The 
slave follows this sequence. Both devices shift between RX and TX 
time slot according to the clock of the master. Additionally the type of 
connection (e.g. single or multi-slot packet) is set up at the beginning 
of the connection. The master adapts its hopping frequency and its 
TX/RX timing is according to the packet type of the connection. Also, 
the slave of the connection uses these settings. Repeating of a 
packet has no influence on the hopping sequence. The hopping 
sequence generated by the master of the connection will be followed 
in any case. That means, a repeated packet will not be send on the 
same frequency, it is send on the next frequency of the hopping 
sequence. 
 

7. Dwell Time in Data Mode 


The dwell time of 0.3797s within a 30 seconds period in data mode is 
independent from the packet type (packet length). The calculation for 
a 30 seconds period is as follows: 


Dwell time = time slot length * hop rate / number of hopping channels 
*30s 


Example for a DH1 packet (with a maximum length of one time slot) 
Dwell time = 625 IJs * 1600 1/s /79 * 30s = 0.3797s (in a 30s period) 


For multi-slot packet the hopping is reduced according to the length 
of the packet. 


Example for a DH5 packet (with a maximum length of five time slots) 


Dwell time = 5 * 625  s * 1600 * 1/5 *1/s / 79 * 30s = 0.3797s (in a 
30s period) 

Summary of Contents for R1000 Series

Page 1: ...Quick Reference Guide R1000 Series...

Page 2: ...ombination system apparatus machine material method or process in which Olympus products might be used An implied license only exists for equipment circuits and subsystems contained in Olympus product...

Page 3: ...the Side Button 7 Using the Stylus 9 Initiating the Screen 10 Input Methods 12 Turn on and off the Backlights 14 Using the Headset 14 Resetting Your R1000 Terminal Performing a Soft Rest 15 Performin...

Page 4: ...0 yyy This is a basic handy terminal of the series with color display and Bluetooth radio function R1000 xx00 yyy This is a batch type handy terminal with color display Note xx shows memory configurat...

Page 5: ...Parts of the R1000 Series LCD Display Communication Port Keypad Mic LED IrDA Port Reset Switch Side Button Audio Connector Speaker Stylus 3...

Page 6: ...t the AC Adapter to the Cable Sync and Charger Insert the Cable Sync and Charger to the Communication Port found at the bottom of the R1000 Plug the AC Adapter into a wall outlet and turn on a wall ou...

Page 7: ...5...

Page 8: ...eeds to be aligned with the tip of your Stylus Windows CE Model Tap and hold the center of each target that appears on the screen with the tip of the Stylus Tap anywhere on the screen to finish to the...

Page 9: ...with the tip of the Stylus Follow the on screen instructions which allow you to set the language your city and time zone Welcome to Qtopia Touch the crosshairs firmly and accurately to calibrate your...

Page 10: ...e PDA to standby or ON mode F1 Press F1 to start Word Pad F2 Press F2 to start Internet Explorer F3 Press F3 to start Media Player F4 Press F4 to display Inbox Enter Press Enter after entering data or...

Page 11: ...ess F1 to start Media Player F2 Press F2 to display the Launcher Screen F3 Press F3 to display Calendar F4 Press F4 to display Contacts Enter Press Enter after entering data or a command Cursor Press...

Page 12: ...reen twice with the Stylus to open an item Drag Hold the Stylus on the screen and drag across the screen to select text and messages Drag in a list to select multiple items Tap and Hold Tap and hold t...

Page 13: ...isplay it by tapping the Desktop icon at the lower right of the screen On the Desktop screen you can see the programs You can start the programs by tapping on the Start Menu Double Tap the item to sta...

Page 14: ...minal the Launcher screen appears You can also display it by pressing F1 key On the Launcher screen you can see the following programs Input method icon Tap the item to start the application Tap the N...

Page 15: ...icon appears at the bottom left of screen Tap the triangle to the right of the input method icon to pop up a list of input methods e g Handwriting Pickboard Keyboard and Unicode Tap the input method y...

Page 16: ...Pickboard Keyboard Unicode 14...

Page 17: ...s press and hold the Power Key This will activates the Keypad backlight to turn off first followed by the Display backlight To turn on the backlights again when both LCD Display and Keypad backlights...

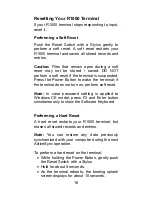
Page 18: ...terminal if the terminal does not turn on perform soft reset Note In case password setting is applied to Windows CE model press F2 and Enter button simultaneously to show the Software Keyboard Perfor...

Page 19: ...17 Realign the screen Note With a hard reset Formats Preferences and other settings are restored to their factory default settings...

Page 20: ...com for software download Using the Cable Sync and Charger To communicate through the Cable Sync and Charger Ensure all connections between the Cable Sync and Charger and the host computer are secure...

Page 21: ...The online help is installed as a default You can get more information about both operating systems from there Windows CE Model To use online help show Start Menu icon and tap Help icon Tap Start Menu...

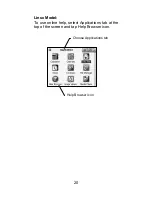
Page 22: ...Linux Model To use online help select Applications tab at the top of the screen and tap Help Browser icon Help Browser icon Choose Applications tab 20...

Page 23: ...period of time Treat your R1000 as you would for a pocket calculator or other electronic instrument The touch sensitive screen of your R1000 contains glass Do not drop your R1000 or subject it to a s...

Page 24: ...ble Lithium Polymer battery did not charge Battery failed Perform a hard reset Cannot see characters on display R1000 not powered on Press the Power Button Distance from the other device is more than...

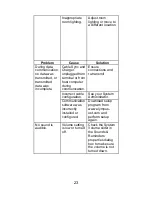
Page 25: ...ble configuration See your System Administrator During data communication no data was transmitted or transmitted data was incomplete Communication software was incorrectly installed or configured Down...

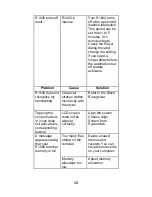
Page 26: ...does not recognize my handwriting Character strokes written incorrectly with the stylus Refer to the Block Recognizer Tapping the screen buttons or icons does not activate the corresponding feature LC...

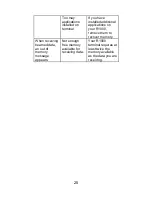
Page 27: ...itional applications on your R1000 remove them to recover memory When receiving beamed data an out of memory message appears Not enough free memory available for receiving data Your R1000 terminal req...

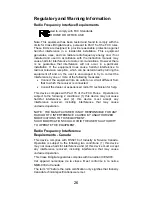
Page 28: ...fferent from that to which the receiver is connected Consult the dealer or experienced radio TV technician for help This device complies with Part 15 of the FCC Rules Operation is subject to the follo...

Page 29: ...derived from it s BD address which is unique for every Bluetooth device additional masters intending to establish new piconets will always use different hop sequences 4 Example of a Hopping Sequence i...

Page 30: ...is the slave The master determines the hopping sequence see section 5 The slave follows this sequence Both devices shift between RX and TX time slot according to the clock of the master Additionally t...

Page 31: ...ng an inquiry but every time with a different start frequency and phase in this sequence For the page hop sequence the device address of the paged unit is used as the input vector This results in the...

Page 32: ...ion for the system to check if there is a valid transmission or not If you regard the presence of a valid access code as one bit of information and compare it with the length of the access code of 68...

Page 33: ......

Page 34: ...SNE100959 Revision C Olympus Technologies Singapore Pte Ltd 41 Science Park Road 04 10 The Gemini Singapore Science Park 2 Singapore 117610 Tel 65 6777 2508 Web Site www olympus ost com...

Reviews: