


23
1
EN
Se
tt
in
g t
im
e a
n
d d
a
te
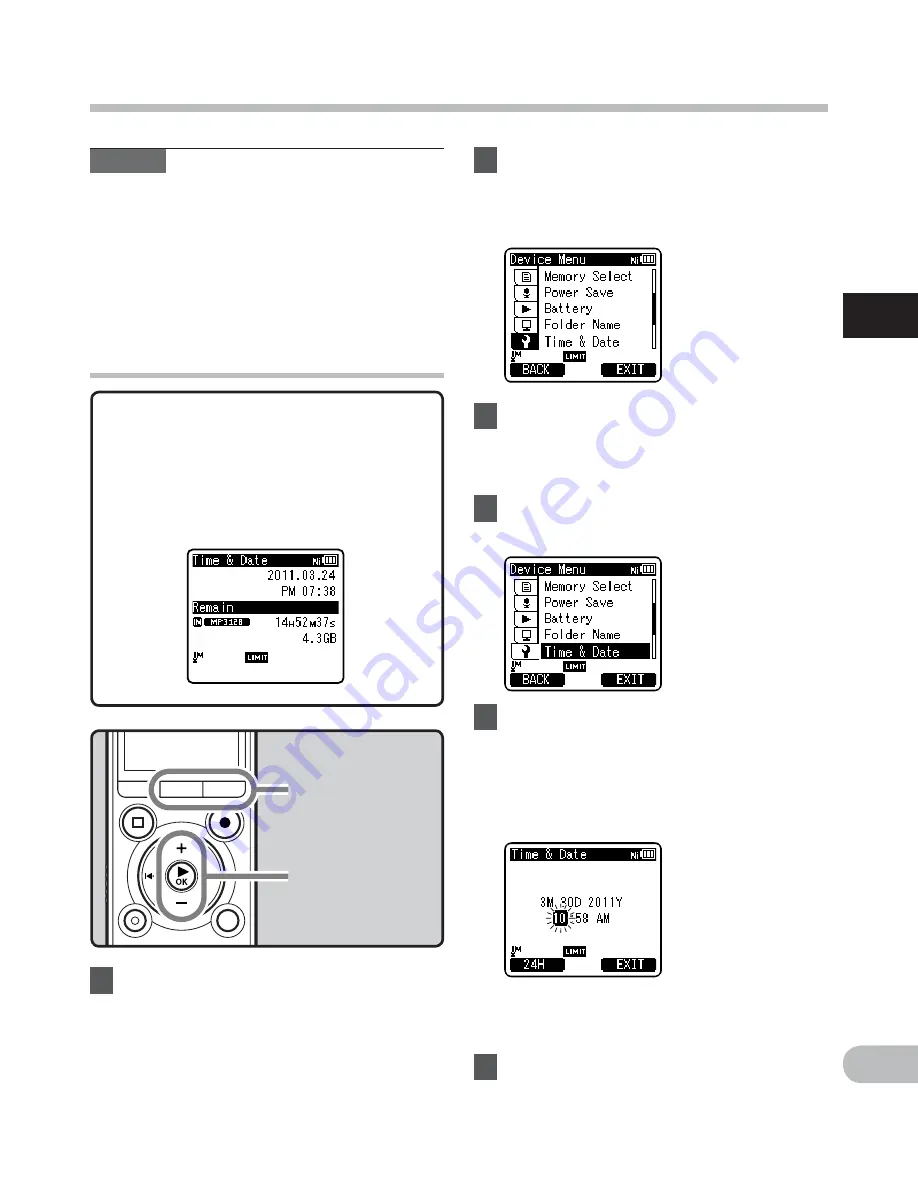
Setting time and date [Time & Date]
2
Press
the
+
or
−
button to select
[
Device Menu
] tab.
• You can change the menu display by
moving the settings tab cursor.
1
While the recorder is during stop
mode, press the
MENU/SCENE
button.
• The menu will appear on the display
(
☞
P.48).
While the recorder is during stop
mode, press and hold the
STOP
(
4
)
button to display the [
Time & Date
]
and [
Remain
]. If the current time and
date is not correct, set it using the
procedure below.
3
Press
the
`
OK
button to move
the cursor to the item to set.
• [
Device Menu
] will appear on the
display.
4
Press
the
+
or
−
button to select
[
Time & Date
].
+ −
button
`
OK
button
MENU/SCENE
button
F2
button
5
Press
the
`
OK
button.
• [
Time & Date
] will appear on the
display.
• The
“
Hour
” will flash on the display,
indicating the start of the Time and
Date setup process.
Notes
• If you press the
`
OK
button during the
setup operation, the recorder will save
the items that were set to that point.
• After setup, a message will sound saying
that If the guidance is not required, select
[
Off
], and the screen goes into [
Voice
Guide
] (
☞
P.72) setup. If you don’t want
the guidance feature, select [
Off
].
Changing the time and date
The following steps are the same as
Step 1 through Step 3 of “
Setting time
and date [Time & Date]
” (
☞
P.22).
6
Press
the
F2
(
EXIT
) button to
close the menu screen.


