38
When Using a Macintosh
1
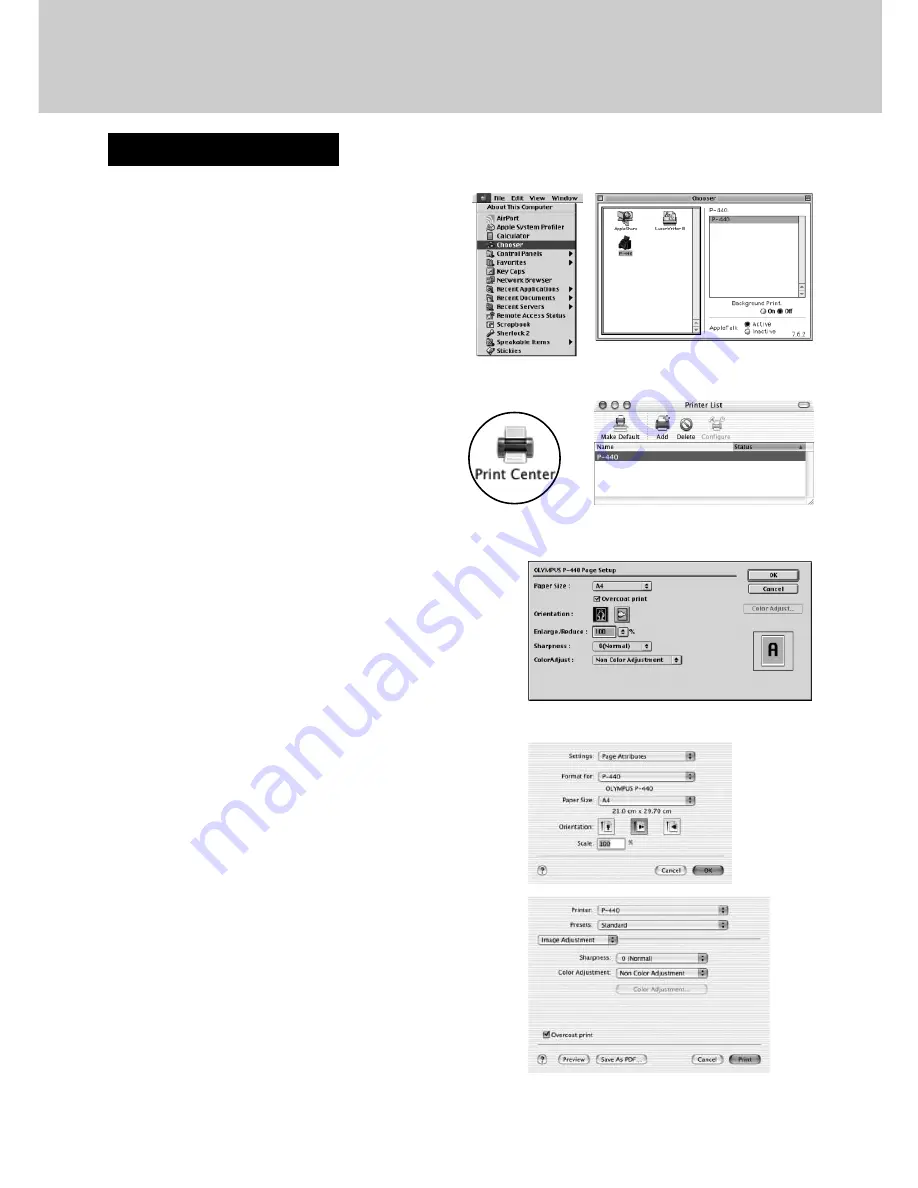
Select P-440 from the Chooser of the
Apple menu.
For Mac OSX, open the “Utilities” folder from
the “Applications” folder, start Print Center,
and then select P-440.
○ ○ ○ ○ ○ ○ ○ ○ ○ ○ ○ ○ ○ ○ ○ ○ ○ ○ ○ ○ ○ ○ ○ ○ ○ ○ ○ ○ ○ ○ ○ ○ ○ ○ ○ ○ ○ ○ ○ ○ ○ ○ ○ ○ ○ ○ ○ ○ ○ ○ ○ ○ ○ ○
2
Select the desired paper settings in the “Page
Setup” dialogue box.
For Mac OSX, select “File” - “Page Setup” or “File” -
“Print”.
Paper Size:
Select the paper size (A4, A4-postcard, A5 WIDE, A6
WIDE) from the pop-up menu. (The printer is not
compatible with A4L-size cards only when printing
from a PC.)
Orientation:
Set the paper usage, Vertical (portrait) or horizontal
(landscape), by clicking on the icon.
Enlarge/Reduce:
Set the print size (25-400%) either by key entry or by
pressing on the up or down arrow button until the
desired percentage is displayed.
Sharpness:
Select sharpness correction (–5-5) from the pop-up
menu.
ColorAdjust:
Select the type of color adjustment you want to make.
(Color adjustment is possible by selecting the “Driver”
item and clicking on the “Color Adjustment” button.)
If you select “ColorSync”, color adjustment will be
performed based on the ICC profile. To output a
landscape image, select “Scene”.
When you use Print Image Matching Plug-in for
Adobe Photoshop, select “Non Color Correction”.
Mac OS 8.6-9.2
Mac OS 8.6-9.2
Mac OS X
Mac OS X


