background image

29

Indicaciones de eliminación

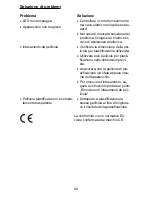
Este símbolo (cubo de basura tachado) significa que después 
de finalizar su vida útil, se debe llevar el producto a un sistema 
de recogida o reciclaje disponible para el usuario final. Este 
símbolo sólo es aplicable a los Estados del EEE. EEE = 
Espacio Económico Europeo que incluye los Estados 
miembros de la UE más los estados de Noruega, Islandia y 
Liechtenstein.

Garantía

¡Guardar en un sitio adecuado! 

Estimado cliente, 

nos alegramos que usted se haya decidido por el aparato laminador A 296 
de Olympia. Si en contra de lo esperado se produce un problema técnico en 
el aparato, se deben tener en cuenta los siguientes puntos: 

x

 El periodo de garantía del aparato es de 24 meses. 

x

 Resulta imprescindible guardar el justificante de compra y el embalaje 

original.

x

 En caso de surja cualquier problema, debe llamar primero a la línea de 

asistencia telefónica: 

+49 180 5 007514 

En muchas ocasiones nuestro personal especializado puede solucionar 
el problema por teléfono. 

x

 No obstante, si no fuera posible eliminar el error por teléfono, rogamos 

que se nos envíe el aparato en su embalaje a la siguiente dirección: 

Centro de Servicio Técnico Hattingen 
Weg zum Wasserwerk 10 

D

-45525 Hattingen 

Sólo se pueden realizar reparaciones bajo garantía si se adjunta el 
justificante de compra. 

Muchas gracias por su comprensión. 

Muy atentamente 

Olympia Business Systems 

Vertriebs GmbH 

Summary of Contents for A 296

Page 1: ...zum Wasserwerk 10 D 45525 Hattingen http www olympia vertrieb de 30 01 2009 OLYMPIA A 296 Laminierger t A 296 Laminator A 296 Machine plastifier A 296 Aparato laminador A 296 Lamineerapparaat A 296 Pl...

Page 2: ...2...
Page 3: ...12 Exemption From Liability 13 Intended Use 13 Features 13 Laminating 14 Clearing Foil Jams 15 Cleaning and Servicing 15 Troubleshooting 16 Disposal 17 Guarantee 17 Fran ais Consignes de s curit impor...

Page 4: ...jke veiligheidsinformatie 30 Aansprakelijkheid 31 Bedoeld gebruik 31 Kenmerken 31 Lamineren 32 Folieblokkade verhelpen 33 Verzorgen en reinigen 33 Storingen verhelpen 34 Milieuverantwoord afvoeren 35...

Page 5: ...sky D le it bezpe nostn pokyny 42 Vylou en z ruky 43 Pou v n pro dan el 43 V konov znaky 43 Laminov n 44 Odstran n uv zl ch f li 45 P e a i t n 45 Odstra ov n z vad 46 Upozorn n k likvidaci 47 Z ruka...

Page 6: ...des Ger ts Netzstecker ziehen 9 Das Ger t immer sofort ausschalten wenn ein strenger Geruch entsteht oder das Ger t nicht in Betrieb ist 10 Netzstecker nicht mit feuchter Hand ber hren 11 Stellen Sie...

Page 7: ...r Umbauten sind nicht zul ssig Sicherheitshinweis Die Steckdose muss in der N he des Ger ts angebracht und leicht zug ng lich sein Sie k nnen somit im Notfall das Ger t schnell vom Netz trennen Leistu...

Page 8: ...sche so ein dass allseitig etwa 3 bis 5 mm Abstand vom Folienrand vorhanden ist Achtung Verwenden Sie ausschlie lich Hei laminierfolien 6 F hren Sie die Folie zusammen mit dem Laminiergut in den Einf...

Page 9: ...g wiederholen oder sich gestaute Folie nicht mehr aus dem Laminierger t ziehen l sst wenden Sie sich bitte an unsere Hotline siehe Garantie Pflege und Reinigung Ablagerungen und Klebereste an den Tran...

Page 10: ...r e der verwen deten Folientasche x Benutzen Sie nur Folientaschen in den angegebenen Gr en x Stellen Sie sicher dass die Folien tasche gerade in das Ger t einge f hrt wurde x Um den Stau zu beheben f...

Page 11: ...t wider Erwarten ein technisches Prob lem ergeben beachten Sie bitte folgende Punkte x Die Garantiezeit f r Ihr Ger t betr gt 24 Monate x Bewahren Sie unbedingt den Kaufbeleg und die Originalverpacku...

Page 12: ...ready to operate 8 Disconnect the power plug when the unit is not in use 9 Always switch the unit off immediately if it emits a strong smell or it is not in operation 10 Do not touch the power plug w...

Page 13: ...e not permitted Safety note The power socket must be close to the unit and easily accessible This en ables you to disconnect the unit from the power supply quickly in an emer gency Features Protection...

Page 14: ...rt the document to be laminated in the foil pocket so that there is a margin of approx 3 5 mm to the edge of the foil on all sides Attention Only use hot laminating pockets 6 Insert the foil pocket co...

Page 15: ...jammed foil cannot be removed from the laminator please contact our hotline refer to Guarantee Cleaning and Servicing Deposits and residual adhesive on the transport rollers can influence the re sults...

Page 16: ...x Check the foil pockets being used are the correct size x Only use foil pockets of the sizes prescribed x Ensure that the foil pocket has been inserted correctly in the unit x To clear the fault fol...

Page 17: ...e with regard to the equipment please ob serve the following points x The period of guarantee for the equipment is 24 months x It is essential to keep the purchase receipt and original packing x The f...

Page 18: ...quand vous ne vous servez pas de la ma chine 9 D brancher toujours imm diatement la machine quand une forte odeur se fait sentir ou quand la machine ne fonctionne pas 10 Ne touchez pas la fiche de sec...

Page 19: ...ncertation pr alable Instructions de s curit La prise de courant doit se trouver dans les environs de l appareil et tre fa cile d acc s En cas d urgence vous pouvez ainsi s parer rapidement l ap parei...

Page 20: ...e de plastique de ma ni re ce que de tous les c t s il y ait une marge d env 3 5 mm par rapport au bord de la feuille de plastique Attention Utilisez exclusivement des feuilles de plastification chaud...

Page 21: ...tique se r p tent continuelle ment ou si la feuille bloqu e ne peut plus tre retir e de la machine plastifier veuillez vous adresser notre hotline voir garantie Entretien et nettoyage Des d p ts et de...

Page 22: ...ez la taille de la poche de plastique utilis e x Utilisez seulement les poches de plastique dans les tailles indi qu es x Assurez vous que la poche de plastique a t introduite bien droite dans l appar...

Page 23: ...un probl me technique veuillez tenir compte des points suivants x La dur e de la garantie est de 24 mois pour votre appareil x Conservez absolument le bon d achat et l emballage d origine x En cas de...

Page 24: ...to inmediatamente cuando se percibe un olor penetrante o cuando el aparato no se encuentra en servicio 10 Con las manos h medas no se debe entrar en contacto con la clavija de red 11 Aseg rese de que...

Page 25: ...ad La caja de enchufe debe estar instalada cerca del aparato y ser f cilmente accesible De este modo podr separar el aparato r pidamente de la red en un caso de emergencia Caracter sticas prestacional...

Page 26: ...5 minutos se alcanza la temperatura de servicio correcta y la l mpara de indicaci n verde READY se ilumina 5 Introduzca el producto a laminar en el compartimento de laminaci n de tal modo que exista...

Page 27: ...e limpiar el aparato repetidamente seg n se describe en el punto Cuidado y limpieza 4 Si los atascos de pel cula transparente se repiten continuamente o si no es posible sacar la pel cula transparente...

Page 28: ...de pel cula transparente utilizada x Utilice s lo fundas de pel cula transparente de los tama os indicados x Aseg rese de que la funda de pel cula transparente haya sido introducida de forma recta en...

Page 29: ...aparato se deben tener en cuenta los siguientes puntos x El periodo de garant a del aparato es de 24 meses x Resulta imprescindible guardar el justificante de compra y el embalaje original x En caso d...

Page 30: ...t worden getrokken 9 Het apparaat altijd direct uitschakelen als u een sterk prikkelende geur ruikt of als het apparaat niet wordt gebruikt 10 Netstekker nooit met vochtige handen vastpakken 11 Overtu...

Page 31: ...egestaan Veiligheidsinstructie Het stopcontact moet in de buurt van het apparaat aangebracht en goed toegankelijk zijn U kunt zodoende in geval van nood het apparaat snel van het net scheiden Kenmerke...

Page 32: ...het lamineerhoesje dat aan alle kanten 3 5 mm afstand tot de folierand overblijft Let op Gebruik alleen heetlamineerfolies 6 Steek de folie samen met het te lamineren voorwerp in de invoeropening van...

Page 33: ...te zitten of klem zittende folie niet meer uit het lamineerapparaat kan worden getrokken neem dan contact op met onze hotline zie Garantie Verzorgen en reinigen Aangekoekt materiaal en lijmresten op d...

Page 34: ...het gebruikte lamineerhoesje x Gebruik alleen lamineerhoesjes met de voorgeschreven grootte x Overtuig uzelf ervan dat het lamineerhoesje recht in het apparaat werd gestoken x Volg de instructies ond...

Page 35: ...en technisch probleem heeft verzoeken wij u op de volgende punten te letten x De garantieperiode voor het apparaat bedraagt 24 maanden x Bewaar beslist de aankoopbon en de originele verpakking x Als e...

Page 36: ...to immediato dell apparecchio non appena si sviluppa un forte odore o in caso di non impiego 10 Non toccare la spina di alimentazione con le mani bagnate 11 Assicurarsi che l interruttore ON OFF sia i...

Page 37: ...rossimit dell apparecchio ed essere facilmente accessibile Ci consente di interrompere in caso d emergenza rapidamente l alimentazione elettrica dell apparecchio Caratteristiche di prestazione Protezi...

Page 38: ...modo da ave re su tutti i lati una distanza di circa 3 5 mm dal bordo Attenzione Si prega di utilizzare esclusivamente pellicole di plastifi cazione a caldo 6 Inserire la pellicola insieme al foglio d...

Page 39: ...lizia 4 Nel caso di frequenti intasamenti o non potendo estrarre la pellicola causa dell intasamento dalla plastificatrice si prega di rivolgersi al no stro servizio di assistenza telefonica vedi gara...

Page 40: ...per plastificazione utilizzata x Utilizzare solo pellicole per plasti ficazione nelle dimensioni previ ste x Assicurarsi che la pellicola di pla stificazione sia stata appena inse rita nell apparecchi...

Page 41: ...e x Il periodo di garanzia per il Suo apparecchio copre 24 mesi x indispensabile conservare lo scontrino d acquisto assieme alla confe zione originale x In caso di problemi rivolgersi innanzitutto al...

Page 42: ...v n p stroje vyt hn te s ovou z str ku 9 Objev li se siln z pach nebo nen li p stroj v provozu p stroj v dy okam it vypn te 10 Nikdy se s ov z str ky nedot kejte vlhkou rukou 11 Zabezpe te aby p ed p...

Page 43: ...n Z suvka mus b t upevn na v bl zkosti p stroje a snadno p stupn Tak m ete v nouzov m p pad p stroj rychle odpojit od s t V konov znaky Ochrana a zdokonalen Va ich dokument Laminuje fotografie dokume...

Page 44: ...minov n tak aby na v ech stran ch byla vzd lenost asi 3 a 5 mm od okraje f lie Pozor Pou vejte v hradn f lie pro laminov n za horka 6 Zasu te f lii spole n s materi lem na laminov n do zav d c t rbiny...

Page 45: ...uv znut f li neust le opakuje nebo pokud ji nen mo no uv zlou f lii z laminovac ho p stroje vyt hnout ven obra te se pros m na na i horkou linku viz Z ruka P e a i t n Usazeniny a zbytky lepidla na tr...

Page 46: ...u x uv zl f lie x Zkontrolujte velikost pou it f liov kapsy x Pou vejte pouze f liov kapsy v uveden ch velikostech x Zabezpe te aby f liov kapsa byla do p stroje zasouv na rovnom rn x Pro odstran n uv...

Page 47: ...v n vyskytl n jak technick probl m respektujte pros m n sleduj c body x z ru n doba u Va eho p stroje in 24 m s c x bezpodm ne n uschovejte doklad o koupi a origin ln obal x pokud by se vyskytl probl...

Page 48: ...y normas vigentes De fabrikant verklaart hierbij dat het apparaat voldoet aan de bepalingen in de richtlijnen en normen Il costruttore dichiara con la presente che la macchina sotto descritta con form...

Reviews: