Installation of Exhaust & Vent Piping
(Perform prior to any plumbing or electrical work)
1. Locate vent termination kit on outside of building and install in accordance with figure 3
on page 3. (make sure air inlet on termination piece is free of restriction).
2. Align the boiler with the termination kit.
3. Install vent adapters, (Note: The termination kit comes with 2 adapters, one for each
end of the vent pipe. One of the adapters has a 5/16" bolt installed.)
A.
Place the adapter with the bolt on the boiler outlet.
B.
Place the other adapter on the vent termination kit.
4. Measure the distance between the adapters for the vent pipe the way it would run and
add 4" to that dimension. The extra 4" is for the pipe to screw into the adapters.
5. Cut the vent pipe flush using a hacksaw having 24 teeth per inch. Dry fit the vent
adapters to the pipe and check for fit before applying RTV silicone.
6. Place a bead of RTV high temperature silicon on each vent adapter (see fig. 4) and
screw the adapters counter clockwise on to the vent pipe until seated. Tighten the 5/16"
clamps on the adapters to secure them to the vent pipes.
7. Install the adapter to the termination kit and boiler outlet and tighten the 5/16" clamps.
Place a bead of silicone around the joints where the adapter meets the boiler outlet (see
figure 5).
8. Install plumbing, electrical, oil lines and appropriate plumbing (If this step is performed
first vent installation will be difficult).
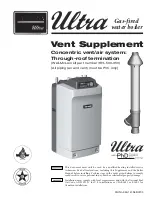
9. Install the inlet air vent and vacuum relief valve from termination to burner air inlet using
4", 26 or 30 gauge vent pipe (Do not use plastic or metal flex dryer vent as it may
collapse due to the thinness of the wall.). Secure pipe using sheet metal screws. See
fig. 1 for location of relief valve. Install vent pipe with crimps
running with
the air flow.
FIGURE 1
PAGE 1
Summary of Contents for OSW
Page 4: ...PAGE 3 FIGURE3...