8
Dust Chute Assembly
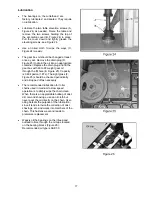
Mount the dust chute (A, Figure 3) to the planer
hood with eight M6x10 hex head screws (B,
Figure 3). Make sure the dust collection system
has sufficient capacity and suction for your
planer. Always turn on the dust collection
system before starting the planer.
Table Roller Handle Assembly
Thread the handle (C, Figure 4) into the hub.
Handwheel Assembly
Line up the key on handwheel shaft with the key
way in the handwheel. Slide the handwheel (D,
Figure 4) into place and secure with knob (E,
Figure 4).
Control Panel (figure 5)
F.
Emergency Stop Button:
Stops all
functions of machine, but the planer still has
power. To reset rotate switch clockwise until
the button pops out.
G.
Main Motor:
Starts rotation of cutterhead.
Will not work if the “Emergency Stop” switch
is engaged, or hood is open.
Changing Feed Rate
The planer has two selectable feed speeds that
feed stock at 20 and 30 feet per minute. To
adjust speed, move lever (H, Figure 5) until it
clicks into place.
Change feed speed only
while the feed system is RUNNING!
Table Roller Adjustment
Loosen the handle (I, Figure 4) and move the
table rollers up, or down by raising, or lowering
the handle (C, Figure 4). When you reach the
desired position tighten the handle.
The rollers are usually set higher when planing
rough stock. When planing smooth stock the
table rollers should be set slightly above, or flush
with the table.
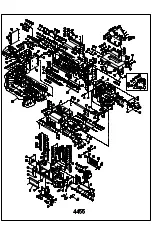
Summary of Contents for 4455
Page 19: ......


