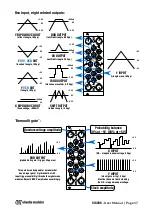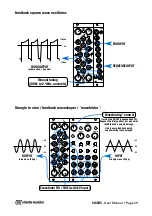
The key thing to understand here is that
moving the offset knob CCW restricts the
range of the altered sequence
coming out of MOD, even going into the negative realm as
shown. This gives a bassier counterpoint to the original sequence while
keeping its root
note steady
(
9th step = 0V
) and
maintaining its tuning within the 12 notes of the
chromatic scale
for more variance and/or dissonance, if you wish.
As a bonus, you get
two copies of the original sequence
, one of them inverted.
The mechanism by which this occurs is similar to that of the first example:
When a certain sequence step reaches the
voltage threshold
set by , the
step size
voltage
(
-1V
) kicks in and substracts a voltage that, in this case, is
inversely proportional of
said threshold level
: the higher is, the lesser of an effect this would have on the
step sequence and viceversa.
Take into account that for this patch to work as intended, the
Modulo output polarity
jumper
in the back of the module must be set to
positive (+)
and the
Modulo step size
trimmer
must be set at
EXACTLY -1V
as it comes when we calibrate each unit before
shipping.
Modulo step size - calibration procedure:
First of all, beware that you will be doing this with your system turned ON, so be careful
to not touch or poke into anything other that the labeled probing points on the back of
the module.
You’ll need a
multimeter
and a
small flat head screwdriver
.
Put your multimeter on DC voltage mode (the V with straight lines).
Test this two points at the same time:
one of the screws (labeled GND)
with your COM
probe and the
circled test point below the Modulo step size trimmer
with the V
probe. You should now be reading a voltage between 0V and +3.3V (or 0V to -3.3V if
you placed the probes backwards, doesn’t matter really).
While probing those two points,
start adjusting the trimmer
until the multimeter
reads exactly 1.000V for factory calibration. Feel free to experiment with different
voltages to achieve different results!
Turn off your system
and put SIGNOS into your rack again.
Done!
SIGNOS
- User Manual | Page 10


