background image

12

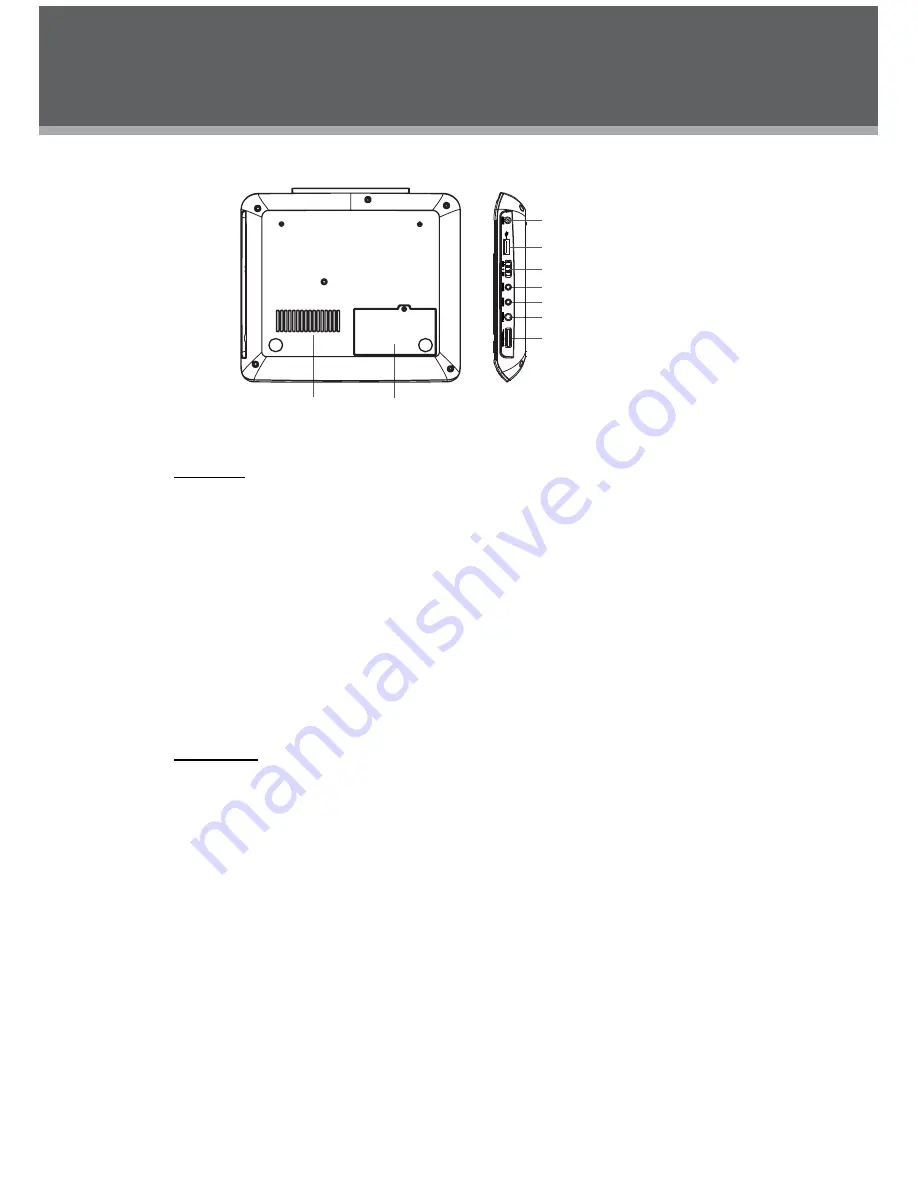
LOCATION OF CONTROLS

Right View       

DC 9V IN Jack

To connect to the AC Adapter / DC Car adapter for power supply.

USB Port

For use with USB flash drives.

Power Switch

To turn on/off  the unit.

Video Jack

To connect to an external TV screen by the AV cable.

Audio Jack

To connect to an external speaker system by the AV cable.

Headphone Jack

Volume Dial

To Adjust the Volume Level.

Bottom View

Ventilation Slots

Ventilation Slots

Battery compartment

Battery Compartment

USB Port

DC 9V in Jack

Power Switch
Video Jack
Audio Jack
Headphone Jack

Volume Dial

Summary of Contents for PD707B

Page 1: ...PD707B 7 INCH SCREEN PORTABLE DVD PLAYER...

Page 2: ...ER CONFINED SPACE ENSURE THE UNIT IS WELL VENTILATED TO PREVENT RISK OF ELECTRIC SHOCK OR FIRE HAZARD DUE TO OVERHEATING ENSURE THAT CURTAINS AND ANY OTHER MATERIALS DO NOT OBSTRUCT THE VENTILATION VE...

Page 3: ...cal authorities or the Electronics Industries Alliance www eiae org PRECAUTIONS Do not make any changes or modi cations to the equipment unless otherwise speci ed in the manual If such changes or modi...

Page 4: ...ble operation of the product and to protect it from overheating These openings should never be blocked by placing the product on a bed sofa rug or other similar surface This product should not be plac...

Page 5: ...so that they are not likely to 20 be walked on or pinched by items placed upon or against them paying particular attention to cords at plugs convenience receptacles and at the point which they exit fr...

Page 6: ...efer servicing to 28 quali ed service personnel under the following conditions a when the power supply or plug is damaged b if liquid has been spilled or if objects have fallen into the product c if t...

Page 7: ...ideo Connections 14 USB Connection 14 Headphone Connection 14 Power Connection 15 Connecting to the wall outlet 15 Using the car plug 15 Using the Built in battery 15 GETTING STARTED 16 Using the Remo...

Page 8: ...8 Repeat A B Mode 19 Repeat Playback of a chapter Title All of a Disc 19 LCD Menu 20 SETUP 21 Language 21 Video 21 Audio 22 Rating 22 Misc 22 SPECIFICATIONS 23 TROUBLESHOOTING 24 TABLE OF CONTENTS...

Page 9: ...e make sure the following items are included in the package If any items are missing please contact your local dealer PACKAGE CONTENTS 1 2 Adapter 3 4 5 6 7 Main Unit Remote Control Earphones L R Menu...

Page 10: ...g the recorded side of the disc To remove a DVD CD from its storage case press down on the center retention mechanism of the case and lift the disc out Do not subject discs to prolonged exposure to di...

Page 11: ...s up down direction button to select Mode 2 and then press the Enter button to toggle the screen dimension between 16 9 and 4 3 Select RESET and press ENTER to return the 3 settings of brightness cont...

Page 12: ...off the unit Video Jack To connect to an external TV screen by the AV cable Audio Jack To connect to an external speaker system by the AV cable Headphone Jack Volume Dial To Adjust the Volume Level Bo...

Page 13: ...ONTROLS Remote Control Display Setup Power Previous Fast Reverse Play Pause Numeric Buttons LCD Mode USB Zoom Subtitle Repeat A B Repeat All Menu Audio Angle Title Next Fast Forward Direction Buttons...

Page 14: ...while for the unit s reading data After the device is detected the screen will display the 2 working menu press the direction buttons to select the desired le from the menu and press Play Pause to sta...

Page 15: ...will turn red To play DVD set the power switch to On power indicator will turn green Therefore the portable DVD cannot be charged while playing This is designed to protect the battery from overcharge...

Page 16: ...the remote sensor of the Portable DVD Player at a distance of no more than 15 and at an angle no greater than 60 degrees Batteries will last for about one year under typical usage Replace the batterie...

Page 17: ...pause Press again to resume playback Press during playback to stop the disc Pre Stop Press to resume playback Press when the disc is Pre Stopped to stop playback completely Next Previous Skip Press t...

Page 18: ...ayer The player will not play the disc BAD DISC T he player is equipped with automatic disc quality detection software If the player detects a disc that is damaged or has a format problem it may play...

Page 19: ...ay have up to 32 selectable subtitles During playback of a DVD that has been mastered with alternate language audio tracks press AUDIO to hear the alternate tracks A DVD may have up to 8 selectable au...

Page 20: ...n to select Mode and then press the Enter button to toggle the 2 screen dimension between 16 9 and 4 3 Select RESET and press ENTER to return the settings of 3 brightness contrast and color to their f...

Page 21: ...menu 1 Press twice to enter the player s setup menu 2 Press the direction buttons to select the desired item 3 Press ENTER to con rm English English Unicode English English SETUP Video Language View M...

Page 22: ...8 8 ADULT is de fault Set Password Change the Parental Ctrl password Enter the old password and then the new password DO NOT FORGET THE PASSWORD this password cannot be reset Misc Use Default Settings...

Page 23: ...23 SPECIFICATIONS Speci cations and manual are subject to change without prior notice 1 192x165x41mm 680g 6W AUTO NTSC PAL...

Page 24: ...wered on and is set to the correct AV mode Ensure that the connections between the player and the TV are secure and correct Check if the connection cables are damaged The picture is noisy or distorted...

Page 25: ...er To activate the battery power Turn off the player and then charge the battery by the AC adapter for about 10 seconds See Using the Built in battery section on Page 15 Copyright This manual contains...

Page 26: ......

Reviews: