background image

13

MAIN MENU

MAIN MENU

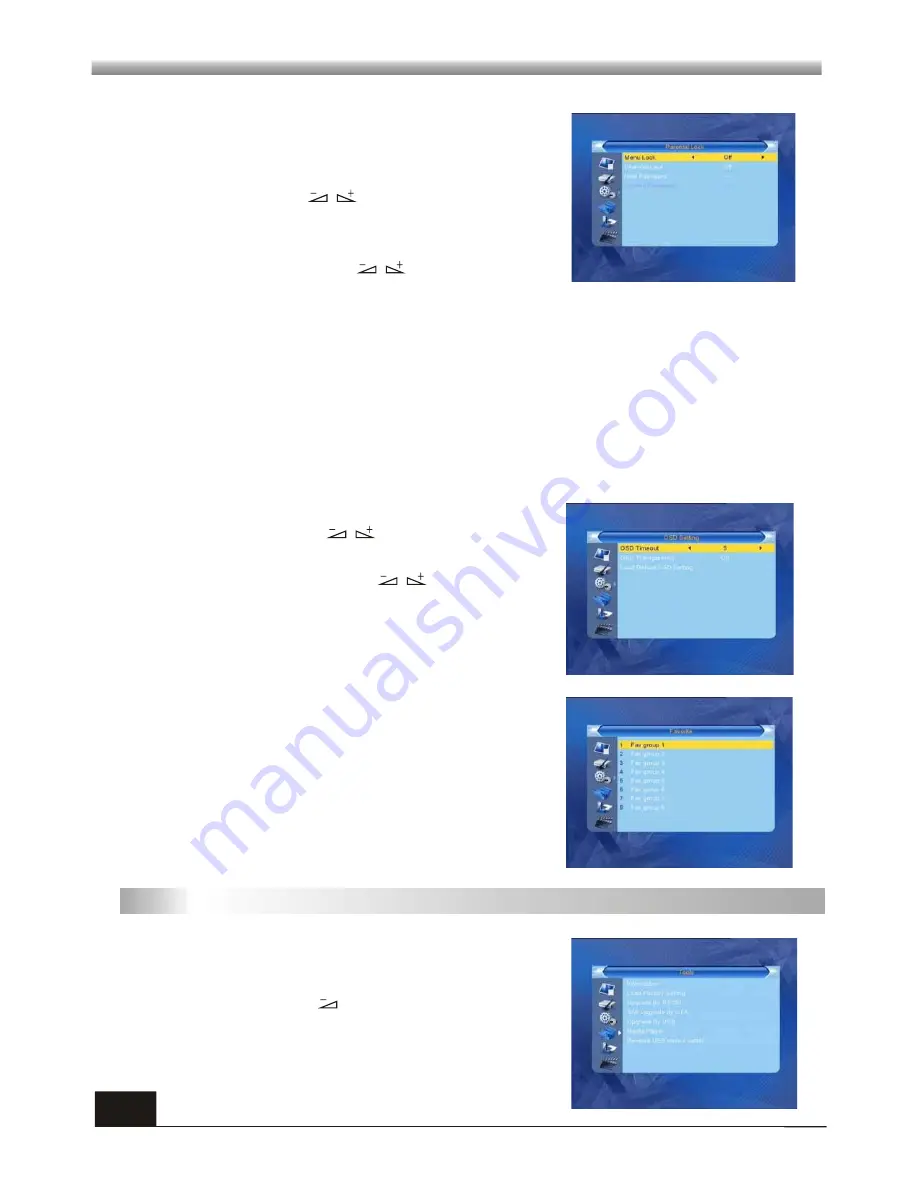
Before entering into the Parental Lock window, you 

need input the correct password. The default 

password is 0000.

1. Menu Lock: 

Press            keys to select between 

Off and On. If ON is selected, password will be 

required to access sub-menus.

2. Channel Lock:

 Press         keys to select 

between Off,  AGE10, AGE12, AGE 16 and AGE 18. 

The default value is Off.

3.5 Parental Lock

If  select "On", you can not view the locked channel set in Chanel List Edit window 

until you input the correct password. 

3. New Password:

 Use numeric key (0-9) to input the new password.

4. Confirm Password:

 Input the new password once again.  Confirm password must 

be the same as the New password. System will inform you "Change password 

successfully!" while they are the same, or inform you to input the password of 

Confirm password once again when they are not the same.

3.6 OSD Setting

1. OSD Timeout:

 Press            keys toselect from 1 

to 10 by  step1. The default values Is 5.

2. OSD Transparency: 

Press            keys to select 

among Off, 10%, 20%, 30%, 40%. The default 

option is Off.

Press MENU or EXIT key to save and exit. 

3. Load Default OSD setting: 

Default OSD timeout 

and transparency.

There are 8 favorites group listed in this window.  Press 

PR+, PR- 

 keys to select one and press 

OK

 key to the 

Rename 

window , here we don't explain any more.

3.7 Favorite

1. Press 

PR+, PR-

 keys to move the cursor up or 

down.

2. Press 

EXIT 

key or            key to move the focus to 

the left menu.

4. Tools

Summary of Contents for HVBTR-1200

Page 1: ......

Page 2: ...Features For Your Safety Unpacking optional General Operation RCU P1 P2 P3 P3 P4 1 Edit Channel 2 Installation 3 System Setup 4 Tools 5 Game 6 REC PVR Ready 7 Hot key P8 P10 P11 P13 P16 P17 P19 SPECIFICATION P22 P7 WELCOME PAGE TROUBLE SHOOTING P23 HVBTR 1400_User_Manual_V1 1 ...

Page 3: ...ronic Program Guide EPG 256 colors On Screen Display Channel search in automatic manual search Various channel editing functions favorite move lock rename and sort Parental control for channels Ease to use Menu System Time set by GMT offset automatic and manual Summer Time support Automatic turn on off by Timer setting multiple options Automatic save for last channel Support Logic Channel Number L...

Page 4: ...ains out of service for an extended period Do not touch the receiver during thunder since that might create electric shock hazards Do not block ventilation holes of the Receiver so that air can circulate freely Do not expose the receiver un der the sunlight And keep it away from the heat source Keep the receiver away from flower vases tubs sinks etc in order to avoid damaging the equipment To avoi...

Page 5: ...ng and many other functions All functions can be carried out using the buttons on the RCU and some of the functions can also be carried out using the buttons on the front panel The receiver is easy to use always at your command and adaptable for future advances Please be aware that new software may change the functionality of the receiver Should you experience any difficulties with the operation o...

Page 6: ...he selected item in the menu screen or enters the desired value in any input mode When watching a channel change channels or move to the next higher or lower item in the menu When watching a channel adjust the volume or move to the left or right item in the menu Call up the EPG Electronic Program Guide Display the Audio window EPG L R PAUSE FIND Enter Record Manager to view current recorded list S...

Page 7: ... your removable external drive via built in USB port when trying to record programs L R IN VIDEO TV AUDIO Antenna DTR CONNECT TO AUDIO R LTO TV OR AUDIO TUNER COMPOSITE VIDEO BROADCASTSIGNAL POWER ON OFF COMPONENT VIDEO OUTPUT ANALOGUE HIGH DEFINITION ANT IN CONNECTTO ANTENNA LOOP OUT CONNECT TO ANOTHER RECEIVER CONNECT TO PC FOR SOFTWARE UPGRADE CONNECT TO TV SET HDMI OUT INPUT CONNECT TO DIGITAL...

Page 8: ...INSTALLATION INSTALLATION 6 The picture is for reference only actual product may vary Antenna ...

Page 9: ... to change Region Language and Aspect Mode Press OK when highlight Display Mode and select from pop up window Press PR PR keys to move highlight to select Region Display Mode Aspect Mode and language Press EXIT key to exit this menu Move highlight to OK option and press OK key to enter Auto Scan menu ...

Page 10: ... the playing program in the small window 1 1 TV Channel List 2 Press FAV key to move the FAV button upward Select the program and press OK key to pop up the favourite group list In the list select the group that you want to add into and press OK key and then you will find the favourite mark is displayed at the right side of the selected program Press EXIT key to exit from the fav mode and then pre...

Page 11: ...on return to the origin position 6 Press blue colour key to enter into the Edit channel window Press red colour key to pop up the Sort drop down list Name A Z The ascending order omitting the character the number is ahead then the capital letter at last the lowercase Name Z A The opposite order of the above Name A Z Free Scrabmle All FTA programs are listed ahead while all scrambled programs are l...

Page 12: ...y Move cursor to the Delete All item and press OK Key to pop up the dialogue Warning Do you really want to delete all channel Select Yes to delete all select No for quit 1 2 Radio Channel List The same operation as 1 1 TV Channel List here we don t explain any more 2 Installation 2 1 Auto Scan In FTA Only press Left Right key to choose Yes or No Move the highlight on the search option and press OK...

Page 13: ...en will display as beside For CH No option press Left Right key to choose the channel For Tuner Power option press Left Right key to choose Off and On 2 4 LCN Logic Channel Number Press Left Right key to choose On and Off 3 System Setup It contains 7 sub menus such as Language TV System Local Timer Setting Timer Setting Parental Lock OSD Setting and Favorite Press OK key to enter the selected item...

Page 14: ...mation will be updated automatically from the TV signal 3 GMT Offset Select the time zone 4 Summer Time Set the daylight saving option 3 3 Local Time Setting 3 Digital Audio Output Select between LPCM Out and BS Out 4 Auto Standby Select ON for auto standby if no operation within 3 hours 5 Date Time Set date and time manually 3 4 Timer Setting If there is no program you can not enter into this win...

Page 15: ... again Confirm password must be the same as the New password System will inform you Change password successfully while they are the same or inform you to input the password of Confirm password once again when they are not the same 3 6 OSD Setting 1 OSD Timeout Press keys toselect from 1 to 10 by step1 The default values Is 5 2 OSD Transparency Press keys to select among Off 10 20 30 40 The default...

Page 16: ...only for distributor s customer support team in the event of restoring the system or repairing User is not recommended to perform the firmware upgrading by oneself Attempt of doing so may result in unit malfunction This feature is built in only for distributor s customer support team in the event of restoring the system or repairing User is not recommended to perform the firmware upgrading by ones...

Page 17: ...V Press FAV key add and MP3 Play List Press FAV key to add the image or music to Play List Press OK on Play List button you can see the image or music you selected and in this list you can play and delete them Red key Playing the image in full screen Yellow key Delete the image you selected Blue key Delete all the image in the list Music List Press PR PR key to select the music you want and press ...

Page 18: ...evice safely 1 Press OK key on Remove USB device safely it will pop up a dialog You can safely remove USB device now Press OK on Yes button to remove the USB device Setup Show Image Size Select between full and real Slide Show Time Select among 1 10sec Slide Show Repeat Select between on and off 5 Game 1 Press OK key or key to enter into the game 2 Press PR PR keys to move the cursor up or down 3 ...

Page 19: ...backward Press key to fast forward or rewind Before you can access the menu page please have this unit connected to a compatible removable storage device To achieve the best recording result users are strongly recommended to use Removable Hard Disk from trusted brands Certain USB Drive with lower speed or smaller capacity may not be compatible with this unit Minimum requirements on compatible exte...

Page 20: ...d Files Press FIND key to display the Record Manager menu Use UP DOWN keys to select recorded files from the list in the lower half of the screen When highlighted the detail of the recorded file will be displayed in the upper half of the screen with a preview window located on the right hand side Press PLAY to play the file in preview window or press OK to play the file in full screen Press STOP t...

Page 21: ...bility is subject to channel broadcasting in each region 7 7 Teletext 7 8 Subtitle Use the numeric keys 0 9 to input the number of the desired channel If the inputted number is beyond the valid channel number system will Invalid number and press OK key to close this message 7 1 Number In normal mode press TV RADIO key to switch between TV mode and Radio mode 7 2 TV RADIO Press PR PR keys to change...

Page 22: ...tween Left Right Mono and Stereo 3 Changing the audio mode is only connected with the current channel not all the channels 4 Press MENU or EXIT key to close this window 7 10 Audio Press key to switch the current channel to the previous channel 7 11 Recall 1 Press INFO key to enter into the information window 2 Double press INFO key to check signal quality 7 12 Info 1 During the viewing or listenin...

Page 23: ...o the Timer window You can add the current program to the Timer If 8 timers is already system will inform Timer is full 3 Detail Information In the EPG window press PR PR keys to select the channel and program and press OK key to know the detail information of the current program 7 14 EPG Press EPG key to enter into the EPG window 1 Press PR PR keys to select up or down left or right 2 Press red c...

Page 24: ...2 2 SPECIFICATION SPECIFICATION ...

Page 25: ...HF channel properly The system is connected by RF leads and the output program of the receiver interferes with an existing terrestrial programs or Video signal Change the receiver output program to a more suitable program or connect the system by SCARTleads There is interference on your terrestrial program or video signal The RCU is not working Battery exhausted Change the batteries RCU is incorre...

Page 26: ...y form or by means or stored in a database retrieval system without prior written permission from us The information of this manual is based on the current version of the product We reserve the right to alter the content without prior notice All brand names in this manual are the property of their respective owners ...

Reviews: