background image

Installation

Dual Monitor

Z  POS

Remove the cable cover
Install a dual monitor by sliding it to the direction of arrow ②
Fasten the screw with a coin or driver

1

2

3

1

2

3

Connecting Cable

Reassemble the cable cover after connecting 
power adaptor cable

2

Connect the VGA cable and dual power cable

1

10

Service Manual

Summary of Contents for ZED-POS

Page 1: ...We use the original version of Microsoft windows OS and recommend customers to use them MANUAL SERVICE www okposkorea com...

Page 2: ...Dual Monitor HDD Disk Recovery Installation ZED POS I POS Z POS K POS Accessary VFD 3P 6P 9P 12P 18P 15P 16P 17P Contents...

Page 3: ...1 Serial Port DSUB9 COM2 Reassemble the cable cover Reassemble the stand rear case Activate the system by pressing the power button 5 6 7 Hold tightly and pull up the rear cover for detaching Push up...

Page 4: ...e cable cover after connecting power adaptor cable 1 2 Connecting Cable Dual Monitor 15inch Remove the cable cover and stand rear case Detach the stand dual set up part Clear up the edge when it detac...

Page 5: ...HDD Disk or SSD Storage Disassembly Detach the cable cover Unfasten the hand screw following the direction of arrow Hold the hand screw and pull out of the HDD to the direction of arrow Disassemble H...

Page 6: ...Port DSUB9 COM1 Serial Port DSUB9 COM2 System Installation and Turn on off Reassemble the cable cover Reassemble the stand rear case Activate the system by pressing the power button 5 6 7 Hold tightl...

Page 7: ...stall a dual monitor by sliding it to the direction of arrow Fasten the screw with a coin or driver 1 2 3 1 2 3 Connecting Cable Reassemble the cable cover after connecting power adaptor cable 2 Conne...

Page 8: ...he cable cover Unfasten the hand screw following the direction of arrow Hold the hand screw and pull out of the HDD to the direction of arrow Disassemble HDD from the bracket 1 2 3 4 4 3 2 1 When MSR...

Page 9: ...Serial Port DSUB9 COM2 System Installation and Turn on off Cable Cover Stand Rear Cover 1 2 A B 3 4 Make sure the adapter direction before plugging in CAUTION Reassemble the cable cover Reassemble the...

Page 10: ...stall a dual monitor by sliding it to the direction of arrow Fasten the screw with a coin or driver 1 2 3 1 2 3 Connecting Cable Reassemble the cable cover after connecting power adaptor cable 2 Conne...

Page 11: ...he cable cover Unfasten the hand screw following the direction of arrow Hold the hand screw and pull out of the HDD to the direction of arrow Disassemble HDD from the bracket 1 2 3 4 4 3 2 1 When MSR...

Page 12: ...l Port DSUB9 COM3 Speaker Port PS 2 Mouse Keyboard LAN Serial Port DSUB9 COM1 Serial Port DSUB9 COM2 System Installation and Turn on off Install the Stand Rear Cover Turn on the system with the Power...

Page 13: ...rews of clamp and to fix hinges after placing the dual monitor holder in a right way like the arrow 1 2 3 4 4 3 2 1 1 Installation Install dual monitor cover on the position of Fasten the screws after...

Page 14: ...e Stand Rear Cover Loosen a screw and separate the HDD Disk Storage Disassembly 2 1 Remove the cable and screw and lift up the monitor Monitor Disassembly 1 2 Remove the screws and slide the MSR sidew...

Page 15: ...lay icon on the Control Panel screen After Display Registered Information screen appeared click the Advanced button on Setting tab After select Display Config tab select Display Configuration Choose R...

Page 16: ...tem After turning on the system follow the 0n screen instructions press the keyboard F11 when the F11 to WinClon message appears on the screen within 3 to 4 seconds PC POST process When Winclon Appear...

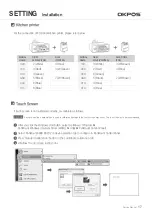
Page 17: ...If a sharp one like a ballpoint pen is used in calibration damage to the touch screen may occur This is not the way to be recommended CAUTION If touch screen is not calibrated correctly re calibrate a...

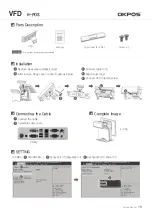
Page 18: ...in Attach VFD in the direction of the arrow Fasten the hand screws 3 4 5 Separate the cable cover After remove hinge cover connect cable as below 1 2 Installation 5 4 3 2 1 I POS ZED POS Connect the c...

Page 19: ...er Connect VFD to fasten screw 3 4 5 Remove Rear cover andBack cover After remove hinge cover connect cable as below 1 2 Installation 5 4 3 2 1 K POS Connect the cable Assemble cable cover 1 2 COM3 Co...

Page 20: ...425 9001 Fax 82 2 6299 5447 URL www okposkorea com 801 802 Ace High End Tower 6 234 Beotkkot ro Geumcheon gu Seoul Korea 08513 Making our customers satisfied is utmost value of ours No 1 Total solutio...

Reviews: