HDRH-44-2U Quick Setup Guide
7 R201304-V10
Part 1. Static IP Address
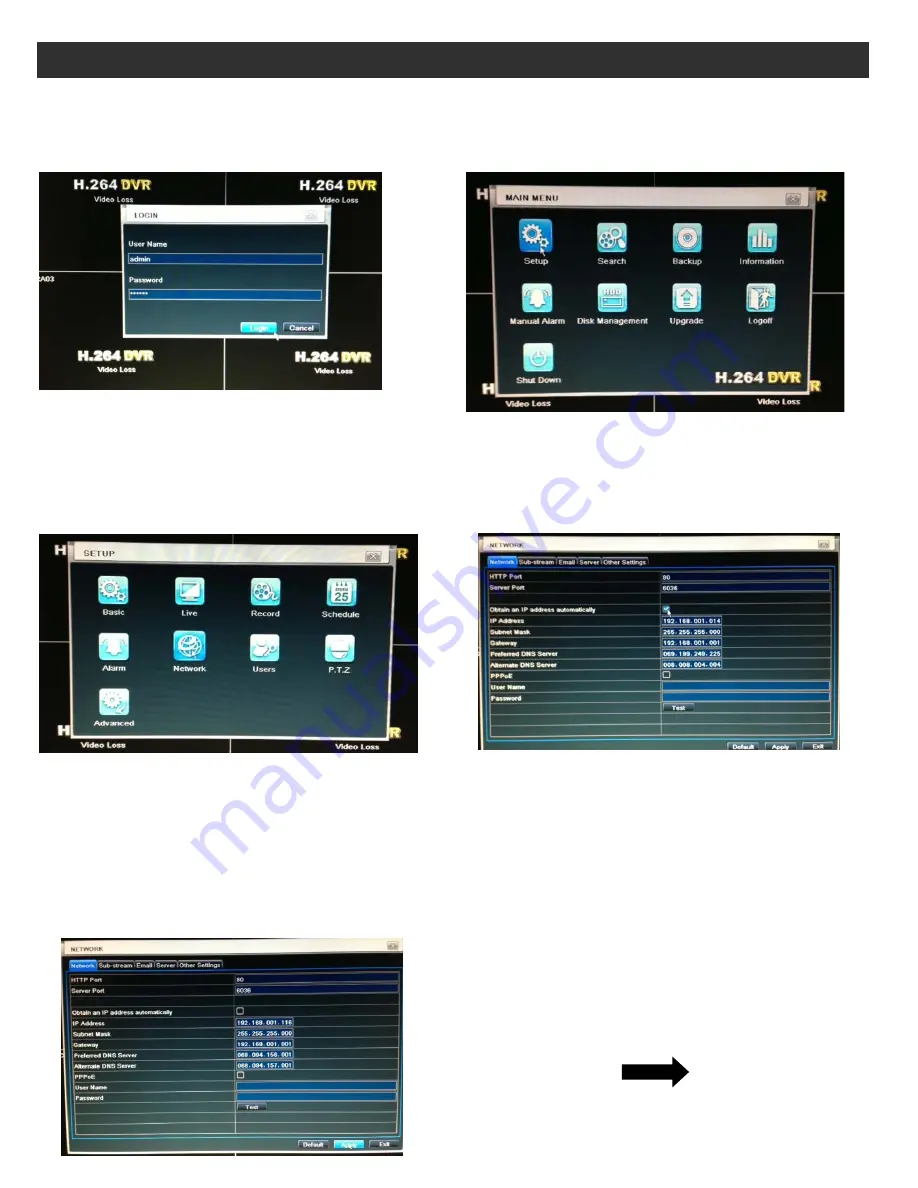
1. Enter Main Menu screen by pressing the
MENU
button
on the front panel of the DVR.
Then enter password “123456” and click Login
2. Select
Setup
.
3. Select
Network
.
4.
Select “
Obtain an IP address automatically
,”
turn on this feature.
Then Select
Apply
at the bottom of the screen
to restart the network.
This will generate a new IP Address.
(Make sure Ethernet Cable is plugged in)
5. After
Apply
, the IP Address, Netmask, Gateway, and DNS addresses should automatically be generated.
*For STA
TIP: Write down HTTP Port, Server Port, and IP Address on a piece of paper for reference. You will need
these numbers later in the installation.
TIP: If you do not know a DNS address and the DVR did not populating those fields by itself, try 8.8.8.8 and
8.8.4.4. These are Google's public DNS addresses, and in addition to working well.
6.
Uncheck “Obtain an IP address automatically” to turn off this feature and make IP Address stay the same. Then
click Apply.
Continued For DDNS
Set up Part 2
Network Setup: Static IP Address & DDNS


